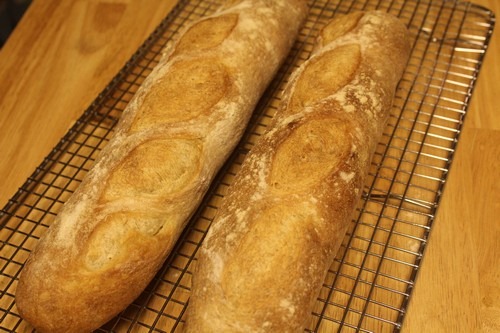
Showing posts with label bread recipes. Show all posts

Tuesday, 18 September 2012

Farewell to Summer with Tomato Basil Bread

Autumn is just around the corner. If you’re ready to bid farewell to hot, dry weather, but still want to remember the delicious flavors from your garden, try this Tomato Basil Bread. It is an easy and tasty bread, made with tomato paste, fresh herbs, Parmesan cheese and red pepper flakes. It goes really well with cheese and pasta dishes.

tomato-basil-bread11


I was waiting for a special occasion to make this bread. The changing of the seasons provided the perfect opportunity. I enjoyed a milder version of this bread, but if you like more heat, you can increase the amount of red pepper flakes to your heart’s desire.

tomato-basil-bread20


Check out my post on Culinary.net to learn more about this bread. You’ll like this one!


Happy Baking!

Cathy

Tuesday, 31 July 2012

Straight Baguettes for Bread Baking Day #52

The theme for Bread Baking Day (BBD) #52 is French Breads. I’m glad Cindy of CindyStarblog chose this theme because I’ve had these baguettes on my list to bake for several weeks. I wanted to continue my baguette-making journey and this provided another opportunity… not that I need any motivation to bake bread.

I’ve been out-of-town on business so my issue was finding the time to actually make them. I finally got the opportunity to bake bread this weekend. It felt so good.

baguettes06

These straight baguettes are really easy. They can be made the same day. It usually takes about 5 hours from start to finish. They don’t even require an overnight poolish or Pâte Fermentée. If you want to serve baguettes for dinner, and have a few hours, this could be a good option.

I started making these baguettes Sunday afternoon, but ran out of steam before I could finish so I retarded the dough in the refrigerator overnight.

The next day, I let the dough warm up to room temperature for a couple of hours and then shaped, proofed and baked the baguettes.

I suppose officially this version wouldn’t be considered a straight baguette, but this process worked better with my schedule and energy level.


Straight Baguettes

Adapted from: The Fundamental Techniques of Classic Bread Baking by The French Culinary Institute

Makes: 2 Baguettes

Ingredients:

  • 383 g (~3 cups) bread flour, plus extra for dusting
  • 284 g (~1 1/4 cups) water
  • 2 g (3/4 tsp) instant yeast
  • 7 g (1 tsp) salt


Directions:

1. Mix the bread flour and water until thoroughly blended.  You can use an electric stand mixer fitted with a dough hook and mix on low speed, but this dough really doesn’t need a mixer.  I used a Danish dough whisk.

2. Let the dough autolyse (rest) for 15 minutes. Then add the salt and yeast and mix until thoroughly blended. The resting period helps the gluten structure start to develop. If necessary, add a little extra water to help dissolve the salt and yeast.

3. Scrap dough into the bowl. Don’t add any additional flour, just scrap the wet dough (using a dough scraper or a wooden spoon) into a large greased bowl. Cover the bowl with plastic wrap and let the dough rest for 20 minutes.

4. Fold the Dough. Uncover the dough, fold it, then cover it back with plastic wrap and let it rest another 20 minutes. Repeat this process and let the dough rest an additional 20 minutes.

5. Final Fold. Uncover the dough again and fold it, then cover it with plastic, but this time let it bulk ferment for 2 hours. I let mine bulk ferment for about an hour or so, then placed it in the refrigerator overnight.

baguettes002 baguettes004
baguettes007 baguettes010

6. Preheat the oven to 450 degrees F. about an hour before you plan to bake the baguettes.  If you are using a baking stone, place it in the oven to preheat along with a steam pan underneath.  I decided to use my baguette pan for these loaves so I didn’t use the baking stone, just the steam pan.

7. Form the dough into rough logs. Uncover the dough and form 2 logs on a lightly floured, clean work surface.  Mist them lightly with spray oil and cover them with plastic wrap.  Let them rest for 15 minutes.

8. Shape the logs into batards. Begin by gently pressing on the dough to degas it. Shape it into a rough rectangle.

Fold the top of the dough down and seal it with you fingers to degas it somewhat. Then fold the lower section of the dough up and seal it with your fingers. You’ll end up with a rough batard-shaped loaf.  This is the seam side up view.

9. Shape into Baguettes. Turn the dough seam side down and using cupped hands, roll the dough back and forth from the middle out, to extend the dough into the shape of a baguette.

baguettes011 baguettes013
baguettes014 baguettes015
baguettes012 baguettes016


10. Proof the Loaves. Place the loaves seam side down on a baker’s couche or baguette pan. Cover again with plastic wrap and let them proof for 30 minutes.

11. Score the Loaves. Uncover the dough, then use a lame or razor to score the loaves for baguettes. I made the French cut version, where you make about 4 or 5 vertical, but slightly angled slashes in the dough starting at the top left of the loaf and ending at the bottom right.  The slashes should overlap about an inch or so.

baguettes020 baguettes023

12. Bake the Loaves. Add 1 cup of ice to the steam pan in the preheated oven and immediately transfer the loaves onto a baking stone (if using) or place the baguette pan in the oven. Spritz the loaves with water and close the oven door. Repeat the spritzing a couple more times during the first few minutes, then close the door. Let the loaves bake for 25 minutes or until the crust is a deep golden-brown and the sides are firm when you touch them.

13. Cool the Loaves. Remove the loaves from the oven and transfer them to a wire rack to cool.

14. Slice and Enjoy!

baguettes042 baguettes19

This bread has been YeastSpotted.

I was pleased with the results and the flavor of these baguettes. I heard them crackle when I took them out of the oven and let them cool on the wire rack. I didn’t taste them until the next day, but they tasted good not blah like I expected from a baguette without a preferment. I had them with some organic butter. Yum!


Happy Baking!

Cathy


Bread Baking Day #52 - French Bread (last day of submission August 1st, 2012)


Thanks to Cindy for hosting Bread Baking Day #52

BreadBakingDay was created by Zorra of http://kochtopf.twoday.net/stories/4124192/

Wednesday, 25 July 2012

Sourdough Einkorn Bread

This is my first attempt at sourdough bread made completely with einkorn flour. This bread is not made with just any sourdough starter, mind you, it is made with an einkorn sourdough starter. The process is similar to the process used for the Whole Grain Spelt Levain

I began experimenting with einkorn in early 2011. I became interested in this grain because I love history, especially the history of wheat. I thought it would be so romantic to learn about and bake bread with the original wheat.  It is. I’ve become enamored with this ancient grain.

einkorn-levain03


My journey is taking me into areas I would never have imagined a few years ago.  I want to find out what happened to make wheat so intolerant. It wasn’t always that way, was it? I mean, bread is considered the staff of life… so what happened along the way? 

I intend to find out. I’m not ready to give up on wheat…modern wheat maybe, or more importantly, modern methods of harvesting and milling the wheat that destroy the nutritional properties and prevent the grains from germinating on the stalk, but not wheat as it was intended to be. I have a lot to learn and understand about this and other ancient grains and their nutritional properties, but I’m fascinated by what I’ve found so far. I’ll try to share more as I begin to learn and understand. For now, I hope you enjoy this Sourdough Einkorn Bread.


Sourdough Einkorn Bread

Adapted from: Spelt Levain Loaf from May 2012 Issue of Saveur Magazine

Makes: 1 Loaf

It takes 10 days to build the Einkorn levain (or starter), but it doesn’t require very much hands on time each day. Just feed the starter each day and let the mixture rest until the next day. On the 10th day, create a sourdough culture and let it rest for 8 to 24 hours until you are ready to bake the bread. After you’ve created the starter, keep it going to use in other breads.

Ingredients:

  • ~ 7 1/2 cups Einkorn flour, plus additional for dusting
  • ~ 3 cups filtered tap water, warm (115 degrees F.)
  • 1/4 tsp active dry yeast
  • 3 tbsp. (1 3/4 oz) honey
  • 1 1/2 tsp. (3/8 oz) kosher salt
  • spray oil for greasing the bowl


Directions:

Here is the process and measurements I used. It was really hot in Atlanta when I started the process so I adjusted the amount of water/flour depending on the humidity that day. I also stirred the levain a couple of times throughout the 24-hour rest period because the mixture seemed to get dry on top before it was time to feed it again.


Day 1:  Create the Starter. In a large bowl, combine 2/3 cup einkorn flour, 1/3 cup water and yeast and stir until it becomes a smooth paste. Cover with plastic wrap and let it sit for 24 hours.

einkorn-levain-Day101


Day 2: Feed the starter.  Add 1/3 cup + 1 tablespoon einkorn flour and 4 tablespoons water. Stir the mixture, recover with plastic wrap and let it sit for 24 hours.

einkorn-levain-Day201


Day 3: Feed the starter.  Add 1/3 cup + 2 tablespoons einkorn flour and 2 tablespoons water.  Stir the mixture, recover with plastic wrap and let it sit for 24 hours.

einkorn-levain-Day301


Days 4 & 5: Feed the starter.  Add 1/3 cup + 1 tablespoon einkorn flour and 2 tablespoons water. Stir the mixture, recover with plastic wrap and let it sit for 24 hours.

einkorn-levain-Day501


Days 6 & 7: Feed the starter.  Add 1/3 cup + 1 tablespoon einkorn flour and 3 tablespoons water. Stir the mixture, recover with plastic wrap and let it sit for 24 hours.

einkorn-levain-Day602


Day 8: Feed the starter. Add 1/3 cup + 1 tablespoon einkorn flour and 4 tablespoons water. Stir the mixture, recover with plastic wrap and let it sit for 24 hours.

einkorn-levain0001


Day 9: Feed the starter. Add 1/3 cup + 1 tablespoon einkorn flour and 2 tablespoons water. Stir the mixture, recover with plastic wrap and let it sit for 24 hours.

einkorn-levain0005


Day 10: Create the Sourdough Culture. Take 1/4 cup starter and place it in a large bowl. Stir in 1/2 cup water and 1 cup einkorn flour.  Mix with a Danish dough whisk until smooth. This will be your sourdough culture.  Let the culture sit for 8-24 hours, until you are ready to bake. Place the remaining starter in a mason jar and put it in the refrigerator to use as your new einkorn starter.

einkorn-levain0012


Day 11:

Mix the Dough. Remove the plastic wrap and add about 3 1/2 cups Einkorn flour, 1/2 cup + 1 –2 tablespoons water, 3 tablespoons honey and 1 1/2 teaspoons salt and mix with a Danish dough whisk until a dough forms and all the flour is absorbed.

einkorn-levain0015


Knead the Dough. The next step is to transfer the dough to a lightly floured work surface to knead it. The dough was a sticky mess so instead of adding too much flour during the kneading process, I covered the dough with plastic wrap sprayed with olive oil and let it rest for 15 to 20 minutes.  During this time, the flour absorbs the water and the gluten structure starts to develop.

einkorn-levain0019


Bulk Fermentation: After the autolyse (rest period), knead the dough for about 10 minutes until it is smooth and elastic and place it in an oiled bowl.

einkorn-levain0021


Cover the bowl with plastic wrap and let the dough proof until it is doubled in size, about 2 1/2 - 3 hours.

einkorn-levain0023


Shape the Loaf: Transfer the dough to a lightly floured work surface, and flatten it into a rough round.

einkorn-levain0025


Fold the top and bottom edges toward the middle, like a letter, to evenly distribute the air pockets and help the bread rise evenly in the pan.  Pinch the seams together.

einkorn-levain0026


Final Proof: Place the dough seam side down in a greased 8” x 4 1/2 x 2 1/2” loaf pan. Recover with plastic and let it sit again until doubled in size, about 2-3 more hours.

einkorn-levain0027


The dough is supposed to reach the top of the pan; however, I let the loaf proof for about 5 hours and it never reached the top of the pan.  I decided it was time to bake it.

einkorn-levain0033


Prepare the Loaf for Baking: Preheat the oven to 375 degrees F. Lightly dust the top of the loaf with more einkorn flour and score it using a razor (lame) or serrated knife.  I used a lame. It was a bit tricky since the dough didn’t rise all of the way to the top.

einkorn-levain0034


Bake the loaf until nicely brown, about 30-40 minutes.  Let it cool on a wire rack before slicing and serving.

einkorn-levain00006


This is a slightly dense, but very tasty loaf. It has a unique and tangy flavor from the sourdough. I like it!


Happy Baking!
Cathy

Wednesday, 18 July 2012

Try this easy little bread recipe

The Bread Baking Babes are staying cool this month making an easy little bread. It’s been so hot, I haven’t felt like baking bread. I’ve been making jam and soups instead. I was starting to go through bread withdrawals. Sara of I Like to Cook came to the rescue with this easy little bread that doesn’t require much hands on time or heat up the kitchen too much. She adapted the recipe from 101 Cookbooks.

This easy little bread with spelt tastes great! The original version is made with equal parts all-purpose flour, whole wheat flour, and rolled oats, but I mixed things up a bit and used whole spelt flour instead of the whole wheat flour and spelt flakes instead of rolled oats. I left it a little too long in the proofing stage so it collapsed a bit on top when baked, but otherwise it turned out just fine. 

easy-little-bread025


Easy Little Bread Recipe made with spelt

Adapted from: 101 Cookbooks

Makes: 1 Loaf

Ingredients:

  • 300 ml warm water (105-115F)
  • 1 1/2 teaspoons instant yeast
  • 1 tablespoon honey
  • 150 g unbleached all-purpose flour
  • 140 g whole spelt flour
  • 75 g spelt flakes
  • 1 1/2 teaspoons fine grain sea salt
  • 2 tablespoons butter, melted, for brushing


Directions:

1. In a large bowl, mix the flours, spelt flakes, instant yeast, and salt.

easy-little-bread001


2. Stir the honey into the warm water, then add the wet ingredients to the dry and stir very well.

easy-little-bread003


3. Brush an 8 x 4-inch loaf pan generously with some of the melted butter or grease with spray or oil. Spread the dough in the pan.

easy-little-bread004


4. Cover with a clean, slightly damp cloth, and set in a warm place for 30 minutes, to rise.

easy-little-bread005


I ran an errand while the dough was proofing so it proofed for an hour instead of 30 minutes. It rose really well in the pan, but not so much in the oven.

easy-little-bread009


5. Preheat the oven to 350F / 180C, with a rack in the middle. When ready, bake the bread for 35-40 minutes, until golden and pulling away from the sides of the pan. 

easy-little-bread011


6. Remove from the oven and turn the bread out of the pan quickly, if using a nonstick pan. I used a glass pan so I let the loaf sit in the pan for about 5 minutes before removing it to the cooling rack. Brush the loaf with melted butter. Then let it cool on a wire rack. Serve warm, slathered with butter.

easy-little-bread0004


As the other Babes have mentioned, this bread may not be much to look at, but it sure tastes good. The spelt gives it a slightly nutty flavor.  Yum!

Happy Baking!

Cathy

Saturday, 9 June 2012

Poolish Baguettes revisited

I really enjoy participating in bread-baking groups and events because it provides me with the opportunity to make many different types of breads and to meet and learn from other bread bakers. However, sometimes you just want to focus on a particular bread or technique until you master it.

With that in mind, I’m beginning a journey to learn more about baguettes and hopefully, how to enjoy them. Baguettes represent the epitome of French bread baking, but I’ve never really been a true baguette fan. Don’t get me wrong. I love the tradition of baguette-making and all that goes along with it -- working with the wet dough, shaping the baguettes, the crackly crust and all that. It’s the flavor that doesn’t wow me.

I decided the problem must be with me, not the baguettes. I must not have given them a fair shake. So I’ll be experimenting with different types of baguettes. In this post, I’m revisiting Poolish Baguettes.

poolish-baguettes0029


For these baguettes, I wanted to use a basic formula and adjust as necessary.  I consulted a few of my bread books and finally decided to use a compilation of the basic bread formula with an overnight poolish in Bread Science by Emily Buehler and the formula for the Team USA Baguettes from Crust and Crumb by Peter Reinhart.

I made these baguettes twice and adjusted the hydration in the poolish and the final dough each time.  I also used different amounts of yeast in the final dough to see how the dough would perform.


1st Attempt:

For my first attempt at these baguettes, I increased the hydration in the poolish and kept the water the same in the final dough because I was aiming for a wetter dough. The formula in Crust and Crumb uses less poolish and more flour than the formula in Bread Science. I ended up somewhere in between the two formulas.

I forgot that my oven is really hot when I decided to go with the suggested temperature of 475 degrees. It was too hot so the tips of the baguettes got a little burned before I turned the oven temp down. I also removed the parchment paper partway through baking on this attempt.

These baguettes were definitely crispy, but not exactly what I was aiming for.  They tasted rather blah. I forgot to write down how much salt I used so that may have been part of the problem. I didn’t forget the salt this time, but I did reduce it a bit. These baguettes worked well as Crostini, but I wanted them to taste good on their own.

poolish-baguettes03


2nd Attempt:

For the second batch, I used the same poolish (I had made a double batch), but reduced the amount of water and yeast in the final dough.  I decided the extra hydration in the poolish needed to be adjusted in the final dough. I also baked the baguettes at a lower temperature (450 degrees). I was much more pleased with these baguettes. They were crispy on the outside and even crackled when they came out of the oven. The flavor was much better as well.  I didn’t get the chance to try them until the next day but they tasted pretty good by themselves the next day.  I also enjoyed them with jam, butter and egg salad.

poolish-baguettes010


Here is the formula I used for the 2nd Attempt.


Poolish Baguettes

Adapted from Bread Science by Emily Buehler and Crust and Crumb by Peter Reinhart

Makes: 3 Baguettes

Ingredients:

Poolish

  • 1 3/4 cup unbleached all-purpose flour
  • 1 cup water
  • pinch of instant yeast

Dough:

  • 3 1/2 cups white bread flour
  • All of the Poolish
  • 3/4 cup water
  • 1/2 teaspoon yeast
  • 1 1/2 teaspoons salt


Directions:

1. Making the Poolish:

Combine all of the ingredients in a mixing bowl.  Beat with a spoon or whisk about a minute, until the batter is mixed thoroughly and is pretty smooth. Cover the bowl with plastic wrap.  Let it rest on the counter for 12 to 15 hours.

poolish-baguettes0006


2. Mixing the Dough:

When the poolish is ready, combine the flour, water, and poolish in a large mixing bowl. 

poolish-baguettes0001


Add the yeast, then the salt and mix the ingredients together until the dough forms a ball. I used my hands to incorporate the yeast and then the salt thoroughly into the dough.

poolish-baguettes0002


3: Kneading the Dough

Knead the dough on a floured surface for about 12 minutes. I only kneaded the dough for about 3-5 minutes.  I used the turn and fold method during the bulk fermentation instead of the longer kneading time.

poolish-baguettes0003


4. Bulk Fermentation

The dough should be shiny and smooth and little bit tacky, but not sticky.  Place the dough in a greased bowl and let the dough proof for 2 hours. After an hour, fold the dough, re-shape it into a ball and place it back in the bowl.  

poolish-baguettes0004


The dough should be about 1 1/2 times its original size after 2 hours.

poolish-baguettes0011


5. Shaping the Baguettes

When the dough has risen, divide the dough into 3 equal pieces.  Shape them into rough logs and place them on a lightly-floured counter.  Mist them lightly with spray oil and cover them with plastic wrap.  Let them rest for 30 minutes.

poolish-baguettes0005


Shape the dough pieces into baguettes and place them on a floured couche.  Refer to the Rosemary and Flax Baguettes post for step-by-step instructions on shaping baguettes.

poolish-baguettes0006


6. Proofing the Loaves

Bring up the folds of the couche to support the shape of the loaves while proofing. I put books at either end to hold up the sides of the couche.

poolish-baguettes0007


Spritz the loaves with spray oil and cover with plastic wrap.  Let the loaves proof for 2 hours at room temperature, or until nearly doubled in size.  If your house is warm, it might not take that long.

poolish-baguettes0010


7. Prepare your oven for hearth baking

In the meantime, prepare your oven for hearth baking by placing a baking stone on the middle rack and an empty steam pan on the bottom rack.  Preheat the oven to 450 degrees F.


8. Scoring the Loaves

Carefully and gently transfer the loaves from the baker’s couche to a baking sheet lined with parchment paper.  I used a baker’s bench to assist with the process.

poolish-baguettes0011


I reused the parchment paper from the previous batch of baguettes.

poolish-baguettes0012


Score the baguettes by making 1/2” cuts in the dough using a lame or serrated knife.  I’m still getting the hang of this part.
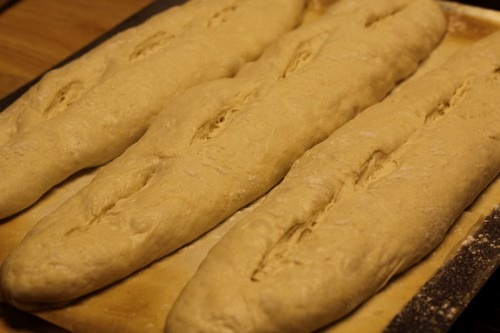
poolish-baguettes0015


9. Baking the Loaves

Pour 1 cups of hot water into the steam pan and immediately slide the loaves off of the baking sheet (parchment sheet an all) onto the baking stone.  Steam the loaves again by spritzing the loaves and the oven walls with a spray bottle. Close the oven door and repeat the spraying process again after 2 minutes.

Bake the loaves for 20 to 30 minutes, or until they are golden brown in color. The formula in Crust and Crumb says to turn off the oven at this point and bake them an additional 5 to 10 minutes; however, this didn’t work for me. As I mentioned previously, the tips burned on the first batch, so for the 2nd batch, I only baked the loaves about 25 minutes at 450 degrees. The crust turned out great.  It was crispy and crackly and wasn’t burnt at all. 


10. Cooling and Slicing the Loaves

Transfer the loaves to wire racks and allow them to cool for at least 30 minutes before slicing and eating.

poolish-baguettes0026


Slice and enjoy!

poolish-baguettes008

This bread has been YeastSpotted.  Please visit Wild Yeast to view all of the lovely breads in the roundup.


I enjoyed these baguettes. I hope to enjoy more baguettes as I continue learning more about them and trying different techniques.


Happy Baking!

Cathy