Showing posts with label baguettes. Show all posts

Tuesday, 1 April 2014

Mini Baguettes and the Train around London

When I visited the UK last year, I toured around London with my son on the train system. It was definitely an experience! Not a bad one just a little hectic at times trying to make sure we were on the right line and knew which stop to take so we didn’t miss our next transfer. 

Mini KAMUT Baguettes

I decided it was best not to rent a car while I was over there because 1) I had never been to London; 2) I’m directionally challenged at the best of times; and 3) they drive on a different side of the road than we do in America. It was confusing enough just figuring out which way the cars would be coming at you when you wanted to cross the street. You can laugh all you want, but they actually have signs in a lot of areas that tell you which direction traffic is coming from. Good thing too.

We utilized the London transit system and as a result, were able to enjoy a totally different view of London. The train stations were so big, they reminded me of an airport.

In these stations, they had all sorts of shops and places to eat. This made things very convenient. While you were waiting to catch the train, you could shop and have lunch. Or bring your food to enjoy on the train ride. This might seem silly, but I’m used to MARTA, the Atlanta rapid transit system, and you don’t eat on those trains. Well some people do, but that’s another story.

I really liked the sandwiches over there. I love bread, but I’ve never been a big sandwich eater, mainly because I don’t like mayonnaise. I’ve also never been fond of the infamous BLT sandwich nor do I enjoy ketchup, but I like mustard. I also like PB&J sandwiches, egg salad, tuna salad and some ham and turkey sandwiches, but only if they are spread with mustard. Well it just so happens that they eat mustard over there. It’s a different mustard, but mustard just the same. I was okay with that!

baguettes-in-London

While we were waiting on a train one day, we went in a place to eat and found these sandwiches made with mini baguettes (photo above). They had all different kinds, but I enjoyed the one filled with tuna.

I liked the sandwich so much I decided to recreate it when I got home. I finally got around to making some this past weekend.

These mini baguettes are very easy and can be made in about 4 hours, not including the overnight Pâte Fermentée. Since I made these with KAMUT all-purpose white flour, I had to adjust the hydration in the final dough. Instead of 70% hydration, these are about 84% hydration, but keep in mind that KAMUT flour is more absorbent than regular bread flour so if you use regular bread flour, you might want to reduce the hydration to 70-75%.

Mini KAMUT Baguettes


Mini Pâte Fermentée Baguettes with KAMUT

Adapted from: The Fundamental Techniques of Classic Bread Baking by The French Culinary Institute

Yield: 4 Small Baguettes

Ingredient Amount Baker’s %

Pâte Fermentée*

All-purpose White KAMUT flour 25 grams 100%
Water 17 grams 68%
Kosher salt pinch 2%
Instant yeast pinch 2%
Final Dough:
All-purpose White KAMUT flour 385 grams 100%
Water 325 grams 84%
Kosher salt 7.5 grams 2%
Instant yeast 1 grams .25%

Pâte Fermentée

42 grams 11%
Total 760.5 grams 197.25%

* The formulas for Pâte Fermentée seem to make way too much for one batch so I reduced the formula by 4.


Making the Pâte Fermentée: 

Combine the KAMUT flour, salt, yeast and water in a small bowl. Mix by hand until completely blended and knead a minute on the counter. It will be quite stiff. Place it back in the bowl and cover with plastic wrap. Let it rest in the refrigerator at least 8 hours or overnight.

The next day, remove the Pâte Fermentée from the refrigerator, cut it into several pieces, cover the pieces with plastic wrap, and let them warm up to room temperature before mixing into the dough.

kamut-baguettes_104


Autolyse:

In the bowl of a stand mixer, combine the KAMUT flour and water using a dough hook. Mix on low speed until the mixture is blended. Turn the mixer off and let the dough autolyse for 15 minutes.

Mix:

Add the salt, yeast and Pâte Fermentée and mix on low speed for 2 to 3 minutes.  Increase the speed and mix for about 5 minutes, or until the dough comes together but is still slightly sticky. 

Bulk Rise:

Transfer the dough to a lightly oiled bowl. Cover with plastic wrap and let it ferment at room temperature for 1 hour.

After an hour, uncover the dough and fold it.  Cover the dough again with plastic wrap and let it ferment for 1 hour.

kamut-baguettes_109


Prepare the Oven:

An hour before you plan to bake the loaf, preheat the oven to 450 degrees F. with a baking stone on the bottom rack and a steam pan or iron skillet on the top rack.

Divide and Bench Rest:

Lightly flour a work surface. Uncover the dough and divide it into four 6.50oz pieces. Shape the pieces into rough logs, cover with plastic wrap and let them bench rest for 15 minutes.

kamut-baguettes_111 kamut-baguettes_114


Shape and Final Proof:

Uncover the dough again and lightly flour surface again if necessary.  Gently press and shape the dough into a baguette.

Place each baguette seam-side down on a floured baker’s couche and bring up the folds of the couche to hold the shape of the loaves. Cover with plastic wrap and let them proof for 30 minutes.

kamut-baguettes_115 kamut-baguettes_122


Score and Bake:

Uncover the dough again and score them using a lame or razor. Sprinkle a little flour on top of the loaves before scoring so you don’t drag the lame.

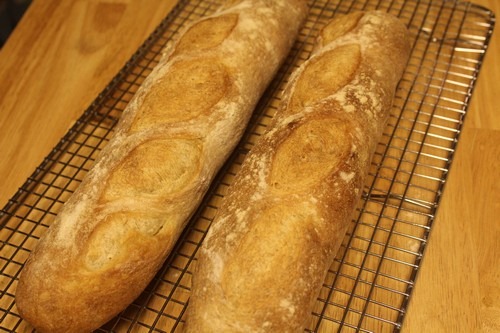
Carefully transfer the loaves to the preheated baking stone. I used my pizza peel and one of the loaves got a little stuck so it ended up with curved shape.

kamut-baguettes_126 kamut-baguettes_131


Add several ice cubes to the steam pan or iron skillet and immediately close the oven door. Bake, with the steam, for 25 minutes, or until the crust is a deep golden brown in color. The sides should be firm and the bottom should sound hollow when thumped.

Cool:

Remove the loaves to wire rack to cool.

Mini Pate Fermentee Baguettes


I made tuna sandwiches with these loaves.  The photo of the sandwich didn’t turn our very well, but here is a picture of the crumb.

kamut-baguettes_402


I’m submitting these baguettes to Bread Baking Day #66, Ultimate Baguettes hosted by Karin from Food for Angels and Devils

BBD #66 - The Ultimate Baguette Recipe (last day of submission April 1, 2014)


Happy Baking!

Cathy

Tuesday, 31 July 2012

Straight Baguettes for Bread Baking Day #52

The theme for Bread Baking Day (BBD) #52 is French Breads. I’m glad Cindy of CindyStarblog chose this theme because I’ve had these baguettes on my list to bake for several weeks. I wanted to continue my baguette-making journey and this provided another opportunity… not that I need any motivation to bake bread.

I’ve been out-of-town on business so my issue was finding the time to actually make them. I finally got the opportunity to bake bread this weekend. It felt so good.

baguettes06

These straight baguettes are really easy. They can be made the same day. It usually takes about 5 hours from start to finish. They don’t even require an overnight poolish or Pâte Fermentée. If you want to serve baguettes for dinner, and have a few hours, this could be a good option.

I started making these baguettes Sunday afternoon, but ran out of steam before I could finish so I retarded the dough in the refrigerator overnight.

The next day, I let the dough warm up to room temperature for a couple of hours and then shaped, proofed and baked the baguettes.

I suppose officially this version wouldn’t be considered a straight baguette, but this process worked better with my schedule and energy level.


Straight Baguettes

Adapted from: The Fundamental Techniques of Classic Bread Baking by The French Culinary Institute

Makes: 2 Baguettes

Ingredients:

  • 383 g (~3 cups) bread flour, plus extra for dusting
  • 284 g (~1 1/4 cups) water
  • 2 g (3/4 tsp) instant yeast
  • 7 g (1 tsp) salt


Directions:

1. Mix the bread flour and water until thoroughly blended.  You can use an electric stand mixer fitted with a dough hook and mix on low speed, but this dough really doesn’t need a mixer.  I used a Danish dough whisk.

2. Let the dough autolyse (rest) for 15 minutes. Then add the salt and yeast and mix until thoroughly blended. The resting period helps the gluten structure start to develop. If necessary, add a little extra water to help dissolve the salt and yeast.

3. Scrap dough into the bowl. Don’t add any additional flour, just scrap the wet dough (using a dough scraper or a wooden spoon) into a large greased bowl. Cover the bowl with plastic wrap and let the dough rest for 20 minutes.

4. Fold the Dough. Uncover the dough, fold it, then cover it back with plastic wrap and let it rest another 20 minutes. Repeat this process and let the dough rest an additional 20 minutes.

5. Final Fold. Uncover the dough again and fold it, then cover it with plastic, but this time let it bulk ferment for 2 hours. I let mine bulk ferment for about an hour or so, then placed it in the refrigerator overnight.

baguettes002 baguettes004
baguettes007 baguettes010

6. Preheat the oven to 450 degrees F. about an hour before you plan to bake the baguettes.  If you are using a baking stone, place it in the oven to preheat along with a steam pan underneath.  I decided to use my baguette pan for these loaves so I didn’t use the baking stone, just the steam pan.

7. Form the dough into rough logs. Uncover the dough and form 2 logs on a lightly floured, clean work surface.  Mist them lightly with spray oil and cover them with plastic wrap.  Let them rest for 15 minutes.

8. Shape the logs into batards. Begin by gently pressing on the dough to degas it. Shape it into a rough rectangle.

Fold the top of the dough down and seal it with you fingers to degas it somewhat. Then fold the lower section of the dough up and seal it with your fingers. You’ll end up with a rough batard-shaped loaf.  This is the seam side up view.

9. Shape into Baguettes. Turn the dough seam side down and using cupped hands, roll the dough back and forth from the middle out, to extend the dough into the shape of a baguette.

baguettes011 baguettes013
baguettes014 baguettes015
baguettes012 baguettes016


10. Proof the Loaves. Place the loaves seam side down on a baker’s couche or baguette pan. Cover again with plastic wrap and let them proof for 30 minutes.

11. Score the Loaves. Uncover the dough, then use a lame or razor to score the loaves for baguettes. I made the French cut version, where you make about 4 or 5 vertical, but slightly angled slashes in the dough starting at the top left of the loaf and ending at the bottom right.  The slashes should overlap about an inch or so.

baguettes020 baguettes023

12. Bake the Loaves. Add 1 cup of ice to the steam pan in the preheated oven and immediately transfer the loaves onto a baking stone (if using) or place the baguette pan in the oven. Spritz the loaves with water and close the oven door. Repeat the spritzing a couple more times during the first few minutes, then close the door. Let the loaves bake for 25 minutes or until the crust is a deep golden-brown and the sides are firm when you touch them.

13. Cool the Loaves. Remove the loaves from the oven and transfer them to a wire rack to cool.

14. Slice and Enjoy!

baguettes042 baguettes19

This bread has been YeastSpotted.

I was pleased with the results and the flavor of these baguettes. I heard them crackle when I took them out of the oven and let them cool on the wire rack. I didn’t taste them until the next day, but they tasted good not blah like I expected from a baguette without a preferment. I had them with some organic butter. Yum!


Happy Baking!

Cathy


Bread Baking Day #52 - French Bread (last day of submission August 1st, 2012)


Thanks to Cindy for hosting Bread Baking Day #52

BreadBakingDay was created by Zorra of http://kochtopf.twoday.net/stories/4124192/

Saturday, 9 June 2012

Poolish Baguettes revisited

I really enjoy participating in bread-baking groups and events because it provides me with the opportunity to make many different types of breads and to meet and learn from other bread bakers. However, sometimes you just want to focus on a particular bread or technique until you master it.

With that in mind, I’m beginning a journey to learn more about baguettes and hopefully, how to enjoy them. Baguettes represent the epitome of French bread baking, but I’ve never really been a true baguette fan. Don’t get me wrong. I love the tradition of baguette-making and all that goes along with it -- working with the wet dough, shaping the baguettes, the crackly crust and all that. It’s the flavor that doesn’t wow me.

I decided the problem must be with me, not the baguettes. I must not have given them a fair shake. So I’ll be experimenting with different types of baguettes. In this post, I’m revisiting Poolish Baguettes.

poolish-baguettes0029


For these baguettes, I wanted to use a basic formula and adjust as necessary.  I consulted a few of my bread books and finally decided to use a compilation of the basic bread formula with an overnight poolish in Bread Science by Emily Buehler and the formula for the Team USA Baguettes from Crust and Crumb by Peter Reinhart.

I made these baguettes twice and adjusted the hydration in the poolish and the final dough each time.  I also used different amounts of yeast in the final dough to see how the dough would perform.


1st Attempt:

For my first attempt at these baguettes, I increased the hydration in the poolish and kept the water the same in the final dough because I was aiming for a wetter dough. The formula in Crust and Crumb uses less poolish and more flour than the formula in Bread Science. I ended up somewhere in between the two formulas.

I forgot that my oven is really hot when I decided to go with the suggested temperature of 475 degrees. It was too hot so the tips of the baguettes got a little burned before I turned the oven temp down. I also removed the parchment paper partway through baking on this attempt.

These baguettes were definitely crispy, but not exactly what I was aiming for.  They tasted rather blah. I forgot to write down how much salt I used so that may have been part of the problem. I didn’t forget the salt this time, but I did reduce it a bit. These baguettes worked well as Crostini, but I wanted them to taste good on their own.

poolish-baguettes03


2nd Attempt:

For the second batch, I used the same poolish (I had made a double batch), but reduced the amount of water and yeast in the final dough.  I decided the extra hydration in the poolish needed to be adjusted in the final dough. I also baked the baguettes at a lower temperature (450 degrees). I was much more pleased with these baguettes. They were crispy on the outside and even crackled when they came out of the oven. The flavor was much better as well.  I didn’t get the chance to try them until the next day but they tasted pretty good by themselves the next day.  I also enjoyed them with jam, butter and egg salad.

poolish-baguettes010


Here is the formula I used for the 2nd Attempt.


Poolish Baguettes

Adapted from Bread Science by Emily Buehler and Crust and Crumb by Peter Reinhart

Makes: 3 Baguettes

Ingredients:

Poolish

  • 1 3/4 cup unbleached all-purpose flour
  • 1 cup water
  • pinch of instant yeast

Dough:

  • 3 1/2 cups white bread flour
  • All of the Poolish
  • 3/4 cup water
  • 1/2 teaspoon yeast
  • 1 1/2 teaspoons salt


Directions:

1. Making the Poolish:

Combine all of the ingredients in a mixing bowl.  Beat with a spoon or whisk about a minute, until the batter is mixed thoroughly and is pretty smooth. Cover the bowl with plastic wrap.  Let it rest on the counter for 12 to 15 hours.

poolish-baguettes0006


2. Mixing the Dough:

When the poolish is ready, combine the flour, water, and poolish in a large mixing bowl. 

poolish-baguettes0001


Add the yeast, then the salt and mix the ingredients together until the dough forms a ball. I used my hands to incorporate the yeast and then the salt thoroughly into the dough.

poolish-baguettes0002


3: Kneading the Dough

Knead the dough on a floured surface for about 12 minutes. I only kneaded the dough for about 3-5 minutes.  I used the turn and fold method during the bulk fermentation instead of the longer kneading time.

poolish-baguettes0003


4. Bulk Fermentation

The dough should be shiny and smooth and little bit tacky, but not sticky.  Place the dough in a greased bowl and let the dough proof for 2 hours. After an hour, fold the dough, re-shape it into a ball and place it back in the bowl.  

poolish-baguettes0004


The dough should be about 1 1/2 times its original size after 2 hours.

poolish-baguettes0011


5. Shaping the Baguettes

When the dough has risen, divide the dough into 3 equal pieces.  Shape them into rough logs and place them on a lightly-floured counter.  Mist them lightly with spray oil and cover them with plastic wrap.  Let them rest for 30 minutes.

poolish-baguettes0005


Shape the dough pieces into baguettes and place them on a floured couche.  Refer to the Rosemary and Flax Baguettes post for step-by-step instructions on shaping baguettes.

poolish-baguettes0006


6. Proofing the Loaves

Bring up the folds of the couche to support the shape of the loaves while proofing. I put books at either end to hold up the sides of the couche.

poolish-baguettes0007


Spritz the loaves with spray oil and cover with plastic wrap.  Let the loaves proof for 2 hours at room temperature, or until nearly doubled in size.  If your house is warm, it might not take that long.

poolish-baguettes0010


7. Prepare your oven for hearth baking

In the meantime, prepare your oven for hearth baking by placing a baking stone on the middle rack and an empty steam pan on the bottom rack.  Preheat the oven to 450 degrees F.


8. Scoring the Loaves

Carefully and gently transfer the loaves from the baker’s couche to a baking sheet lined with parchment paper.  I used a baker’s bench to assist with the process.

poolish-baguettes0011


I reused the parchment paper from the previous batch of baguettes.

poolish-baguettes0012


Score the baguettes by making 1/2” cuts in the dough using a lame or serrated knife.  I’m still getting the hang of this part.

poolish-baguettes0015


9. Baking the Loaves

Pour 1 cups of hot water into the steam pan and immediately slide the loaves off of the baking sheet (parchment sheet an all) onto the baking stone.  Steam the loaves again by spritzing the loaves and the oven walls with a spray bottle. Close the oven door and repeat the spraying process again after 2 minutes.

Bake the loaves for 20 to 30 minutes, or until they are golden brown in color. The formula in Crust and Crumb says to turn off the oven at this point and bake them an additional 5 to 10 minutes; however, this didn’t work for me. As I mentioned previously, the tips burned on the first batch, so for the 2nd batch, I only baked the loaves about 25 minutes at 450 degrees. The crust turned out great.  It was crispy and crackly and wasn’t burnt at all. 


10. Cooling and Slicing the Loaves

Transfer the loaves to wire racks and allow them to cool for at least 30 minutes before slicing and eating.

poolish-baguettes0026


Slice and enjoy!

poolish-baguettes008

This bread has been YeastSpotted.  Please visit Wild Yeast to view all of the lovely breads in the roundup.


I enjoyed these baguettes. I hope to enjoy more baguettes as I continue learning more about them and trying different techniques.


Happy Baking!

Cathy

Friday, 22 October 2010

Garlic-Studded Baguettes: HBinFive

I had some Healthy Bread in Five Minutes 100% Whole Wheat Olive Oil dough in the refrigerator that needed to be used so I decided to make one of the breads I missed for the HBinFive October 15th Bread Braid. These Garlic Studded Baguettes were easy and fun to make.

garlic-studded-baguette 042

To make these baguettes, all you do is take 1/2-pound of stored 100% Whole Wheat Olive Oil dough out of the refrigerator.  Then shape the dough into a ball and let it rest. I had 1 1/2 pounds so I decided to make three baguettes.  I made one loaf the night before I made the others ones so these photos just show two baguettes.

garlic-studded-baguette 001 

After the dough has rested a bit, gently shape it into an oval.

garlic-studded-baguette 017

Then, fold the dough in thirds, like a letter. Bring one side and gently press it in the center.

 garlic-studded-baguette 018


Bring up the other side and pinch the seam closed.  This will help you get an evenly shaped baguette and a tapered end.

garlic-studded-baguette 019

Stretch the dough gently into a log, working the dough until you have a nice thin baguette.  Try  not to deflate the dough while you’re doing this.  The final width of the baguette should be about 1 1/2 inches.

garlic-studded-baguette 020

Shape the other loaf and place both of them on a pizza peel lined with parchment paper or a silicon mat sprinkle it with cornmeal.  You can also use a baguette pan if you prefer.  I find that parchment paper works best for me

garlic-studded-baguette 024


Let the loaves rest loosely covered with plastic for 40 minutes.

garlic-studded-baguette 025

Right before baking, use a pastry brush to paint the top crust with egg white wash.

garlic-studded-baguette 026

Use the handle of a wooden spoon to gently make an indentation along the length of the baguette.

garlic-studded-baguette 027

Press about halfway through the dough to create a trench.

garlic-studded-baguette 028


Then, press the garlic (or cherry tomatoes if you prefer) into the trench, evenly spacing them along the baguette.  Press the garlic cloves into the dough really good so that they don’t pop out when baking.

garlic-studded-baguette 030

Preheat the oven to 450 degrees about 30 minutes before you’re ready to bake the loves.  Slide the loaves onto the hot baking stone with the steam pan underneath.  Pour one cup of hot tap water into the steam pan and close the oven door.

garlic-studded-baguette 031

Bake for about 25 minutes, or until richly browned and firm.   The garlic cloves were starting to pop out halfway through baking so I pushed them back down.

If you used parchment paper, a silicone mat, or a baguette pan under the loaf, carefully remove it and bake the loaf directly on the stone or an oven rack two-thirds of the way through baking.  Sometimes I remove the parchment paper, but this time I didn’t because I forgot. It turned out just fine on the bottom.

garlic-studded-baguette 032

Allow the bread to cool on a rack before slicing and eating. 

garlic-studded-baguette 038

Now it’s time to serve the Garlic-Studded Baguettes.

garlic-studded-baguette 042


You’re supposed to spread the now-roasted garlic on the sliced bread.  However, my garlic wasn’t roasted enough to be spreadable. Instead, I topped it with Roasted Red Pepper Spread and the roasted garlic cloves. 

garlic-studded-baguette 036

It was good, but I think it could’ve used a little more garlic flavor.  I’m going to try it toasted and spread with a garlic spread and the red pepper spread.


Be sure to check out BigBlackDog to see what the other bakers made for the October 15th Bread Braid roundup and the upcoming November 1st Bread Braid roundup.  I’m sure you’ll get some new and creative ideas.


About the HBinFive Baking Group
The HBinFive Baking Group, started by Michelle of Big Black Dogs, is baking through all of the breads in the Healthy Bread in Five Minutes book. For more information on the HBinFive baking group, check out BigBlackDog.