Sunday 29 August 2010

Msemmen (Algerian Flatbread)

I had the opportunity to visit with my boyfriend's family this afternoon. The menu was varied and they left it up to my discretion as to what I wanted to bring. 

Well, you know I'm always up for making bread. So, I decided to make Healthy Bread in Five Minutes Algerian Flatbread.  Hummus was also on the menu so I thought the Algerian Flatbread might go really well with it.


How to make this delicious bread:

The recipe for this Algerian Flatbread is found on page 228 of the Healthy Bread in Five Minutes book. For the dough, I used the 100% Whole Wheat Bread, Plain and Simple recipe (found on page 79), but you can also use 100% Whole Wheat Bread with Olive Oil recipe, or the Healthy Bread in Five Minutes Master Recipe for the dough.

I made the dough a couple of days in advance and let it ferment in the refrigerator until I was ready to use it.  I used home-milled whole wheat flour from hard red spring wheat.

When I removed the dough from the refrigerator, I cut off two 1/2 pound pieces, shaped them into a ball and put them in a plastic bag to transport to the get together.  The formula in the book calls for 1/4 pound pieces, but I had extra dough so I made them a little bit bigger.


The dough and the rest of the ingredients are very transportable.  All I had to take with me, my Mise en Place, was the dough balls, cumin, paprika, cayenne pepper, turmeric, and kosher salt. The only thing I forgot was the rolling pin.  I put all of this in a plastic bag and was ready to go.


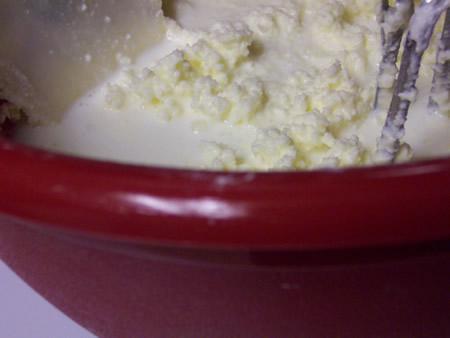
Once I got there, I mixed some olive oil with the spices.  I forgot to add the salt, but it really didn't need it.


The dough had been resting while in transport so it was easy to work with once I got there. I rolled it into a circle to fit the cast iron skillet. I had to do this with my fingers since I didn't have a rolling pin. It worked just fine. I spread the spice mixture evenly over the top, leaving a 1/2-inch border.


Then I rolled the dough up into a log.


The spice mixture was really liquidy due to the olive oil so it oozed out as I was rolling it up.  It also made a big mess on the counter.  The next time I make this bread, I'll wear gloves and make sure I roll it out on something that I don't mind getting stained.  Fortunately the stains from the spices (cumin mostly) came off the counter.


Next I coiled the rope (log) tightly around itself and placed it in the skillet to rest for about 20 minutes.  I didn't want to put it on the work surface since we had just cleaned it from the cumin stains.


After the coil had rested sufficiently, I rolled it out into a circle again using my fingers.  This time, I used a plastic bag underneath so that it wouldn't get yellow stains on the counter. 


I baked the flatbread in the preheated skillet for about 2 to 5 minutes on the first side. 


Then I flipped the msemmen when the underside was richly browned and continued cooking it another 2 to 5 minutes, until the second side was browned.  I had rolled my msemmen a little bit thick so I let it cook for a little while longer.


I let it cool slightly and I mean slightly, because I had people waiting with baited breath to eat it. Then, I cut it into slices. This bread is a wee bit spicy, but it went really well with the hummus. I didn't think to take a photo of a piece with hummus on it.  We were enjoying it too much.


Since we enjoyed the first one so much, I made the other one.  I didn't use all of  the olive oil/spice mixture on the first one so I used the rest on this one. 


This is one time that the whole wheat flour did not overpower the spices in the bread.  It was really really good!  I got rave reviews from all of the taste testers.

Thanks for joining me in the bread-baking blog.  This flatbread has been YeastSpotted. Please visit Wild Yeast to view all of the lovely breads in the roundup.


Friday 27 August 2010

Baguettes: Poolish and Pâte Fermentée - Mellow Bakers

Until recently, I was not a baguette fan.  However, the two breads we just made for the Mellow Bakers' group: Baguettes with Poolish and Baguettes with Pâte Fermentée have changed my mind.  I really like the flavor of these baguettes particularly the Baguettes with Pâte Fermentée.  The loaves in the photo below are the Poolish Baguettes.


"The simplest of breads are the most difficult to produce, and the baguette is high on the list of "simple" breads: simple, in that it is made with a minimum of ingredients; there are no strong flavors that dominate, and it is above all the flavor of the flour that prevails.  Properly made, it is magnificent; poorly made, it is bland and insipid."  Jeffrey Hamelman

As I mentioned in a previous post, this has been the month for baguettes.  I started with Rosemary Flax Baguettes for the HBinFive Bakers. I posted about those last week.

That same weekend, I made Baguettes with Pâte Fermentée. Unfortunately, I over proofed them so the scoring didn't work very well and they didn't look like beautiful graceful loaves.  My boyfriend said these looked like creatures from the deep sea.  Not sure if that's a good thing or not.


They may have looked like creatures from the deep sea, but the flavor of these loaves was exceptional!  I served these baguettes and some Rosemary Flax Baguettes for dinner and the Pâte Fermentée Baguettes were the favored bread hands down.


The Rosemary Flax Baguettes tasted really good, but my dinner guests preferred the flavor of the Pâte Fermentée baguettes.  In fact, I sent one of the scraggly-looking loaves home with my son's girlfriend and she said her parents thought it was the best bread they had ever tasted.  So, the moral of the story is that even scraggly-looking loaves (or loaves from the deep sea) can taste good. It's all in the mouth of the taster.

If you're looking for the recipe for these delicious Pâte Fermentée Baguettes, Natashya with Living in the Kitchen with Puppies created a modified version and it's posted here


Next on the list was the Poolish Baguettes.

I tried my hand at these this past weekend.  I was not disappointed. 

You can find a modified version of the Poolish Baguettes on breadcetera.com.  The main difference in this formula and the one in the book is that Steve uses all-purpose flour instead of bread flour, he reduced the dry yeast by 1/4 tsp and he uses a different technique than the one outlined in the book for mixing the dough. I actually tried it both ways but I'm only posting about the hand mixing method. Otherwise, this post would be really long.

I love mixing dough by hand.  I've resisted the urge so far to buy a KA Mixer but I've found at times that mixing the dough by hand doesn't always produce the results I'm looking for. I do use a mixer sometimes especially when my carpel tunnel is acting up, but since I've been taking my vitamins, it doesn't seem to be a problem.  So, happily I'm able to mix the dough by hand again.

The method that Steve demonstrates on his blog is Richard Bertinet's method of mixing the dough.  I was very intrigued by this method so I decided to try it.  I must say that this method gives you a good upper body workout. 

Here is a video of Richard demonstrating his technique. This is one time I wasn't able to take photos of the process because the dough starts as a sticky mess and I would get it all over the camera.  Of course, that usually happens anyway, but I thought you might enjoy seeing the master at work.


I was able to take a few photos of the process.

I started out mixing the dough with my dough hook.


Until it was a sticky mess.


Then I dumped the sticky mess on the counter.  I didn't put any flour or oil on the counter because Richard said that was cheating.


Then I started folding and slamming the dough down on the counter.  It was harder than it looked.  I had to bring the dough up really high to get it to slam on the counter.  I finally got the hang of it and had some fun.

This is the dough about halfway through the process.


It took about 15 minutes of slamming the dough but it finally became smooth and silky.


Then you put the dough in a bowl.


Cover the bowl with a cloth and let it proof for 1 1/2 hours.


It only took a little over an hour for my dough to proof because my kitchen was really warm.  This time, I didn't fold it halfway through as suggested by the book. 


Then I carefully removed the dough from the bowl to the counter.


And divided the dough into 4 equal portions.


Then I shaped each piece into a baguette and placed the baguettes on a couche and covered them with plastic to proof for about an hour.  


Once the loaves had proofed, I scored them using a serrated knife.


I baked them about 25 minutes on a baking stone that had been preheated in a 475 degrees oven.  I used a steam pan underneath and also spritzed the sides of the oven with water three times during the first 10 minutes of baking.

Here are the finished Poolish Baguettes.  They tasted really good, but I think I like the Baguettes with Pâte Fermentée the best.


Thanks for joining me for my baguette-making experience. Be sure to check out what all the other bakers have been up to in the Mellow Bakers group.

Happy Baking!
Cathy


The Mellow Bakers group was started by Paul at Yumarama. We’re baking breads from Bread: A Baker’s Book of Techniques and Recipes by Jeffrey Hamelman.

Tuesday 24 August 2010

Cultured Butter and Buttermilk

This month, the Artisan Bread Bakers substituted B for Butter instead of Bread for the Bread of the Month (BOM).  We made Cultured Butter to go with all the delicious bread we like to bake and enjoy. I like bread and butter so this sounded like an great idea to me.


I've never made butter before. When I think about homemade butter, I have visions of women churning butter by hand.  That seems like a very long and tedious process to me so I was never inclined to partake in it.  That is, until I saw the directions for this cultured butter.  The mixer does most of the work. How easy is that. Oh! And did I mention that it tastes great!  In fact, I made some bread to go with the butter rather than the other way around. 

I had so much fun making this cultured butter that I already have the ingredients to make some more. I've been telling everyone I'm going to give them some homemade butter.  Of course, I'll have to give them some bread to go with it, but that's okay with me.  That just means I'll get to bake some more bread. ;)

If you would you like to make some delicious homemade butter, then follow along, it's really easy and fun.


Cultured Butter
Yields two cups buttermilk and about 12 ounces butter

Ingredients:
One quart heavy cream
1/3 cup whole milk yogurt (Dannon is a good brand; make sure whatever you use doesn’t contain any gums or stabilizers)
Salt, to taste

Directions:

Mix the cream and yogurt in a clean glass or ceramic bowl. Avoid plastic, which can harbor bacteria in any scratches or imperfections.


Cover and let rest for 12 -18 hours, until the mixture has thickened slightly and tastes somewhat tangy. If your room is cool (i.e., less than the mid-70s), it may take longer to culture.  Mmmm...that tastes good, even with no salt.


Once the mixture has cultured, cool it slightly by placing in the refrigerator for an hour or so, or by submerging the bowl in a sinkful of ice water for a minute or two. The ideal temperature is around 60° F.  It was really hot the day I made this butter, plus I was making bread so I left it in the refrigerator for a couple of hours.


Prepare a bowl of ice water, which you will use to clean the butter.

Put the cream mixture in a mixing bowl. If using a stand mixer, use the whisk attachment. Beat the mixture on high until stiff peaks form, then reduce the speed to low. Watch closely at this point, as the cream mixture will soon break, separating into butter and buttermilk. If you have a splash guard on your mixer, you might want to use it so you don’t have buttermilk flying everywhere. Once the mixture breaks, turn off the mixer.

This is what it looks like when it separates.  I don't have a splash guard for my mixer so I had to pay close attention.  It did make a little mess but not too much.


Pour the buttermilk into a clean container.


You can use this just as you would commercial buttermilk for drinking or baking. If you aren’t going to use it within a week or so, it can be frozen and used later for baking.


Press the butter with a spatula, spoon, or your hand to remove as much buttermilk as possible.


Pour water from the bowl of ice water over the butter to cover.


Rinse the butter by kneading it under the water, then dump off the water.


Continue to add water and rinse until the water you pour off is clear. It is necessary to remove all the residual buttermilk in order to keep the butter from spoiling too quickly.


Once the butter has been cleaned thoroughly, knead it on the counter for a minute.


If you want to salt the butter, press the butter out on the counter, sprinkle lightly with salt, then knead it in.


To store the butter, you can press it into ramekins or, roll it into logs. Cover the ramekins or wrap the logs tightly in plastic wrap. If you make two butter rolls, you can freeze one for later use.   

I did both.  I rolled some into a log and froze it to enjoy later.


And, I put some in a ramekin to enjoy now. 


It sure tasted good in this bread.  I used it instead of regular butter.  I also enjoyed it on this bread.  I forgot to take a photo of a slice smeared with butter, but I'm sure you can envision what that might look (and taste) like.  Delish is all I have to say!


BOM (Bread of the Month) is a virtual bread-baking party hosted by Phyl Of Cabbages & King CakesVisit the Facebook page to learn more about the Artisan Bread Baking group.


Happy Baking!
Cathy


Saturday 21 August 2010

Hamburger Dill Pickles

I made these Hamburger Dill Pickles during the Can-a-Rama 2010 weekend in July. I'm finally getting around to posting about them. 


Did you know that the term pickle is derived from the Dutch word pekel, meaning brine? In the U.S. and Canada, the word pickle alone almost always refers to a pickled cucumber (other types of pickles are described as "pickled onion," "pickled cauliflower," etc.).    
Source: http://en.wikipedia.org/wiki/Pickled_cucumber 

I thought this recipe sounded good because it includes honey and green peppers. The pickles were really easy to make and didn't take that many cucumbers. Which was perfect since I didn't have that many left in my garden.  I used some cucumbers from my garden and some that friends had given me.


Hamburger Pickles
Recipe from Pickles & Relishes: From apples to zucchini, 150 recipes for preserving the harvest by Andrea Chesman
Yield: 4 pints


Ingredients:

10 medium-sized cucumbers, sliced
1 large onion, sliced
1-3 cloves of garlic
1 green pepper, cut into strips
5 tablespoons pickling salt
2 cups honey
2 cups cider vinegar
1/2 cup water
1 teaspoon turmeric
4 fresh dill heads

Directions:

Combine the cucumbers, onions, garlic, green peppers, and 4 tablespoons of the pickling salt in a large glass, ceramic, or stainless steel bowl.  This part draws out the water from the cucumbers. It's pretty cool how it works. 


Let stand for several hours.  Drain.  You can't really tell from this photo, but after a few hours, the cukes were sitting in water. I literally drained out a cup or more of water.


In a large saucepan, combine the honey, vinegar, water, the remaining pickling salt, and turmeric.  Heat to boiling. 


Add the drained cucumber mixture and heat almost to the boiling point, but do not boil.


Pack the cucumbers and syrup into clean, hot pint jars.  Top with a dill head, and be sure to leave 1/2 inch headspace. 


Seal. 


Process for 30 minutes in a water bath canner.  If you need more detailed instructions on water-bath canning, please refer to the instructions on this site: National Center for Home Preservation.


Remove the jars from the canner and let them sit on the counter until the seals set.  Then move them to storage. 


I'm looking forward to serving some of these pickles when we grill out burgers soon. It's been too hot here recently, but things should be cooling off a bit soon.  I hope...


Thanks for joining me for another pickle adventure.

Happy Canning and Baking!
Cathy


Here are some of the references I use in my canning adventures. You might enjoy them as well: