Wednesday 29 September 2010

Quinoa Bread

I’ve heard a lot about the benefits of Quinoa and have wanted to try it for awhile.  This Quinoa Bread is one of the breads that was listed for the HBinFive September 15th Bread Braid, but I didn’t have any Quinoa at the time so I postponed making it. The other HBinFive Bakers raved about this bread so I got some Quinoa grains and set out to see for myself what all the fuss was about.

If you’re not familiar with the benefits of Quinoa, here’s a little background info:

“Quinoa was of great nutritional importance in pre-Columbian Andean civilizations, being secondary only to the potato, and was followed in importance by maize. In contemporary times, this crop has become highly appreciated for its nutritional value, as its protein content is very high (12%–18%). Unlike wheat or rice (which are low in lysine), and like oats, quinoa contains a balanced set of essential amino acids for humans, making it an unusually complete protein source among plant foods. It is a good source of dietary fiber and phosphorus and is high in magnesium and iron. Quinoa is gluten-free and considered easy to digest.” http://en.wikipedia.org/wiki/Quinoa

quinoa-bread 052

Quinoa has a light, fluffy texture when cooked, and a mild, slightly nutty flavor.  It looks and smells like sesame seeds to me. I love sesame seeds so I thought if it tastes as good as it smells, then we would have a winner. 

quinoa-bread 058

Look for the recipe for this delicious Quinoa Bread on page 132 of the Healthy Bread in Five Minutes book.  You can also find some of the Healthy Bread in Five Minutes recipes on Google Reader.

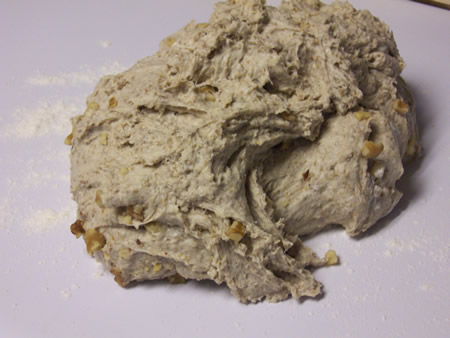
I halved the recipe so I used a mixture of 1 1/2 cups of white whole wheat, 1 3/4 cups of all-purpose flour and 1/2 cup of uncooked quinoa grains along with some yeast, vital wheat gluten, kosher salt, and water for the dough.  Since it’s a multigrain bread, I thought it would bake well in my clay bread pot.  It turned out to be a beautiful golden-brown color and the crust is delicious!

quinoa-bread 008

I was not disappointed. This Quinoa Bread does taste as good as it smells and it’s good for you. Can’t beat that!

Thanks for joining me in the bread-baking blog.  This bread has been YeastSpotted. Please visit Wild Yeast to view all of the lovely breads in the roundup.


Be sure to check out BigBlackDog to see all of the breads in the October 1st Bread Braid roundup. 


About the HBinFive Baking Group
The HBinFive Baking Group, started by Michelle of Big Black Dogs, is baking through all of the breads in the Healthy Bread in Five Minutes book. For more information on the HBinFive baking group, check out BigBlackDog.

Monday 27 September 2010

Maple Oatmeal Bread: BOM

The choice for the Bread of the Month (BOM) for September is from one of my favorite cookbooks, Bernard Clayton’s Complete Book of Breads.  I was thrilled when I learned that we would be making this Maple Oatmeal Bread for the Artisan Bread Bakers this month. I love oatmeal bread. This loaf is very fluffy and has a delicious and light sweetness due to the maple syrup.

maple-oatmeal-bread 049

Did you know that maple syrup was discovered by the Native Americans who lived among the maple forests in North America? However, it was the pioneer, or early American housewife that turned it into the commodity it is today.  Sugar was scarce in those times, but maple syrup was plentiful so it was used in breads, biscuits, and pies and poured over pancakes. 

-- Bernard Clayton, New Complete Book of Breads


Maple Oatmeal Bread

Makes: Two Loaves

Recipe from Bernard Clayton’s Complete Book of Breads

This loaf, created by the baker at Staffords in the Field Inn in New Hampshire, is reminiscent of those times.  The recipe was adapted from a century-old recipe.  I don’t know about you but I enjoy tasting history.

Ingredients:

  • 2 1/2 cups boiling water
  • 1 cup rolled oats
  • 1 package dry yeast
  • 3/4 cup maple syrup
  • 2 teaspoons salt
  • 1 tablespoon oil
  • 5 cups bread flour or all-purpose flour, approximately (I used about 7 1/2 cups total)

Directions:

Put the oats into a bowl. Pour the boiling water over the oats and set aside to soak for an hour.

Sprinkle the yeast over the cooled oatmeal and stir to mix. Add the maple syrup, salt, cooking oil, and 3 cups of the flour. Blend all of the ingredients.  It will have the consistency of a heavy batter. Cover the bowl with plastic wrap and set aside to rise for about an hour. Add more flour, 1/2 cup at a time, until the dough is the correct consistency.

maple-oatmeal-bread 007 maple-oatmeal-bread 008
maple-oatmeal-bread 009 maple-oatmeal-bread 011


Knead for 10 minutes. Add more flour if the dough is sticky.  Mine was really sticky so I added more flour.  Divide the dough into two pieces.

maple-oatmeal-bread 012 maple-oatmeal-bread 014


Shape into loaves and place in greased loaf pans.

maple-oatmeal-bread 015 maple-oatmeal-bread 016
maple-oatmeal-bread 017 maple-oatmeal-bread 018


I used one glass pan and one nonstick pan to see if they baked it differently. Cover and let rise another 45 minutes or until the dough reaches the edge of the pan.  I used wax paper so it wouldn’t stick to the loaves.

maple-oatmeal-bread 022 maple-oatmeal-bread 023
maple-oatmeal-bread 024


Bake at 350 for 30 - 40 minutes.  The recipe says to bake for 40 to 50 minutes but it didn’t take that long for my bread to bake.  Remove the loaves and place on metal rack to cool before serving.

maple-oatmeal-bread 026 maple-oatmeal-bread 028


Notes:  This bread makes great toast and can be kept frozen for an indefinite period at 0 degrees.  I think I’ll freeze this loaf to enjoy later and eat the other loaf now.

maple-oatmeal-bread 033


BOM (Bread of the Month) is a virtual bread-baking party hosted by Phyl Of Cabbages & King CakesVisit the Facebook page to learn more about the Artisan Bread Baking group.


Thanks for visiting The Bread Experience Bread-Baking Blog. I hope you enjoyed your visit and will join me again next time.

Happy Baking!
Cathy

Thursday 23 September 2010

Sourdough Strata with Tomatoes and Greens: Grow Your Own #45

 Grow Your Own #45 is being hosted by Heather at girlichef this month.


Grow your own is an event that celebrates and shares what you have grown, foraged, hunted, or fished.  The dish should use at least one item from your very own garden or farm. Your garden doesn’t have to be big, container gardens are welcome! If you hunted or foraged, those items are also eligible.


I've been growing a bunch of tomatoes and herbs in my container garden and straw bale garden this year so I thought this would be the perfect opportunity to use them on some pizza.

Then, I saw this Sourdough Strata with Tomatoes and Greens featured in the October Issue of Food Network Magazine and that completely changed my mind.  I knew I had to make it.

It just so happens that we made Sourdough Rye Bread for the Mellow Bakers this month.  Perfect, I thought and put it on my schedule. Now, all I had to do was wait for the tomatoes to ripen.


Thankfully, some of the Roma Tomatoes from my container garden did ripen in time.

So I took these tomatoes ...


and added some English Tyme


and some Lemon Tyme


Then tossed the herbs with the tomatoes and olive oil, and roasted them.


Next, I took this delicious Sourdough Rye Bread with Walnuts ....


And, cut it into 1-inch cubes, then tossed the bread cubes with milk, eggs, cheese, baby spinach and topped it with the roasted tomatoes.  Then the casserole went in the refrigerator overnight.


The next day, I topped it with Parmesan cheese and baked it. 


From my garden to the table...


Strata is a breakfast casserole, but I enjoyed it for dinner. It was delicious! 


Be sure to check out girlichef at the beginning of October to view the roundup.

Happy Baking!
Cathy

Here are some additional bread-making resources:

Tuesday 21 September 2010

Sourdough Rye with Walnuts: Mellow Bakers

I've always maintained that I'm not a big Rye Bread fan, but it seems I need to reconsider that statement.  The more I make rye bread, the more I like it. This Sourdough Rye with Walnuts is no exception.


Sourdough Rye with Walnuts
Makes: 2 large loaves

The formula for this Sourdough Rye bread can be found on page 208 of Bread: A Baker’s Book of Techniques and Recipes by Jeffrey Hamelman.

You can find a modified version on Living in the Kitchen with Puppies.

The formula  included raisins, but I omitted them because I wanted to use this bread in a savory dish. I also only added a handful of walnuts rather than a full cup as the recipe suggests.  I was very pleased with the results.  This sourdough rye has a slightly nutty flavor and chewy crust.  It tastes great warm with butter and goes really well with cheese. We served it for dinner with a salad and pasta and homemade roasted vegetable pasta sauce.  The flavors went together very nicely.


Preparing the Sourdough

The night before I planned to make the bread (Friday night), I mixed up the sourdough using my fed starter, medium rye flour and water.  Then I let it ripen for 16 hours. I used the starter we created in the Bread Bakers Apprentice Challenge.


Mixing the Dough

The next day, after 16 hours, I mixed all of the ingredients (except the walnuts) in my spiral mixer.


I kneaded in the walnuts by hand.


Fermenting the Dough

Then placed the dough in the bowl and let it ferment for 1 hour.


After the dough had doubled in size, I placed it on the counter sprinkled with flour.


Then divided it into two pieces using my bench scraper.


Shaping the Loaves

I thought about proofing the loaves in my bannetons, but opted to do freeform loaves instead. I decided to shape the loaves into my favorite shape - the torpedo.  I took photos of the process but they turned out fuzzy.  For directions on shaping a torpedo loaf, refer to my New York Deli Rye post.

I placed the loaves on parchment paper sprinkled with cornmeal and let them ferment for an hour.


After the loaves had fermented for an hour, I scored them using a serrated knife.  I made 3 slashes in one loaf and one slash down the middle on the other loaf.  I wanted to see the difference when they were baked.


After the oven had preheated to 475 degrees, I placed the loaves in the oven on my rectangular baking stone with a steam pan underneath.  I spritzed the walls of the oven three times with water during the first 15 minutes of baking. Then turned the oven down to 450 degrees.


I baked the loaves for about 15 more minutes at 450, but the bottom was beginning to darken so I turned the oven down to 425 degrees and let the loaves finish baking. 


This rye bread was really easy to make.  I am pleased with the way the scoring turned out.


I especially like the loaf with the slash down the middle.  I decided to send these loaves to be YeastSpotted. Please visit Wild Yeast to view all of the lovely breads in the roundup.


As I mentioned, we enjoyed a few slices of one of the loaves for dinner with pasta.


I saved the rest for Sourdough Strata with Tomatoes and Greens.  It was delicious!


Please check out what the other bakers have been up to in the Mellow Bakers group.


The Mellow Bakers group was started by Paul at Yumarama. We’re baking breads from Bread: A Baker’s Book of Techniques and Recipes by Jeffrey Hamelman.


Thanks for joining us in the Bread Experience bread-baking blog.  Please join us again soon.

Happy Baking!
Cathy

Friday 17 September 2010

Georgia Pickled Ginger Peaches: tigress can jam

The theme for this month's tigress can jam is stone fruits. Stone fruits belong to the genus Prunus which includes apricots, cherries, peaches, nectarines and plums. Georgia is known for it's peaches so I was all over this one.


I've made two batches of peach jam already so I needed to come up with something different. I thought about making peach butter, but I still have some left from last year because, um, I went a little crazy canning last year. I also considered making peach salsa since I have a bunch of tomatoes and peaches ...

Then I saw a recipe for pickled peaches in Sheri Brooks Vinton's new cookbook Put 'em Up!  These pickled peaches are uniquely Southern. I've never had pickled peaches before, the combination just seemed a little weird to me.  However, after reading the rest of the ingredients in this recipe, I decided these pickled peaches sounded delicious. I asked some of my friends and family whether they would eat them if I made them and they said "yes". Some reluctantly, some enthusiastically.

If that wasn't enough to convince me, last weekend, I went to the Atlanta Food Blog Forum.  At the conference, I met Virginia Willis, the author of Bon Appétite, Y'all.  The recipe in Put 'em Up! is actually based on Virginia's recipe. So, that settled it!  The Pickled Ginger Peaches were meant to be.

Pickled Peaches.  Now say that three times...


What I really like about these pickled peaches is that you don't have to serve them for dessert.  You can serve them with a holiday meal.  Now that's a great idea!

Pickled Ginger Peaches
Makes: about 2 quarts but I used pint-sized jars instead
Recipe found in Put 'em Up! by Sheri Brooks Vinton

Ingredients:
6 (500 mg) vitamin C tablets, crushed
2 quarts cold water
2 cups ice
5 pounds peaches (10-12)
4 cups distilled white vinegar
4 cups sugar
1 (2-inch) knob ginger, sliced into coins
2 cinnamon sticks
1 teaspoon ground allspice
1 teaspoon whole cloves

Directions:
In a large nonreactive bowl, cooler, or your impeccably clean kitchen sink, create an antibrowning ascorbi-acid bath by dissolving the crushed vitamin C tablets in the cold water.  Add the ice.  I opted to use a stainless steel bowl for this part.


Bring a large pot of water to boil.  Working in batches of 2 peaches at a time, blanch the fruit in the boiling water for 30 seconds to loosen the skins.


Scoop the peaches out of the water and plunge them into the prepared ice water.  


Repeat with the remaining peaches.  Drain.  Using a small paring knife, peel, pit, and halve the peaches, returning them to the ice bath as you go.


Bring the vinegar, sugar, ginger, cinnamon, allspice, and cloves to a boil in a large nonreactive saucepan, stirring to dissolve the sugar.


Add the drained peaches, return to a boil, and then reduce the heat and simmer until tender, about 10 minutes.


At this point, you can refrigerate the pickled peaches for up to 3 weeks or, can them using the boiling-water  method.  I opted for the water-bath canning method, of course, since this is what this challenge is all about.

Ladle the peaches into clean, hot quart (or pint) canning jars, covering the peaches by 1/2 inch with liquid.  Leave 1/2 inch headspace between the top of the liquid and the lid.  Screw the lids on the jars temporarily.  Gently swirl each jar to release trapped air bubbles.  Remove the lids and add syrup, if necessary to achieve proper headspace.  Wipe the rims clean; center lids on jars and screw on jar bands.


Process for 20 minutes. If you live in a higher altitude or need more detailed instructions on water-bath canning, please refer to the instructions at the National Center for Home Preservation.


Turn off heat, remove canner lid, and let jars rest in the water for 5 minutes.  Remove jars and set aside for 24 hours.  Check seals, then store in a cool, dark place for up to 1 year.


Click for tigress can jam food blog challenge
We're making jams or pickling every month in 2010. For more info, click on the button.  Check out the September Can Jam Roundup to see what the other can jammers canned.


Happy Canning and Baking!
Cathy

Here are some of the references I use in my canning adventures. You might enjoy them as well: