Friday 31 December 2010

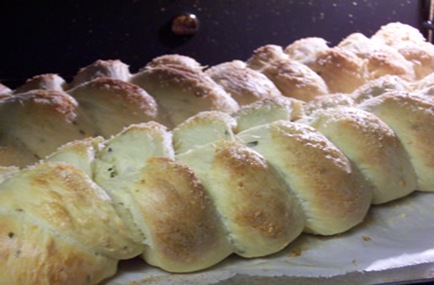
Celebrating 2010 ~ Slideshow of Breads

It’s New Years Eve 2010 and I’m feeling nostalgic today so I decided to take a stroll down memory lane and showcase the breads I’ve made and posted about this year.

2010 was another wonderful year of baking for me. For twelve months, I baked with the HBinFive (Healthy Bread in Five Minutes) bakers.  I finished the BBA Challenge in March and started baking with the Mellow Bakers in April.  I also participated in the tigress can jam each month, hosted BBD #29 in April and participated in most of the other Bread Baking Day events.  I baked with the Artisan Bread Bakers bakers as much as possible and hosted the BYOB roundups for several months.

One of my most memorable moments this year was participating in Stir It 28 Atlanta. I made about 19 breads for this event to benefit the people of Haiti.  It was a wonderful event and I was honored to participate with such a wonderful group of bloggers for such a worthy cause.


I made other breads that I didn’t post about because some turned out to be flops and others I had already made and posted about.

I had lot’s of fun baking bread this year and participating in these baking groups. I plan to continue my bread-baking journey in 2011.  I hope you'll join me in The Bread Experience.

Happy New Year from The Bread Experience!

Thursday 30 December 2010

Granola Bread with Dried Fruit: BBD #35

For Bread Baking Day (BBD #35), the bread of choice is Bread with Dried Fruits. I didn’t want to make another Holiday bread with fruit in it so I almost skipped this one, but you know me… I can never pass up a chance to bake bread.

I was having a little trouble deciding what bread to make, then, I got this neat little bread book from my sister for Christmas. Of course, now I want to bake all of the breads in it.

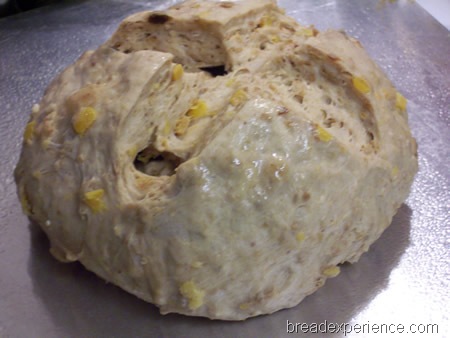
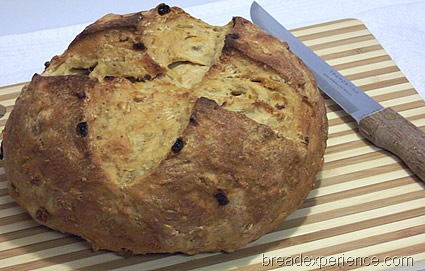
This Granola Bread seemed really interesting and healthy so I decided to make it for Bread Baking Day #35. I didn’t have any plain granola so I just added some cereal with granola, wheat flakes and raisins. I also added dried apricots.  It makes a healthy and delicious bread. I enjoyed it toasted with butter for breakfast.

granola-bread 048 

Granola Bread with Dried Fruit

Source: Making Fresh Bread from your oven to your table from LOVE FOOD

Makes: 1 Loaf

Ingredients:

  • Generous 2 1/2 cups white bread flour
  • 3/4 cup whole wheat bread flour
  • 1 1/2 tsp salt
  • Generous 1 1/4 cups unsweetened granola
  • 3 tbsp nonfat dry milk
  • 1 1/2 tsp active dry yeast
  • 1 cup lukewarm water
  • 2 tbsp vegetable oil
  • 1 tbsp honey
  • 1/3 cup chopped plumped dried apricots


Directions:

Pour boiling water over the dried apricots and let them plump for awhile.  I let the bowl sit for about an hour.

granola-bread 003

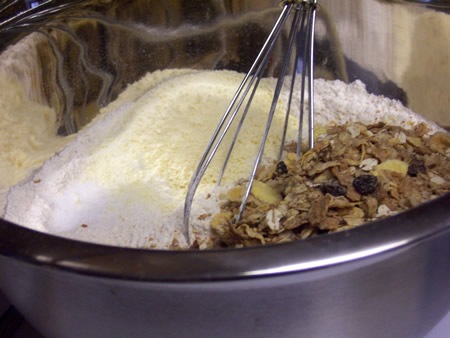
Sift both types of flour and the salt together into a bowl and tip in the bran from the sifter.  Stir in the granola, milk and yeast. 

granola-bread 004

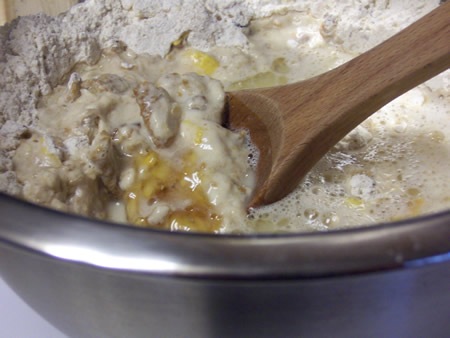
Make a well in the center and pour in the lukewarm water, oil, and honey.

granola-bread 005

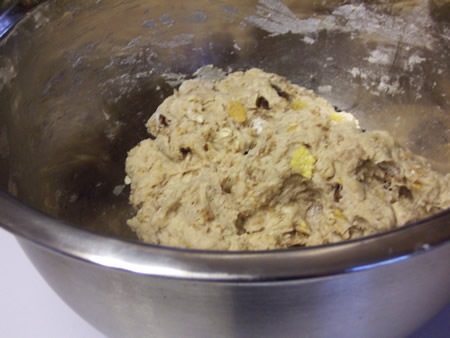
Stir well with a wooden spoon until the dough begins to come together, then knead with your hands until it leaves the side of the bowl. 

granola-bread 006

Turn out onto a lightly floured counter and knead well for 5 minutes. 

granola-bread 007

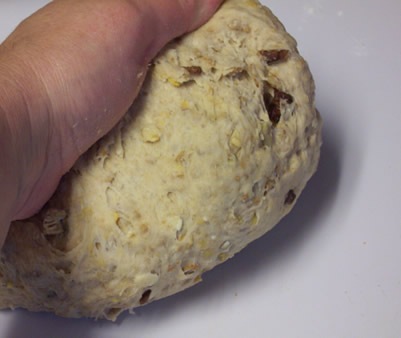
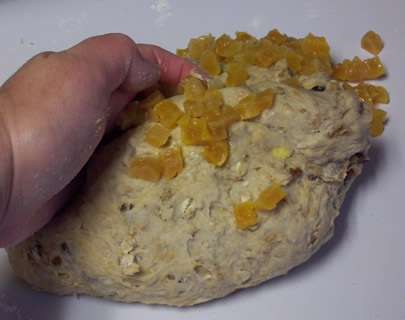
Knead in the apricots and continue to knead for 5 minutes more, until the dough is smooth and elastic.

granola-bread 008

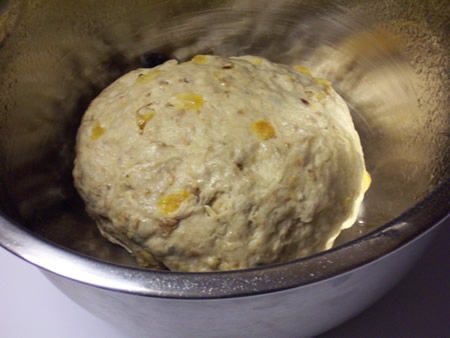
Brush a bowl with oil or spray it with spray oil.  Shape the dough into a ball, put it into the bowl, and put the bowl into a plastic bag or cover with a damp dish towel. 

granola-bread 010

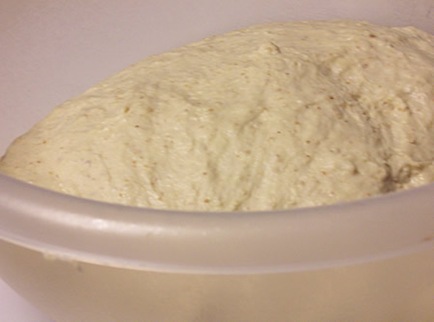
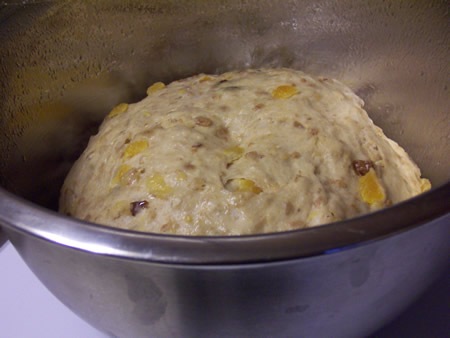
Let rise in a warm place for 1 hour, until the dough has doubled in volume.

granola-bread 011

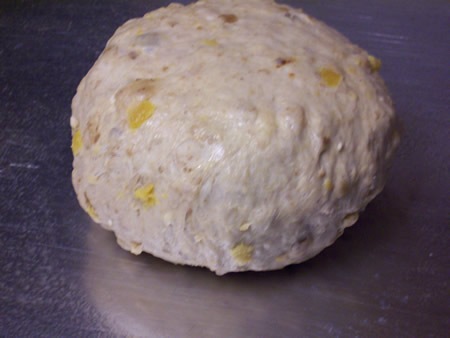
Brush a baking sheet with oil. Turn out the dough onto a lightly floured surface and punch down with your fist.  With lightly floured hands, shape the dough into a round and place on the prepared baking sheet.

granola-bread 012

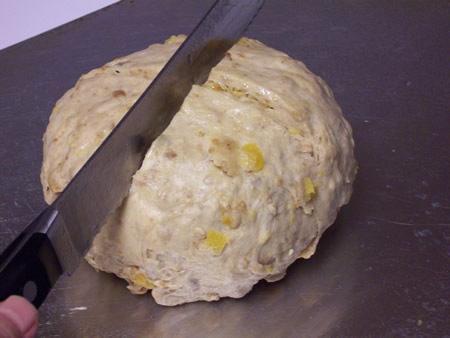
Cut a cross in the top of the loaf.

granola-bread 013

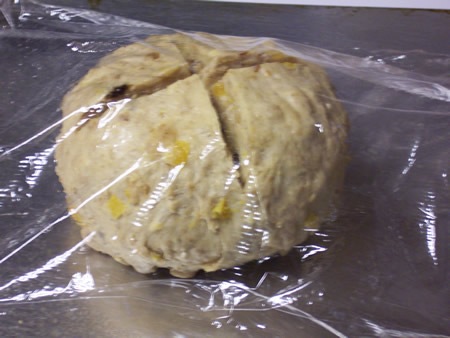
Cover the loaf with plastic wrap or a damp dish towel and let rise in a warm place for 30-40 minutes.

granola-bread 015

granola-bread 016

Preheat the oven to 400º F/200º C. Bake the loaf for 30-35 minutes, until golden brown and it sounds hollow when tapped on the bottom with your knuckles. 

granola-bread 017

Transfer to a wire rack to cool.  I know, this isn’t a wire rack.  I forgot to take a photo of that part.

granola-bread 034


Slice and enjoy!

granola-bread 052


Thanks for visiting The Bread Experience Bread Baking Blog. I hope you enjoyed your visit and will join me again soon.


Umm Mymoonah of Taste of Pearl City is hosting BreadBakingDay #35. Be sure to check out all of the fabulous breads in the BBD #35 Roundup.

image 

BreadBakingDay was created by Zorra of http://kochtopf.twoday.net/stories/4124192/.  Read more about Bread Baking Day and access the previous roundups on her blog.

Wednesday 29 December 2010

2010 Canning Adventures ~ The Bread Experience

I’ve caught the canning bug. In 2010, I canned something every month. I participated in the tigress can jam and I canned on my own. Some months, I made jams from fruits that I got from my favorite farms or the local market. Other months, I pickled in-season vegetables from my garden or from the local farmer’s market. 

Each month, in the can jam, we canned something different. In fact, I canned some things that I would never have thought to try much less can on my own.  Participating in the tigress can jam challenge was a wonderful learning experience and definitely broadened my horizons. 

I had never even heard of an allium before, but we canned them.  If you’re wondering, the allium family consists of green scallions, chives, scapes, ramps, leeks, husky onions, shallots, and garlic.  I made caramelized red onion relish. We also canned herbs, peppers, carrots, dried fruits and of course, lot’s of delicious fruits. I even made rhubarb jam and I liked it. Who knew!

I had lot’s of fun jamming and pickling this past year. Here is a slideshow of my 2010 Canning Adventures.  Enjoy!


Here are the jams and other items I canned throughout 2010 listed in the order posted on the blog. Feel free to try some of these for yourself.


The fun goes on...

The tigress can jam is continuing in 2011.   Look for more details on tigress in a jam.


Happy Canning from The Bread Experience!

Have a Happy and Blessed New Year!

Tuesday 28 December 2010

BYOB 2011 Blog Roll

Here are the Bakers that participated in BYOB in 2011. To visit the BYOB archives here.

**A**

Abby
Blog: Stir It! Scrape It! Mix It! Bake It!
Twitter: mixitbakeit

Andrea
Blog: Family & Food
Twitter: ap269

Annie in Canada

Apu
Blog: Annarasa - Essence of Food

**C**

Calamity Jane
Blog: Apron Stringz

Cat
Blog: Buttery Bakery

Cathy
Blog: Bread Making with the Bread Experience
Twitter: breadexperience 

Champa
Blog: Versatile Vegetarian Kitchen

Chelsea
Blog: LoveMakingDough

Cindy in Cedar Park, Texas

Connie
Blog: mydiscoveryofbread

Crystal
Blog: Duodishes
Twitter: theduodishes

Cynthia
Blog: motherskitchen
Twitter: momskitchen

**D**

Di
Blog: diskitchennotebook
Twitter: diskitchennotes

Dori
Blog: I Eat Clay


**E**

Elly in Bear, Delaware

**F**

Freida
Blog: Frieda Loves Bread
Twitter: friedalovesbread

**G**

Gayathri
Blog: Gayathri's Cook Spot

**H**

Hanna
Blog: MyBreadBakingExperiences

Heather
Blog: GirliChef
Twitter: girlichef

Honeybee
Blog: Honeybee Cooks Jackfruit

**I**

Idania
Blog: El Aroma De Idania


**J**

Jacqueline
Blog: Designing My Day

Janet in Plainfield, IL

Jennifer
Blog: For Such a Time as This
Twitter: jennifer_sikora

Jill
Blog: BakingBread-101.com

Joshua
Blog: The Well Cooked Lad

**K**

Kathy
Blog: Panini Happy
Twitter: paninikathy

Kathy in Derwood, Maryland

Krista
Blog: http://www.thebeetreporter.blog.com/

KyLeen
Blog: www.sixteenbeans.com

**L**

Leslie
Blog: La Cocina de Leslie


**M**

Margie
Blog: Tea and Scones 

Marion in United Kingdom

Melanie
Blog: Mel’s Home Baking Adventures

Michelle
Blog: The Beauty of Life
 

**P**

Pam
Blog: Pam’s Bread

Priya
Blog: http://eq-myblog.blogspot.com/
Twitter: priyasreeram
 

**R**

Roxana
Blog: A little bit of Everything
   

**S**

Shira
Blog: http://shirasbread.blogspot.com/

Soepkipje
Photo album: http://www.ipernity.com/home/soepkipje

Swathi
Blog: Zesty South Indian Kitchen
Twitter: zestysouthindia


**T**

Tina
Blog: http://www.tinaculbertson.blogspot.com/
Twitter: @tinaculbertson


 **W**

Winnie
Blog: Somthing Sweet - Winnie's blog

BYOB 2011 ~ A Year of Bread and a Giveaway

The year is 2011…

Your mission, should you choose to accept it, is to bake your own bread and other baked goods throughout the whole year.


BYOB has moved and is now hosted by

Carola of Sweet and That's it.


What is BYOB?

BYOB began with Sandy of At the Bakers Bench in 2009.  The tradition has moved to it’s new home on this blog, but the commitment is the same.

The idea behind BYOB is that instead of running to the store to buy a loaf of bread, pastry or sandwich buns, you make them yourself. You won’t be penalized if you do need to buy a loaf of bread from the store every once in awhile, but you might miss out on some of the rewards. We’ll understand of course.  Life happens. There aren't any deadlines, either. You bake what you need, when you need it.

The BYOB bakers decided to commit to another year of baking our own bread and other baked goods.

And so the tradition continues…


Why should you BYOB?

Baking bread helps reduce food costs and relieve stress at the same time. Plus, homemade baked goods taste so much better than store bought. Not to mention, it’s fun and so satisfying to be able to claim that it’s homemade.

These days you never know when an emergency condition (weather or other) could prevent you from going to the store so this will be good practice.


How to participate in BYOB

There are no formal signups, just a personal commitment to bake as much of your baked goods as you can.

  1. Just send an email with the url to your blog and I’ll add you to blog roll.  Feel free to include your twitter account if you have one.
  2. Then bake your own bread and other baked goods each month as needed and post about them.
  3. Place the BYOB badge on your post with a link back to this page.  You may also want to place the badge on your blog to showcase your participation in this fun adventure.
  4. By the 1st of each month, send an email with links to your bread and other baked goods’ posts.  Please include a photo 250 pixels wide. The file size should be no more than 200KB.
  5. If you are not a blogger, you can still participate, just let me know what baked goods you’ve made and submit a photo if possible.  We like to view all of the lovely breads.

Don’t worry, I’ll send a reminder each month if you forget to send me the links.

Here is the badge.  This is such a nice badge, I decided to continue using it rather than creating a new one.  Just cut and paste the code below and insert it in the source (html) code in your blog post. 

BYOB  


And now, a giveaway just for fun

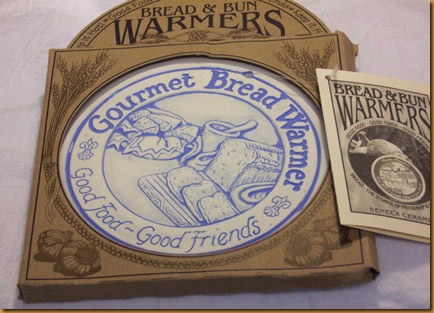
As an added incentive, but mainly just for fun, I’m giving away this cute bread warmer. I liked it and thought someone might enjoy using it to keep their dinner rolls warm in the bread basket.

bread-warmer 003

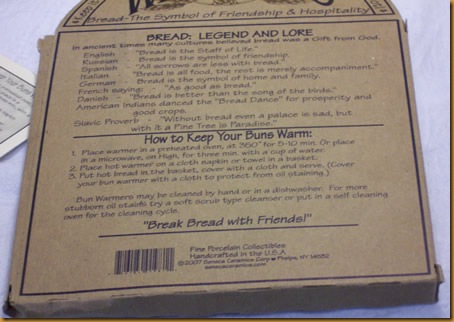
This is the back of the package.  It shows some neat bread lore from different countries.

bread-warmer 005

Everyone that signs up to participate in BYOB by January 15th will be entered in the drawing. If your name is already on the blog roll, you are already entered.  If your name is not on the blog roll and you want it to be, just let me know and I’ll add it to the list and you’ll be entered in the drawing as well.

That’s all there is to it! 

Happy Baking!

Cathy

Monday 27 December 2010

Ciabatta with Olive Oil & Wheat Germ

The Mellow Bakers have been working on Ciabatta this month. We had three different versions to choose from: Ciabatta with Stiff Biga, Ciabatta with Poolish, or Ciabatta with Olive Oil & Wheat Germ. I decided to make the Ciabatta with Olive Oil & Wheat Germ the day before Christmas Eve so we would have an easy and quick dinner on Christmas Eve.

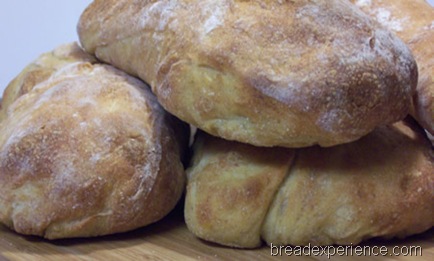
Ciabatta means slipper in Italian. The dough is very wet and slack so you typically don’t shape this bread, you just divide the dough and stretch out the pieces a little bit. When I made Ciabatta for the BBA Challenge, the loaves turned out looking like an old shoe rather than a slipper.  My second attempt turned out better, but it still wasn’t my favorite dough to work with.  

This time, however, the dough was easier to work with. It was wet, but the addition of the wheat germ and olive oil, made it very manageable.  The loaves still look pretty funny, but they tasted good.
ciabatta 030 

Ciabatta with Olive Oil and Wheat Germ

From the book: Bread: A Baker’s Book of Techniques and Recipes by Jeffrey Hamelman

You can find a copy of the formula here.


This is the method I used to make this bread:


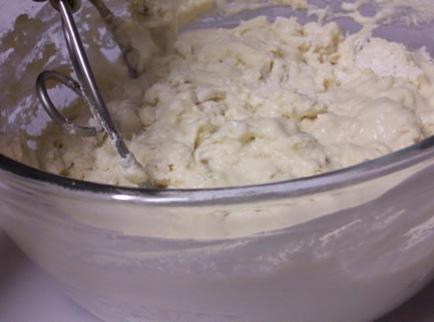
POOLISH: Disperse the yeast in the water, add the flour, and mix until smooth. Cover the bowl with plastic and let stand for 12 to 16 hours at about 70° F.
ciabatta 002


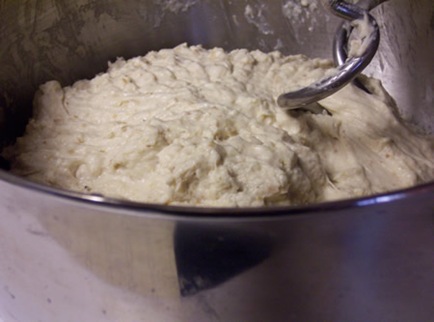
MIXING: Add all the ingredients to the mixing bowl, including the polish and toasted wheat germ, but not the olive oil. In a stand mixer, mix on first speed for 2 ½ minutes in order to incorporate the ingredients. If necessary, correct the hydration by adding water or flour in small amounts. Turn the mixer to second speed and begin to add the olive oil in a slow, steady stream. Mix on second speed for 4 ½ to 5 ½ minutes, until gluten development is evident. The dough will be rather loose and sticky, but when tugged on, some definite dough strength should be noted -- there should be some “muscle” to the dough. Notice the nice flecks of what germ spread throughout the dough. Desired dough temperature: 75° F.
ciabatta 005


BULK FERMENTATION: 3 hours.

ciabatta 007


FOLDING: Fold the dough twice, after 1 hour of bulk fermentation and again after 2 hours. To do so, flour the work surface, using somewhat more flour than you think is necessary. Excess flour will not be incorporated into the dough because it will all be brushed off. Turn the dough out onto the work surface, so that the top of the dough is neatly turned over and spread onto the floured work surface. Now take one side, say, the left side of the dough, and lift up about one-third of the bulk and turn it vigorously onto the body of the dough.
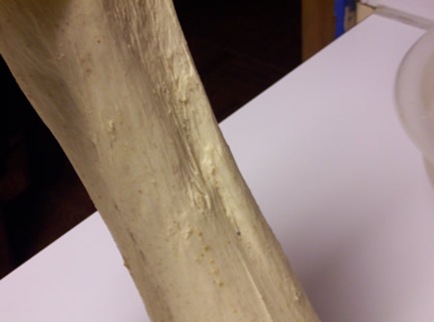
ciabatta 008


With spread fingers, use both hands to pat down the dough and degas it. Don’t attempt to drive out every bit of fermentation gas; just press enough to expel the major portion of the gases.
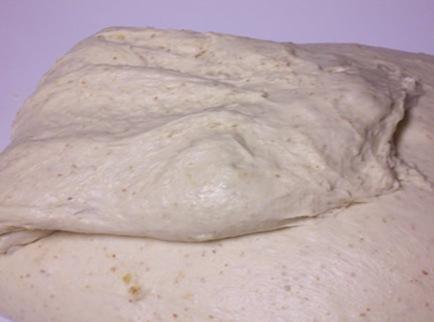
ciabatta 009


Now take about one-third of the dough from the right side and fold it in toward the center, overlapping the first fold.
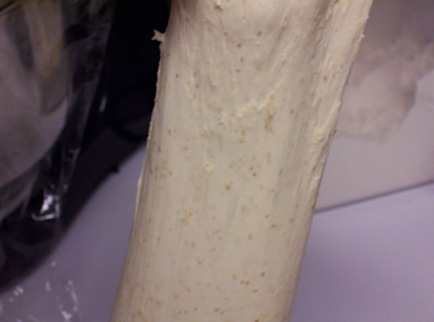
ciabatta 010


Again press to degas. Be sure, before that second folding and prior to all folds, that any raw flour on the top surface of the dough is brushed away. I didn’t use any extra flour for this part.  This particular Ciabatta dough didn’t need it.
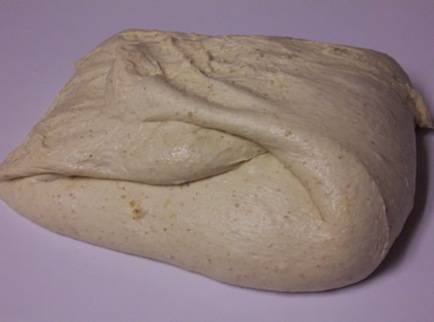
ciabatta 011


After folding the right-hand third of the dough into the center, reach over to the far side of the dough, bring about one-third toward you, and fold this portion.
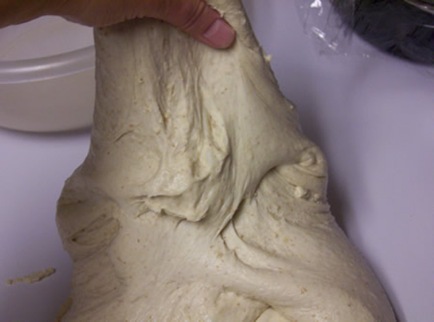
ciabatta 012


Finish by taking the dough closest to you and folding that portion away from you and into the center.
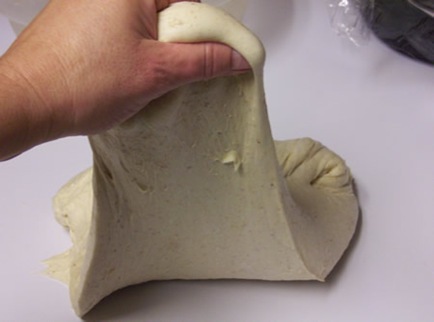
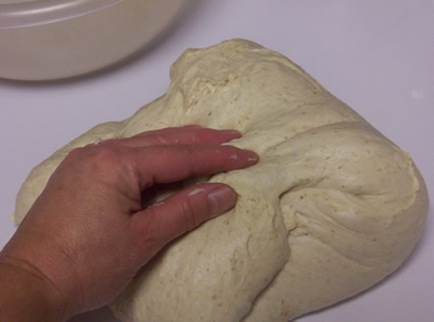
ciabatta 013


ciabatta 014


When this fourth side has been folded, turn the dough over on the work surface so the seams are underneath, bring your hands under the dough from the left and right sides, pick it up in a mass and replace it in the dough container. The folds give a final strengthening to the dough.
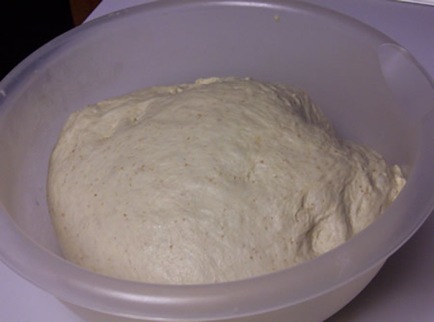
ciabatta 015


DIVIDING AND SHAPING: Flour the work surface. Invert the dough onto the work surface and gently pat out the larger air bubbles -- but remember that for the most part the fermentation gasses and the associated interior holes and pockets in the dough should remain intact. Lightly flour the top surface of the dough. Have ready a sufficient number of bread boards (or a baker’s couche) that are thoroughly (but not too thickly) covered with sifted bread flour.
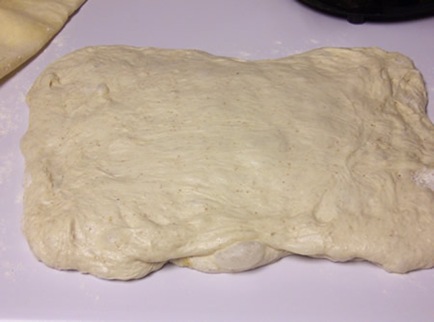
ciabatta 016


Using a pastry cutter that has been dipped in water, divide the dough into three approximately equal rectangles. Each should weigh about 18 ounces. I cut the dough into four rectangles instead of three.
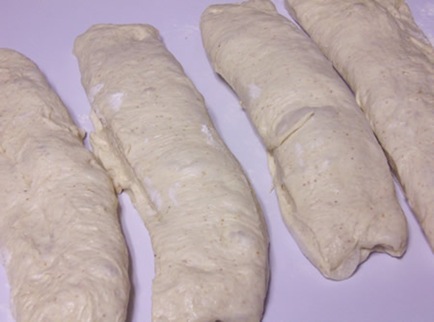
ciabatta 017


Lay the loaves on the cloth (or a floured bread board).
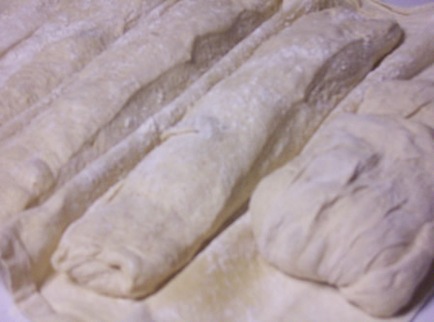
ciabatta 018


Gently fold each piece of dough, from left to right, letter style, into an oblong about 6 inches long.
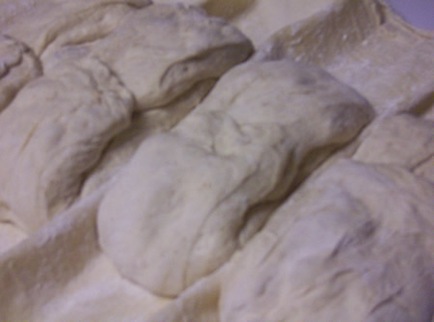
ciabatta 019


Bunch the cloth between the pieces to provide a wall. Mist the top of the dough with spray oil and dust the dough with more flour, then cover the cloth with a towel.  I used plastic wrap instead of a towel.
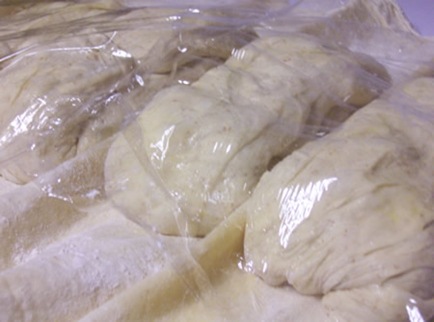
ciabatta 020


FINAL FERMENTATION: Approximately 1 1/2 hours at 75° F.

Prepare the oven for hearth baking. About 45 minutes to 1 hour before baking, place a baking stone on the middle rack with a steam pan underneath. Preheat oven to 500 degrees Fahrenheit.


BAKING: Dust a peel or the back of a sheet pan with semolina flour or cornmeal and very gently transfer the proofed ciabatta dough to the peel or pan.  Or, use a piece of parchment paper and dust it with cornmeal.
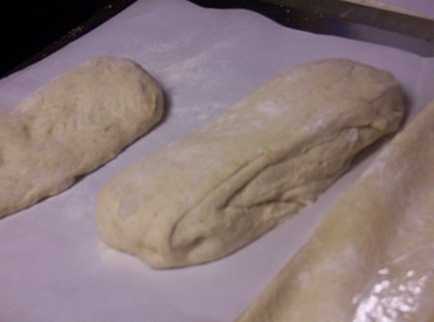
ciabatta 021


Lift the dough from each end and tug the dough out to a length of 9 to 12 inches.  If the dough bulges too high in the middle, gently dimple it down with your fingertips to even out the height of the dough.
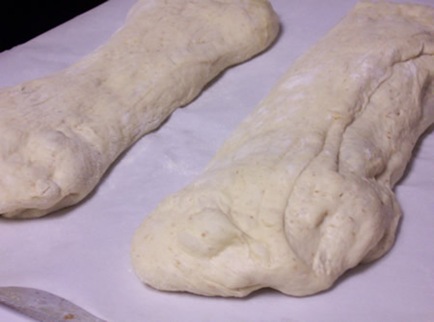
ciabatta 023


Slide the dough onto the stone.  Pour 1 cup of hot water into the steam pan and close the door.  After 30 seconds, open the door, spray the side walls of the oven with water, and close the door. Repeat twice more at 30-second intervals.  After the final spray, turn the oven setting down to 450 degrees F and bake for 10 minutes.  Rotate the loaves 180 degrees, if necessary, for even baking and continue baking for 5 to 10 minutes longer, or until done.
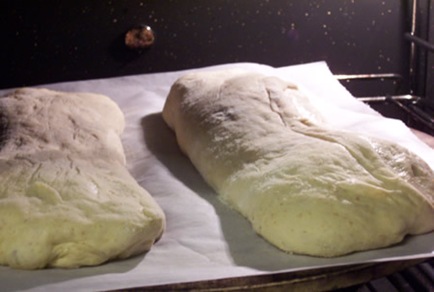
ciabatta 024


The bread should register 205 degrees F in the center and should be golden in color.  The flour streaks will also give it a dusty look. The loaves should feel quite hard and crusty at first but will soften as they cool.


COOLING & SERVING:  Remove the loaves from the oven, let them cool fully (about 45 minutes) before slicing and eating.
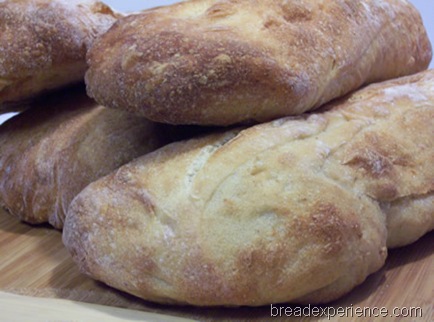
ciabatta 035


I really like the flavor of the Olive Oil and Wheat Germ Ciabatta. We used these loaves for sandwiches.  We sliced them and served them with Italian sausage and marinara sauce. Here is the shot of the crumb. I don’t have photos of the sandwiches.  We were too hungry to wait for photos.
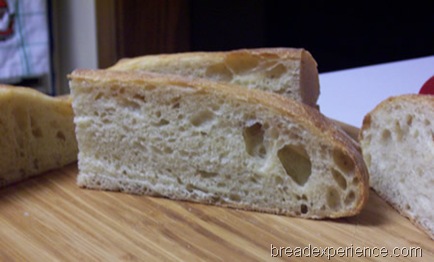
ciabatta 039


Thanks for visiting the Bread Experience bread-baking blog.  I hope you’ll join me again soon.

Happy Baking!
Cathy


Mellow Bakers was started by Paul at Yumarama.
We’re baking breads from Bread: A Baker’s Book of Techniques and Recipes by Jeffrey Hamelman.
Saturday 25 December 2010

Cheese and Chive Challah

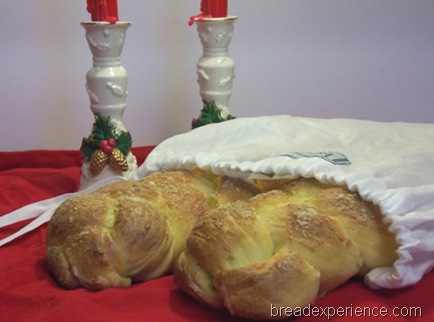
Christmas was wonderful this year.  I got to spend time with my family and friends and it snowed.  It hasn’t snowed in Atlanta on Christmas since 1882. That’s a very rare phenomenon indeed!  We enjoyed good food, good bread, good company and a beautiful display of falling snowflakes outside the window. 

Happy Holidays from The Bread Experience!

cheese-chive-challah 056 

At family events, more often than not, I’m the one who brings the bread. In fact, the first question I usually get asked when I walk in the door is, “what kind of bread did you bring today?” 

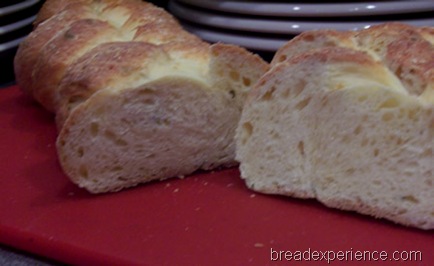
This year, instead of bringing rolls for Christmas dinner, I made a festive Cheese and Chive Challah.  This challah recipe made two loaves so I shared one loaf with my family and gave the other loaf to my boyfriend for his family to enjoy.  The bread was well received at both gatherings.

cheese-chive-challah 076 

Cheese and Chive Challah

Source: Cooking Light November 2010 Issue

Makes: Two loaves

This Cheese and Chive Challah is a traditional yeasted egg bread that is further enriched with the addition of cheese.  I used fontina, but feel free to use your favorite shredded cheese.

Ingredients:

  • 1  cup  warm 2% reduced-fat milk (100° to 110°)
  • 1  teaspoon  sugar
  • 1  package dry yeast (about 2 1/4 teaspoons)
  • 3  tablespoons  butter, melted
  • 1 1/2  teaspoons  salt
  • 5  large egg yolks
  • 3  large eggs
  • 3/4  cup  (3 ounces) shredded aged fontina cheese
  • 1/2  cup  finely chopped fresh chives
  • 10.7  ounces  bread flour (about 2 1/4 cups)
  • 13.5  ounces  all-purpose flour, divided (about 3 cups)
  • Cooking spray
  • 1  large egg
  • 2  tablespoons  water
  • 2  tablespoons  grated fresh Parmigiano-Reggiano cheese

Directions:

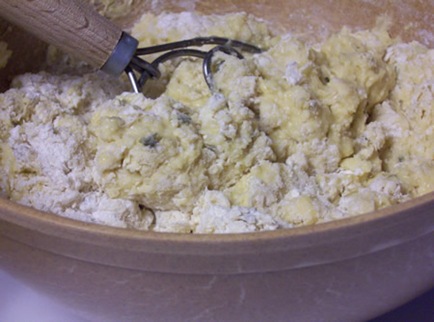
Combine first 3 ingredients in a large bowl; let stand 5 minutes or until bubbly.  Stir in butter, salt, 5 egg yolks, and 3 eggs. Stir in fontina and chives. Weigh or lightly spoon flours into dry measuring cups; level with a knife. Add 10.7 ounces bread flour (about 2 1/4 cups) and 12.4 ounces (about 2 3/4 cups) all-purpose flour to yeast mixture, stirring until a soft dough forms (dough will be sticky).

cheese-chive-challah 005


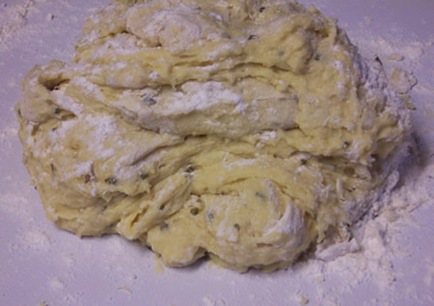
Turn dough out onto a lightly floured surface. Knead until smooth and elastic, adding remaining 1/4 cup all-purpose flour, 1 tablespoon at a time, to prevent dough from sticking to hands.

cheese-chive-challah 006


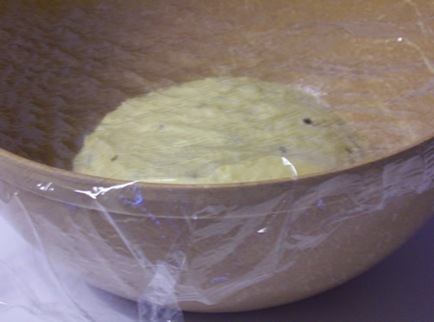
Place dough in a large bowl coated with cooking spray, turning to coat top. Cover with plastic wrap.

cheese-chive-challah 009


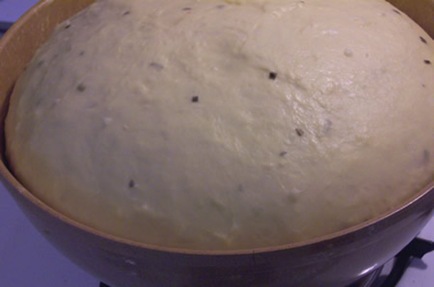
Let the dough rise in a warm place (85°), free from drafts, for 45 minutes or until doubled in size.

cheese-chive-challah 011


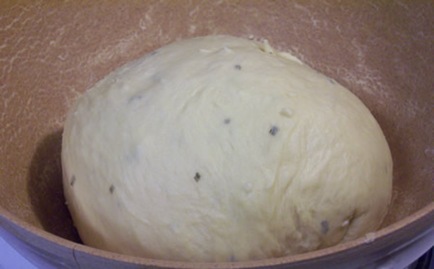
Punch down dough;

cheese-chive-challah 012


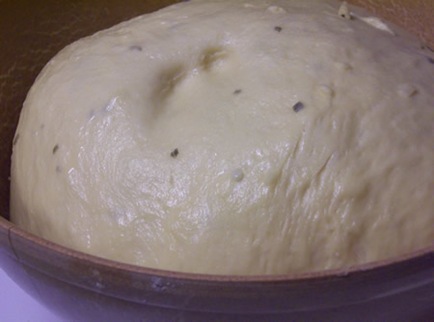
Cover and let rise 50 minutes or until doubled in size. (Gently press two fingers into dough. If indentation remains, dough has risen enough.)

cheese-chive-challah 016


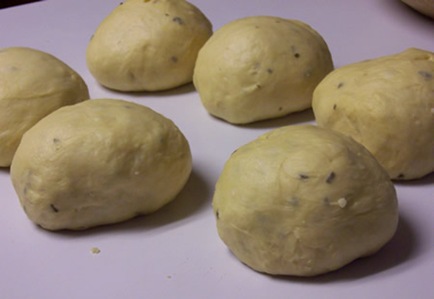
Divide dough into 6 equal portions. Roll each portion into a ball.

cheese-chive-challah 017


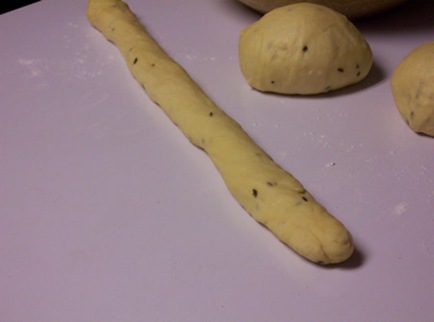
Roll each ball into a rope about 15 inches long.

cheese-chive-challah 018


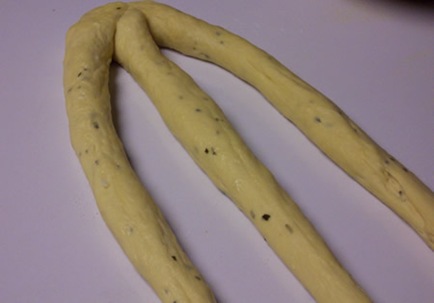
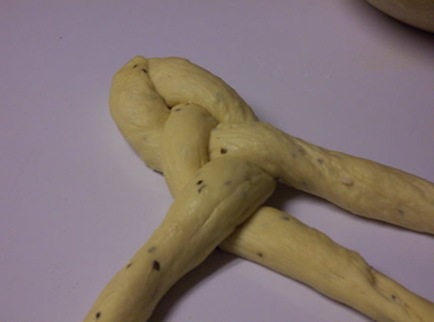
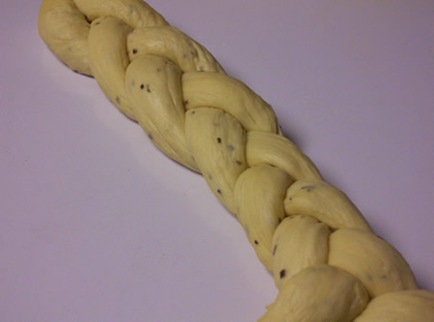
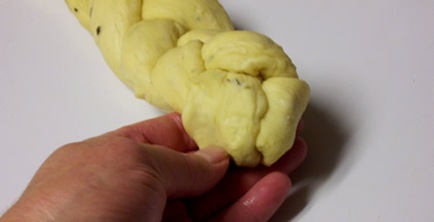
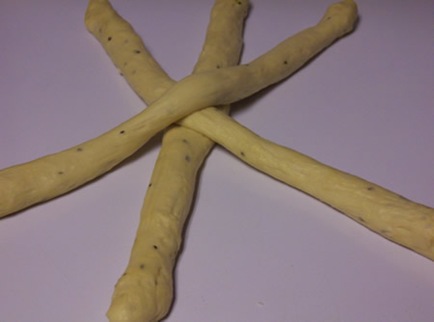
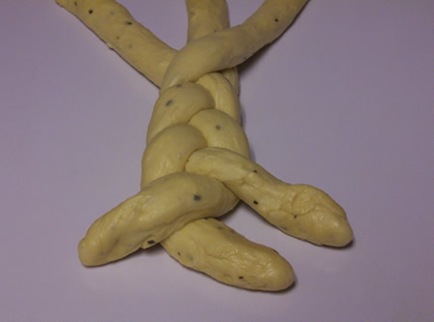
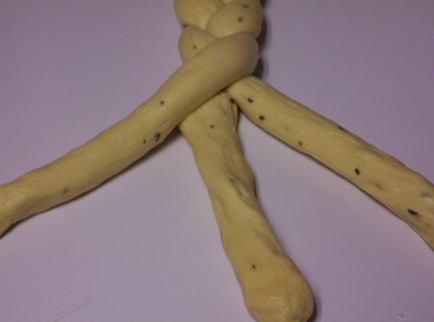
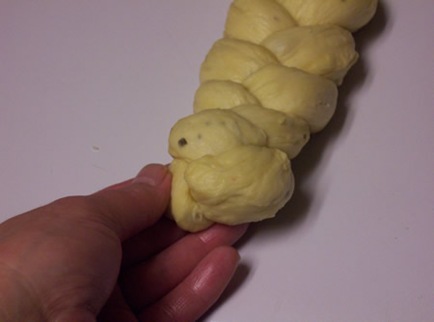
Place 3 ropes parallel to one another; braid ropes. Pinch ends together, and tuck under loaf.  I braided the first loaf this way and the second loaf a different way.

cheese-chive-challah 020

cheese-chive-challah 021

cheese-chive-challah 022

cheese-chive-challah 023


Repeat procedure with remaining 3 ropes.  I formed this braid a little bit different than the first one.  See photos below:

cheese-chive-challah 025

cheese-chive-challah 026

cheese-chive-challah 027

cheese-chive-challah 028


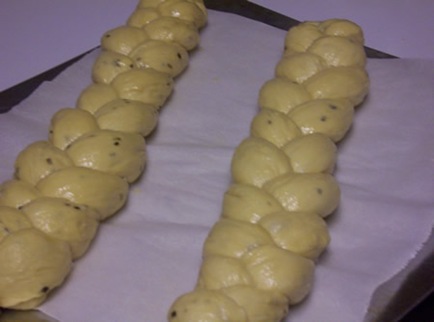
Place loaves on a baking sheet lined with parchment paper; coat with cooking spray. Cover and let rise 30 minutes or until doubled in size.

cheese-chive-challah 030


Preheat oven to 375°.

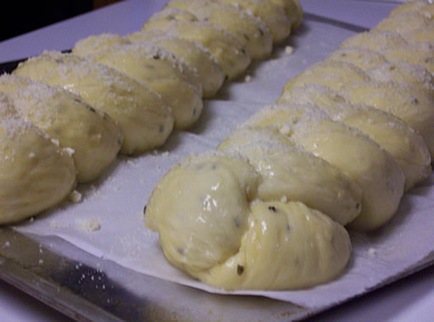
Combine 1 egg and 2 tablespoons water, stirring well with a whisk. Brush loaves gently with egg mixture.  Sprinkle loaves evenly with Parmigiano-Reggiano.

cheese-chive-challah 040


Bake at 375° for 25 minutes or until golden. Remove from baking sheet; cool on a wire rack.

cheese-chive-challah 043


Nutritional Information

Calories: 160
Fat: 4.7g (sat 2.3g,mono 1.5g,poly 0.5g)
Protein: 6.2g
Carbohydrate: 22.5g
Fiber: 0.8g
Cholesterol: 78mg
Iron: 1.6mg
Sodium: 210mg
Calcium: 51mg