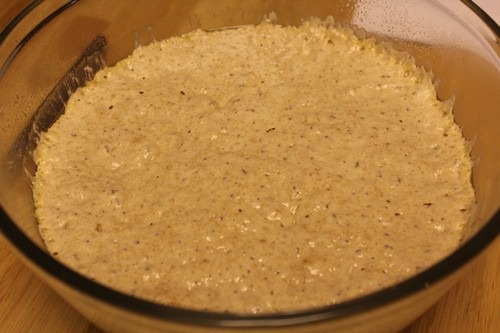
Monday, 3 September 2012

Strawberry-Kiwi Jam for a Jam Exchange

It’s time once again for Steph Chow’s Jam Exchange.  I always enjoy participating in this jam exchange because I get to make some new jams and try some new jams that somebody else made.

Print

This is my third year participating in this jam exchange. In 2010, I made Cherry Preserves and Cantaloupe Preserves with Cinnamon, last year I made Spiced Wine and Peach Jam and Mango Raspberry Jam.

This year, I made Peach Orange Marmalade for the exchange, but I still needed one more jam. I had a hard time deciding which one to make. Then I remembered I had some frozen strawberries from my strawberry-picking adventure this past May. I wanted to make something unique and I finally found this tasty recipe for Strawberry-Kiwi Jam.

Strawberry-Kiwi-Jam01


This is a beautiful and delicious jam. The kiwis blend really well with the strawberries to create a rather exotic flavor, and the little black seeds add eye appeal and crunchiness to the jam.


Strawberry-Kiwi Jam

Makes: About 2 pints or 4 cups

Recipe from The Joy of Jams, Jellies, and Other Sweet Preserves by Linda Ziedrich


Ingredients:

  • 1 pound hulled strawberries
  • 1 pound peeled fuzzy kiwis
  • 3 cups sugar


Directions:

1) Place the fruit in a large non-reactive preserving pot. Crush the fruit with a potato masher. Then still in the sugar.

Strawberry-Kiwi-Jamd01


2) Heat the mixture over medium heat and stir until the sugar dissolves. Turn the heat to medium-high, then boil the jam until a drop mounds in a chilled dish.

Strawberry-Kiwi-Jamd04


3) Ladle the jam into clean, sterilized, half-pint (8 oz) canning jars, leaving 1/4-inch headspace. Remove air bubbles if necessary with a bubble remover and headspace tool. Wipe the edges clean with a clean, wet paper towel. Center lid on jar.  Screw the band down until resistance is met, then increase to fingertip-tight. Process for 10 minutes in a water-bath canner.

I ended up with enough jam for 3 1/2 jars so I processed 3 jars and put the remaining 1/2 jar in the refrigerator to enjoy.

Strawberry-Kiwi-Jamd06

If you live in a higher altitude or need more detailed instructions on water-bath canning, please refer to the instructions at the National Center for Home Preservation.


4) Turn off the heat, remove canner lid, and let jars rest in the water for 5 minutes.  Remove jars and set aside for 24 hours.  Check seals, then store in a cool, dark place for up to 1 year.

Strawberry-Kiwi-Jam03


Here are the jams I sent my jam partner. Strawberry-Kiwi Jam and Peach Orange Marmalade. I hope my jam exchange partner enjoys them.

strawberry-kiwi-jam0004


Happy Canning!

Cathy

Tuesday, 28 August 2012

Pain Francais in Honor of Julia Child

This month, the Bread Baking Babes and Buddies are honoring Julia Child who would’ve been 100 years old on August 15th. In memory of this remarkable woman, the BBBs have been baking Julia’s version of Pain Français (French Bread) from her book Mastering the Art of French Cooking, Volume Two.

Julia Child was very detailed and thorough which I appreciate being a detail-oriented person myself.  Her process for making this bread is presented in 20 pages of meticulous directions. Even though I appreciate Julia’s thoroughness, I was delighted that Susan of Wild Yeast simplified the process for us by summarizing the formula and condensing the instructions. 

French-Bread10


This French Bread takes about 7 –10 hours from start-to-finish so dedicating that amount of time will take a little bit of planning, but it’s definitely worth the effort. I followed Susan’s summary for the most part, but deviated on the kneading process and the bulk fermentation because as usual, I was trying to cram too much into my day off and ran out of time. I’m sure you never do that, right!


Pain Français (French Bread)

From: Mastering the Art of French Cooking, Volume Two by Julia Childs

Makes:

  • 3 baguettes or batards or boules
  • Or 6 short loaves (ficelles)
  • Or 12 rolls (petits pains)

Process:

I followed the ingredients and mixing instructions from Julia Child’s French Bread — Recipe Summary by Susan at Wild Yeast.

I deviated from the instructions at the kneading phase. Instead of kneading the dough for 5 – 10 minutes, I used the method from Tartine Bread by Chad Robertson. With this method, you do a series of turns in the bowl during the bulk fermentation to develop the dough structure.

Refer to my Tartine Country Bread post for a step-by-step photo tutorial on this method.

For the first 3 hours, I turned the dough every 45 minutes.  Then I deflated the dough and let it rise for another 1 1/2 hours.

French-Bread007
Dough after the initial mixing.
French-Bread010
Dough after a couple of hours and several turns.
French-Bread013
The deflated dough after 3 hours.
French-Bread016
Dough after an additional 1 1/2 hours.  The structure is really developed now.
French-Bread017
Dough divided into 3 pieces and resting on the counter before shaping.
French-Bread021
Shape the balls into baguettes and place on Baker’s couche to proof.
French-Bread018
I placed the loaves in the refrigerator at this point because I had somewhere I was supposed to be.
French-Bread024
The next day, I took the loaves out of the refrigerator, let them warm up to room temperature, and gently transferred them to a parchment-lined baking sheet.
French-Bread026
I scored the loaves using my Scaritech lame.
French-Bread027
The loaves are covered with plastic and resting while the oven is preheating.
French-Bread029
Baked loaves cooling on a wire rack.
French-Bread051
Baked loaves ready to slice & serve.


I sliced one of my loaves lengthwise because I wanted to see how it would taste as sandwich bread.

French-Bread09


I made egg salad sandwiches and served them with homemade kosher pickles. It was a pretty chewy sandwich but good nonetheless.

French-Bread0004


I think this French Bread might be better suited as an accompaniment to some delicious soup.  I’ll try that next!  


Happy Baking!

Cathy

Friday, 24 August 2012

Italian Spelt Loaves

If you enjoy Italian Bread, but want to give it a slightly different flair, try this Italian Spelt Bread. Instead of using regular bread flour, the biga and final dough are made with a mixture of white and whole grain Spelt flour.

italian-spelt-loaves09


The method for making this bread is similar to the method we used for the Italian Bread in the BBA Challenge; however, this bread is made with Spelt instead of regular bread flour and the percentage of biga to dough is lower than the one we made in the BBA Challenge. The biga performs best when you make it the day ahead and place it in the refrigerator to ferment overnight.

This is a pretty healthy bread, and the dough is very versatile. You can make loaves, rounds, torpedo rolls, pizza, focaccia, bruschetta, calzones, and breadsticks using this basic dough.


Italian Spelt Loaves

Adapted from: Spelt Healthy! by Marsha Cosentino, M.A.

Making the All-Purpose Biga

This recipe makes about 2 cups (14 oz/375 g) of biga.

Ingredients:

  • 1/4 tsp instant yeast
  • 1 cup lukewarm water (divided 3/4, 1/4)
  • 1 1/2 cups white spelt flour (divided 1, 1/2) 
  • 1 cup whole grain spelt flour (I used home-milled spelt flour)

Steps:

  • In a large bowl, stir together 1 cup of white spelt flour, 1 cup of whole grain spelt flour and the yeast.
  • Pour in 3/4 cup of water and mix well.
  • The biga will be thick to begin with (Photo #2) but will soften and become lively while it sits on the counter.
  • Cover it with plastic wrap and let it stand for 4 hours at room temperature (75 degrees F). The biga is pretty active after 4 hours. (photo #3 below)
  • Stir in the additional 1/2 cup of White Spelt flour and 1/4 cup water.
  • Let the biga stand at room temperature for another hour or so until it becomes active and bubby.
  • Use the biga at the end of the 5-6 hour proof or refrigerate it overnight to use the next day. If you refrigerate it overnight, just be sure to give it time to warm up to room temperature to get the fermentation activity going again. 
  • I placed mine in the refrigerator overnight. Photo #4 below shows what it looked like after warming up to room temperature the next day.


italian-spelt-bread001 italian-spelt-bread002
italian-spelt-bread004 italian-spelt-bread012


Making the All-Purpose Italian Dough

Makes: 2 loaves

Ingredients:

  • 2 cups biga
  • 1 1/2 tsp instant yeast 
  • 1 1/2 cups water (divided 1 1/4, 1/4)
  • 2 tsp salt
  • 1 cup whole grain spelt flour
  • 3 1/4 to 4 cups white spelt flour (this will vary with the type of white spelt flour you use. I used a scant 3 1/4 cups)

Steps:

  • Place the biga in a large mixing bowl and pour in 1 1/4 cups of water. Mix vigorously.
  • In a separate bowl, stir together the whole grain flour, 2 cups of white spelt flour and the yeast.  
  • Add the dry ingredients to the wet ingredients and mix to form a rough dough.
  • Add the salt to the remaining 1/4 cup of water and stir then add it to the bowl.
  • Gradually add 1 1/4 to 1 1/2 cups of the white flour and beat or stir with a Danish Dough whisk until it forms a soft dough. Adjust the consistency if necessary by adding White Spelt flour by the tablespoon.
  • Scrape down the sides of the bowl and mix until the dough forms a ball.  The dough will be sticky, soft and very moist at this point.
  • Turn the dough out onto a surface lightly floured with White Spelt flour.  Cover it and let it rest 10 minutes
  • Form the dough into a loose ball, knead it briefly by hand until it is elastic but still slightly tacky.
  • Place the dough in a lightly oiled bowl. Cover and let the dough rise in a draft-free place at cool room temperature (70 – 75 degrees F) for about 40 – 50 minutes. 
  • Check the dough and if an impression remains when a finger is pressed gently into it, then it is ready.
  • Ease the dough from the sides of the bowl and fold it over the top using a plastic spatula. 
italian-spelt-bread013 italian-spelt-bread014
italian-spelt-bread016 italian-spelt-bread018
  • Gently deflate the dough using your fist, but don’t press down hard or punch it. You don’t want to expel the gases.  It should be springy at this stage.
  • Remove the dough from the bowl and divide it into two pieces.
  • Shape the pieces into rough balls and let them rest seam side up, covered with plastic wrap on the counter for 10 minutes before shaping.
  • Shape the balls into torpedo-shaped rolls and place onto parchment paper. 
  • For assistance in shaping the rolls, refer to the shaping section in the Five Grain Sourdough with Rye Sourdough post.
  • Preheat the oven to 425 degrees F. with a baking stone on the middle rack and a steam pan underneath.
  • Sprinkle the tops of the loaves lightly with White Spelt flour and cover loosely with plastic wrap. I sprayed the loaves with olive oil instead of using more flour.
  • Let the loaves rise until doubled in size.  This should take about 15 – 20 minutes.
  • During the last 5 minutes of the rise, score the loaves using a lame or serrated knife.  Make 2” long, 1/4” deep slashes along the tops of the rolls.
  • When the oven is ready, slide the rolls (and the parchment paper) onto the preheated baking stone and pour hot water into the steam pan.
  • Spritz the walls of the oven several times during the first 3 minutes of baking.
  • Bake the loaves for 15 – 20 minutes or until they reach a deep golden brown color.
  • The loaves should sound hollow when thumped on the bottom.
  • Remove the loaves to a wire rack to cool completely before slicing and serving.
italian-spelt-bread019 italian-spelt-bread026
italian-spelt-bread032 italian-spelt-bread037


Slice and enjoy!  These loaves taste really good dipped in olive oil and herbs.  I also enjoyed them with jam. They do tend to get dry fairly quickly since they don’t contain any fat in them.

italian-spelt-loaves1


Happy Baking!

Cathy

Wednesday, 22 August 2012

Hokkaido Milk Bread using the Tangzhong method

Every once in a while I just want to bake some delicious and fluffy white bread. I missed my chance last month so I’m making up for it this month.

Hokkaido Milk Bread was the BOM (Bread of the Month) for July for the Artisan Bread Bakers FB Group. I’m late to the party, but believe me, this bread is worth the wait. It looked so good and the method for making it intrigued me so I just had to make it. I was not disappointed and you won’t be either.

Hokkaido-Milk-Bread11


This bread is as good or better than it looks. When I tasted it, I was instantly reminded of a delicious flavor and fluffy texture that I had enjoyed before. I searched my brain to try and figure out just where I had tasted that flavor and texture before. Then it dawned on me…Brioche! That’s what this bread reminds me of. However, I think this bread might actually be better than Brioche. Simply because the fluffy, delicious and rich taste of this bread comes from the Tangzhong and not loads of butter like Brioche. I love Brioche mind you, but all that butter, yikes!   I’ve also seen comments by some of the other bakers that this reminds them of challah.  I can see that as well.

Hokkaido-Milk-Bread26


Hokkaido Milk Bread using the Tangzhong method

This recipe is adapted from Kirbie’s Cravings…adapted from Christine’s recipes. You’ll want to check out both sites for rolling and shaping techniques and ideas for adding extra ingredients.  Just Google the term tangzhong. You’ll find some interesting information about the tangzhong method. I spent awhile on several sites just learning about the method.  It’s pretty neat!

Equipment needed:

  • Stand mixer or a bread machine.  I used my bread machine.  The dough is really sticky so I didn’t try the by hand method with this one.
  • A digital scale comes in handy although the cup measurements are provided
  • Instant read thermometer so you can tell when the roux has reached 149 degrees.  I actually used a candy thermometer for this part.


Tangzhong:

Makes: Enough for 2 loaves

  • 50 g/1/3 cup bread flour
  • 1 cup Water

This amount makes enough for 2 loaves.  Just reduce the amount to 25g/~1/4 cup bread flour and 1/2 cup water if you only want to make one loaf.  You can keep the roux in the refrigerator for a couple of days.  However, if it turns gray, then throw it out.

Mix the flour and water together until there aren’t any lumps. Place in a sauce pan and cook over medium heat, stirring constantly, until it reaches 149 degrees and then remove it from the heat. If you don’t have a thermometer, remove the mixture when it is thick and the spoon begins to make trails.

Hokkaido-Milk-Bread001


Scrape the mixture into a clean bowl and allow it to cool completely. When it cools, cover it with plastic wrap and place it in the refrigerator. Let it sit overnight.

Hokkaido-Milk-Bread002


Hokkaido Milk Bread:

Makes: 1 loaf

Ingredients:

  • 350 g/2½ C bread flour
  • 55g/3T + 2 tsp. caster/superfine/baker’s sugar (if you only have regular sugar, just grind it to a finer texture in a food processor. Do not use powdered sugar.*
  • 1 tsp. salt
  • 2 tsp. instant yeast
  • 1T + 1 tsp. milk powder (optional)
  • 1 large egg
  • ½ cup milk
  • 120 g of the tangzhong (1/2 of the above recipe)
  • 3T softened room temperature unsalted butter, cut into pieces
  • 1 egg for egg wash

* I made one loaf using raw sugar that I ground to a fine powder in my coffee grinder. For the 2nd loaf, I used regular granulated white sugar and it worked fine.


Directions:

Add the ingredients to your bread machine in the order listed by the manufacturer.  For my machine, all of the wet ingredients are added first.

Hokkaido-Milk-Bread009


Then add the dry ingredients and make a well in the flour and add the yeast.

Hokkaido-Milk-Bread010


Use the dough setting on your bread machine.  You’ll only use it for mixing/kneading and the first rise.  The dough process takes about 2 1/2 hours in my machine.

Hokkaido-Milk-Bread011


Remove the dough from the bread pan to a floured surface. 

Hokkaido-Milk-Bread012


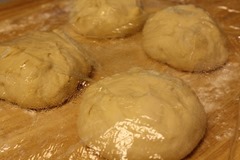
Gently deflate the dough and divide it into 4 equal pieces. My dough balls were about 285g each. Form them into balls and place them seam side up on the floured surface. Cover the balls with plastic wrap and let them rest for about 15 minutes.
 Hokkaido-Milk-Bread014


Using a rolling pin, take each piece and roll it out into a long oval shape.

Hokkaido-Milk-Bread015


Fold the shorter sides of the oval into the middle and overlap the ends like an envelope.  Press gently to seal the seams

Hokkaido-Milk-Bread016


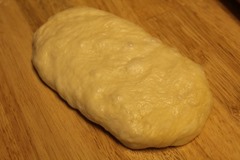
Flip the dough over and roll it out into an oval again. 
Hokkaido-Milk-Bread017


Flip the dough back over and roll each oval into a roll/cylinder, from one end to the other.

Hokkaido-Milk-Bread018


Continue this process with the rest of the balls. You can use the rolling pin or your hands for this part. I started out using the rolling pin, then decided it was easier just to flatten out the dough and shape it by hand.  You’ll need a little extra flour for this part, but don’t use too much or the bread will be dry.  You want a nice and fluffy bread.  It’s worth it!

Hokkaido-Milk-Bread019


Arrange the rolls seam side down in an oiled 9” x 5” loaf pan.

Hokkaido-Milk-Bread022


Allow the loaf to proof until it reaches about 3/4 of the height of the bread pan.  This takes about 30 minutes or so.  Mine actually rose a little higher than 3/4 of the height of the pan.

Hokkaido-Milk-Bread027


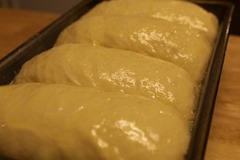
Brush the loaf with the egg wash and bake in a pre-heated oven at 350 degrees for 25 to 35 minutes. If the top of the loaf starts to brown too quick, tent the loaf with foil while it finishes baking.
Hokkaido-Milk-Bread028


Remove the loaf from the pan and cool completely on a wire rack before serving.

Hokkaido-Milk-Bread07

This bread has been YeastSpotted. Please visit Wild Yeast to view all of the lovely breads in the roundup.


Slice and enjoy!  Actually, you can just break this bread apart at the seams.  It would make great pull apart rolls.  That’s how I ate it anyway.  I confess, I ate the whole loaf. Not in one sitting, but it was so good.  It keeps really well.

Hokkaido-Milk-Bread20


My sons love fluffy white bread so I’m sending the 2nd loaf to my youngest son who is away at college. I’ll have to make another loaf to send to my oldest son. 

Thanks to Karen of Karen’s Kitchen Stories for sharing this recipe with the Artisan Bread Bakers FB group.  It’s awesome!  I’m definitely going to try this method again especially with rolls.


image


Happy Baking!

Cathy