Showing posts with label einkorn. Show all posts

Thursday, 3 July 2014

Einkorn Zucchini Bread from the Garden

The other day, I found a giant zucchini growing in my community garden plot. It had been hiding under one of the leaves so I didn’t see it for several days. It finally caught my eye one evening when I went to water my plants. I couldn’t believe how big it was. I had lot’s of fun parading around the garden and showing it off to the other gardeners. They of course humored me because that’s what gardeners do.

giant zucchini from my garden

I’ve since found two more zucchinis just as big and one even bigger. They keep eluding me. One evening, I’ll go water the garden and nothing seems to be growing. Then a day or two later, boom, out of nowhere, these huge squashes just crop up.

What’s a girl to do with all this squash? Make zucchini bread, that’s what and lot’s of it.  I’ve been baking loaves, freezing them and giving some away. 

I’ve made several different kinds of bread using different types of flour. Some with nuts and some without. One of my favorite versions so far is made with whole grain einkorn pasty flour.

Einkorn Zucchini Bread


This bread is considered a quick bread because it utilizes baking powder which is a quick rising agent. Quick breads are usually fairly quick to prepare, quick to rise and quick to bake. However, when you mill your own flour, it takes a little bit longer to get all of the ingredients together (i.e. mise en place).

I began the process of making this bread by grinding the einkorn berries on the pastry setting of my WonderMill Grain Mill. The flour was soft and fluffy when I sifted it through my fingers.

Einkorn berries and milled flour

After I milled the flour, I cut the zucchini into long chunks and ran them through the food processor. I ended up with heap of shredded zucchini; enough for about six loaves.

I wasn’t sure how the whole grain flour would perform in this loaf, but grinding the berries on the pastry setting made the flour very light. The whole grain version didn’t rise quite as much as the all white version, but it still worked really well. I liked the texture and flavor.


Einkorn Zucchini Bread

shredded zucchini

Adapted from this quick bread recipe

Ingredients:

  • 2 1/3 – 2 1/2 cups home-milled einkorn whole wheat pasty flour*
  • 1 cup raw sugar
  • 1 tablespoon pumpkin pie spice
  • 2 teaspoons baking powder
  • 1/2 teaspoon salt
  • 1 cup shredded unpeeled raw zucchini
  • 3/4 to 1 cup walnuts, optional
  • 1/3 cup olive oil
  • 1/3 cup milk
  • 2 eggs
  • 1 teaspoon pure vanilla extract

* Einkorn flour doesn’t absorb water as much as regular wheat flour. I added more flour rather than reducing the amount of liquid.  If you make this with regular all-purpose or bread flour, reduce the amount of flour to about 2 cups.


Directions:

Makes 16 servings.
Prep Time: 15 minutes
Cook Time: 40 minutes

Preheat oven to 350°F.

Mix flour, sugar, pumpkin pie spice, baking powder and salt in large bowl. Stir in zucchini and walnuts, if using.

Beat oil, milk, eggs and vanilla in separate bowl. Gradually add to dry ingredients, mixing until just moistened. Do not over mix.

For mini loaves: Pour batter into 4 greased 5 1/2x3-inch mini loaf pans. Bake 40 minutes or until toothpick inserted in center comes out clean.

For larger loaves: Bake 45 to 50 minutes in two 8x4-inch pans or 55 to 60 minutes in one 9x5-inch pan.

Cool on a wire rack.

As with most quick bread, this loaf tastes better the next day.  Just wrap it in plastic and let it sit overnight, if you can.


Happy Baking!

Cathy

Tuesday, 24 June 2014

Einkorn & Wheat Tartine

They stayed in their designated corner of the garage for a long time. The white winter wheat berries, along with the buckets of rye, hard red winter and spring wheat berries waited patiently for me to open their sealed containers once again and measure some of the berries into the grain mill to process into flour.

Einkorn and Wheat Tartine

Like a child with a new toy who forsakes all of her other play things, I had relegated all of my modern grains to their resting spot while I experimented with the grains of the ancients.

Once I started baking with ancients grains, I wasn’t sure if I would come back, but my old friends in the garage kept beckoning to me to give them another chance.

The romance of working with ancient grains and the fact that they are more easily tolerated than modern wheat appeals to me immensely so I will continue to incorporate them into my breads. However, I still like regular wheat. I’ve missed working with it.

So when one of the bakers in the Artisan Bread Baker’s FB group posted about her experiments with the Einkorn/Wheat Tartine from Tartine Book No. 3, it peaked my interest. I have the book, of course, but I haven’t tried very many breads. I decided to remedy that.

Einkorn and Wheat Tartine

I like the way Chad Robertson, the author of Tartine 3, blends flours and grains in his loaves. He uses ancient grains, but he also incorporates whole wheat and bread flour in his breads. I decided if he can do it, so can I.


Einkorn and Wheat Tartine

This Einkorn and Wheat Tartine is a marriage between old and new grains; milled and sifted.

Makes: 1 Loaf

Adapted from Tartine Book No. 3 by Chad Robertson

Ingredients:

  • 200g white winter wheat, sifted (I used home-milled flour, then sifted it once to remove some of the bran)
  • 150g whole grain einkorn flour
  • 150g all-purpose einkorn flour
  • 75g refreshed levain (100% hydration) *
  • 425g warm water (80ºF or 27ºC), reserve 50g to mix with salt
  • 12g sea salt

* To make one loaf, you only use 75g of the refreshed starter so you’ll have some left over.  See directions below.


Method:

Build your Levain

For the best results, you should start by refreshing, or building your starter. To do this, take 25g of your favorite starter. I used my einkorn starter (aka EK) and to that, added 100g water, 50g all-purpose einkorn flour, and 50g whole grain einkorn flour. Mix well, cover, and let stand at room temperature for 4 – 6 hours.

If you’re making this bread in a colder climate, it might take longer for the levain to be ready for use. To test for doneness, take a spoonful of the levain and drop it in a glass of water.  If it floats, it’s ready, if it sinks to the bottom, let it ferment a little longer.


Mix the Dough:

In a large bowl whisk together the flours.

In a separate bowl combine the refreshed starter and the warm water.

Combine the wet and dry mixtures and mix with your hands or with a Danish dough whisk until no dry bits remain.

Autolyse: Cover and let the dough rest (autolyse) for at least 30 minutes.

After the autolyse, add the salt and 50g of warm water.

Mix well to incorporate into the dough. Transfer dough to large bowl, and cover for bulk fermentation.

Bulk Rise: During the bulk rise (3 to 4 hours, depending on temperature), fold and turn the dough every 30 minutes for the first 2 ½ hours. To do a fold, scoop the underside of the dough up and stretch it over itself towards you. Rotate the container one-quarter turn and repeat three to four times. Keep dough covered between folding. After 3 hours and six folds, the dough should feel aerated, billowy, and softer. You will see a 20-30 percent increase in volume. If not, continue bulk rising for 30 minutes to 1 hour longer.

Dividing & Shaping: The next day, or after the bulk rise, turn out the dough onto a clean, un-floured work surface. Lightly flour the top surface of the dough and cut into two pieces. Pre-shape each piece gently into a round by working the dough in a circular motion. Take care to work the dough gently and not de-gas.

Bench Rest: Lightly flour the tops of the rounds, cover with a kitchen towel, and let rest on the work surface for 20-30 minutes. Line two medium baskets or bowls with clean, dry kitchen towels and dust generously with a 50/50 mixture of any wheat and rice flours.

Final Shaping: Refer to the Tartine (Chad Robertson) method for shaping wet dough (here is a helpful video link: http://youtu.be/cIIjV6s-0cA, the shaping starts at the 3:09 minute mark)

Final Rise: Transfer the dough to the floured basket, flipping the dough over so that the seam side is facing up and centered. Cover with a clean, dry kitchen towel and let rise at warm room temperature for 3 to 5 hours or overnight in the refrigerator (bake directly from the refrigerator, if using this option).

I placed the baskets in the refrigerator overnight.

To Bake: Pre-heat the oven to 500F/260C, adjust the oven rack to its lowest position, and place a cast iron Dutch oven, or any other heavy ovenproof pot with a tight-fitting lid into the oven. I used a Dutch oven combo baker to bake this loaf. Pre-heat for at least 30 minutes.

Carefully transfer the dough round into the preheated Dutch oven, tipping it out of the basket into the pot so it is now seam-side down. Score the top of the dough in the pattern of your choice. Cover the pot and return it to the oven.

Einkorn and Wheat Tartine

After 20 minutes, reduce the oven temperature to 450F/230C. Bake another 10 minutes, then carefully remove the lid (being careful of the cloud of steam). Continue to bake for another 20 to 25 minutes, until the crust is a deep golden brown.

When the loaf is done, turn it out onto a wire rack to cool.

Cool completely, then slice, and enjoy!  


Happy Baking!

Cathy

Thursday, 19 June 2014

Got Sourdough … Make Crackers

When it’s time to feed your wild-yeast starter, what do you do with the discarded sourdough?  By discarded, I’m referring to the cup of starter you’re supposed to pour out before you feed it to reduce the acidic level and keep the organisms alive and kicking.

Do you throw the excess sourdough in the trash or wash it down the sink?  Does the thought of wasting all of that flour (and your energy) make you uncomfortable? 

Sourdough Einkorn Chili Crackers

I always had a hard time throwing out half of my starter when it was time to feed it. So I’ve tried different methods for using it up instead of pouring it out.

One weekend, I made six loaves just to keep from wasting it. I took the discarded sourdough, placed it in a separate container and fed it, along with the starter I planned to keep. I ended up with a double batch of fed sourdough starter and more loaves than I knew what to do with.

Needless to say, that was an effort in futility. If you need six loaves of bread, that’s one thing, but I didn’t. My freezer thanked me and so did my friend who likes sourdough bread, but even sourdough lovers can grow tired of a good thing.

I finally found a solution that I really enjoy. Making crackers.

Making sourdough crackers has become one of my favorite ways to use discarded starter because it’s so easy and pretty much failsafe.

You can use any type of starter and almost any combination of flours and toppings for the crackers. You can also vary the type of fat used. Sometimes I use coconut oil and other times I use olive oil.  You can even use butter.

I have different sourdough starters for each type of flour that I bake with. At the moment, I have an Einkorn starter, a KAMUT starter, a rye starter, and two white starters – my original starter which is made from a recipe from Boudin Bakery and my apple starter which is made from hazy apples. I keep all of my starters in the refrigerator and feed them as if they were my pets. Well, actually, they are my pets.

When it’s time to feed them, I have a good bit of discarded starter, but now I don’t dread throwing it out. I actually look forward to feeding my starters because I know I get to make (and eat) some crackers.

Sourdough Chili Crackes with Einkorn


Sourdough Einkorn Chili Crackers

These are not your average crackers. They are healthy crackers that don’t contain any preservatives. The sourdough ferments the dough for several hours which makes them more easily digestible than crackers made without sourdough.

This batch has a hint of chili powder sprinkled on top to give the crackers some added flavor. You can add extra chili powder if you like more heat.

Ingredients:

  • 1 cup fed sourdough starter * (I used this Einkorn starter)
  • 1/4 cup coconut oil
  • 1 – 1 1/4 cups all-purpose Einkorn flour **
  • 1/2 teaspoon Sea salt
  • Chili powder, too taste, for sprinkling on top

* This recipe works with discarded sourdough or recently fed sourdough. For the best results, let the starter warm up to room temperature before mixing with the oil so that the oil doesn’t harden and make the dough clumpy.

** Depending on the hydration level of your starter, you may need to add more flour.

Directions:

1) In a medium bowl, combine the sourdough starter and coconut oil. Add a cup flour, the Sea salt and herbs and mix thoroughly. Add as much additional flour as needed to make a dough that is workable, but not dry.

2) Cover the dough with plastic wrap or a lid to keep it from drying out and let it rest at room temperature for at least 7 hours.

Refrigerate Overnight: Another option is to let the dough rest on the counter for a few hours, then place it in the refrigerator overnight, or until you are ready to bake. It will keep in the refrigerator for a couple of days. The dough will harden a little in the refrigerator so when you’re ready to bake the crackers, let it warm up a bit before rolling. If it’s hot in your kitchen, don’t let it warm up too much or it will be too sticky to roll out.

3) Divide the dough into 2 pieces and place each ball on a greased or floured piece of parchment paper, or a nonstick baking mat.

4) Roll the dough out very thinly on the parchment paper. Brush or spray with olive oil and sprinkle with chili powder, to taste. 

5) Cut the dough into squares or diamonds using a pizza cutter.  I used a pastry wheel to cut the jagged edges.

einkorn-chili-crackers-3-1

6) Preheat the oven to 350 degrees F. Place one baking sheet (of crackers) on the middle shelf of the oven and the other one on the bottom shelf. Bake the crackers for about 5-7 minutes, then rotate the baking sheets top-to-bottom and front-to-back for even baking. Bake for a total of 12-15 minutes, or until golden brown.

7) Transfer the crackers to a wire rack. They will shrink in the oven and break apart fairly easily. 

For crispy crackers: Let the crackers cool down completely in the oven. If you want to do this in an electric oven, leave the door slightly ajar so the crackers don’t continue baking (and burn) while the oven is cooling down. 

Sourdough Einkorn Chili Crackers


Next time you feed your sourdough starter, don’t throw out the excess starter; make crackers with it. You’ll wonder why you never tried this before.


Happy Baking!

Cathy

Tuesday, 10 June 2014

Baking Einkorn Bread in a Hot Kitchen

I’ve been working with einkorn flour for a couple of years, and as with every other type of grain I’ve experimented with, I’ve had some successes and some flops. It takes a little while to get used to how the grain works, especially when compared to regular bread flour, but that’s part of the fun.

Einkorn Sandwich Loaf


The “Baking with Einkorn” workshop I attended a couple of weeks ago helped me understand more about the nuances of the flour. So after I got home, I couldn’t wait to begin testing this grain again.

Armed with some new tips and techniques, I set out to bake bread. I wanted to jump right in and start converting some of my favorite recipes now that I have a better idea of how to do that, but I opted to make a tested Einkorn bread recipe instead.

Start with the Classic Einkorn Sandwich Loaf

I started with a Classic Einkorn Sandwich Bread using the recipe printed on the bag of all-purpose Einkorn flour (also listed on the Jovial Foods’ site).

I was still getting over jet lag when I started this experiment so I forgot about the adjustments that need to be made when you’re baking in a hot kitchen. It’s 78 degrees F. in my Atlanta kitchen (with the air on and the oven off) so all bets are off when making bread, even if the recipe has been tested.

The first time I made it, I had to add a good bit more water than the recipe called for. I also reduced the yeast a bit, but I kept the amounts of other ingredients the same. The flavor of the bread was good, but the texture was too hard and chewy. Due to the excessive heat (and my foggy brain), the loaf was over proofed. It also didn’t have enough salt, in my opinion.

I baked the loaf at the suggested temperature of 375 degrees F. That temperature was too hot, especially in a ceramic loaf pan. The loaf turned out a bit chewy and harder than I expected. However, it made for a good grilled cheese sandwich. So although the loaf wasn’t optimal, it didn’t go to waste.


einkorn-sandwich-loaf-14-1This loaf rose too much, was a bit chewy & dry, but still edible


Make Adjustments for Baking in a Hot Kitchen

The second time I attempted this bread, I made several adjustments based on the issues I found with the first loaf. I ended up using more water than the original formula, but not as much as I did for the first loaf. I also reduced the yeast by half and increased the salt to help keep the dough from rising to fast and too much in the heat. I kept the flour ratio and the amount of honey the same for both loaves.

Einkorn is very extensible so the dough came together really easily. However, the gluten structure is weaker so it doesn’t benefit from a long mix like you would with regular bread flour.

This time, I paid careful attention to the bulk fermentation period and the final proof so the loaf didn’t overproof. As a result, this loaf turned out much better. It rose beautifully, but not too much. The extra salt helped with the texture and the flavor. The texture was soft and fluffy like sandwich bread is supposed to be and the flavor was good.

Einkorn Sandwich LoafThis is the version I really liked


Einkorn Sandwich Loaf (in a hot kitchen)

I have not tested this particular recipe in milder weather yet, but this is version that worked for me in my hot kitchen during the summer.

Adapted from: Classic Einkorn Sandwich Loaf by Jovial Foods

Ingredients:

  • 4 cups (480 grams) all-purpose einkorn flour
  • 1 teaspoon (3.5 grams) instant yeast
  • 1 1/2 teaspoons (8.5 grams) sea salt
  • 1 1/8 cups (260 grams) water, lukewarm
  • 1 tablespoon (14 grams) honey

Method:

Whisk together the flour, salt and yeast in a large mixing bowl.

Mix the warm water and honey in a separate container and stir to dissolve.

Add the water/honey mixture to the flour mixture and mix, using your hands or a Danish dough whisk, until there are no dry bits of flour. Add in additional water if necessary.

Transfer the dough to a lightly-floured work surface and knead gently until smooth.

Place the dough in a large, clean mixing bowl and let it rise at room temperature for 45 minutes to an hour.

When the dough has doubled in bulk, remove it from the bowl to a lightly-floured work surface and shape into a loaf. 

To shape the loaf, press the dough out into a rough rectangle, then fold the bottom and top edges in like a letter, pressing the seams closed so they don’t pop open during the proof cycle. Fold the left and right edges in toward the center; then fold it up again so the seam is enclosed in the center of the dough. Flip the loaf over and roll it gently back and forth on the work surface to elongate it to fit the loaf pan. Use a bench scraper to keep the dough from sticking to the work surface.

Place the loaf in a greased 8” x 4” loaf pan and cover with plastic. Let the loaf rise at room temperature for 30 minutes or until the loaf crests slightly over the top of the pan.

einkorn-sandwich-loaf-17-2 einkorn-sandwich-loaf-17-3
einkorn-sandwich-loaf-17-4 einkorn-sandwich-loaf-17-5
einkorn-sandwich-loaf-17-6 einkorn-sandwich-loaf-13-8


Bake the loaf for 35-40 minutes in a preheated oven at 350 degrees F. for nonstick pans and 325 degrees F. for glass loaf pans.

Remove the loaf from the oven, and if using glass pans, allow the loaf to rest in the pan for 10 minutes. Then remove the loaf to a wire rack to cool completely before slicing and serving.

Einkorn Sandwich Loaf with Peanut Butter


I enjoyed slices of this bread with butter and with peanut butter, my favorite taste test for sandwich loaves.  It passed both taste tests.

Happy Baking!

Cathy


Saturday, 7 June 2014

My Journey with Einkorn in the Hills of Tuscany

I’ve fallen in love with the ancient grain Einkorn so I jumped at the chance to attend a workshop to learn more about baking with it. The event was hosted by Jovial Foods, and the setting was a beautiful villa nestled in the hills of Tuscany.

Einkorn in Tuscany Einkorn in Tuscany

I wanted to get more practice making different types of bread using Einkorn, and what better way to learn than to go to the source, the source of the wheat, that is. 

Jovial Foods is the main grower of Einkorn wheat. Currently, their wheat is only grown in Tuscany. They also produce Einkorn pasta products and olive oil from ancient olive trees as well as gluten-free products.

Carla (one of the partners and our host at the workshop) has recreated almost all types of breads using Einkorn. This interested me because that’s what I’ve been trying to do.  I got to learn from her trials and errors.

I have a lot more experimenting to do, but while I was there, I had the opportunity to immerse myself in the beauty and history of Tuscany and learn more about this ancient grain.


Making Pasta with Einkorn

The first evening, we learned how to make pasta. The owner of the factory that produces Einkorn pasta showed us how to mix the dough and run it through the pasta machine to produce long sheets of pasta. The long sheets were placed on the table to dry, then run through the machine again to cut the dough into the appropriate shaped noodles.  Then the noodles were placed on the table to dry until it was time to boil them for dinner.

We made regular egg noodles, whole wheat noodles, Swiss chard pasta, and potato gnocchi; all with Einkorn flour. I had never made pasta before. I was amazed at how easy and fun it was to prepare. Of course, it always looks easy when someone else is showing you how to do it, but now that I’ve seen how to do it, I’m going to take the plunge and try it myself.

The gnocchi was soft, like a light and feathery marshmallow that you could flick across the room. I was pleasantly surprised to find out that forming the grooves in the gnocchi didn’t require any special tools. We just pressed a piece of gnocchi dough down with our fingers and slid it across the tines of a fork. Then we gently flicked the piece of dough onto a baking sheet.

We worked late into the night making the pasta and gnocchi and enjoying the fellowship of new friends. When we finally sat down to eat, I was too tired to take any photos of the finished pasta and sauces, but trust me, it was good.

Making pasta with Einkorn Making pasta with Einkorn


Eating and Loafing Around

The next day, we learned how to create different types of loaves using Einkorn. We prepared the dough for sandwich bread, whole wheat bread, ciabatta, and no knead bread.

As we were mixing the dough for each type of loaf, Carla (our host) would give us tips and insight into the nuances of each bread. I watched, listened, participated and soaked up as much knowledge as I could.

I volunteered to work on the whole wheat dough so I could use their European grain mill to grind the grains into flour. After grinding the Einkorn berries into flour, it was time to mix the dough in one of their beautiful ceramic bowls. When the mixing was complete, we covered all of the bowls and left the dough to bulk ferment. 

Once the bulk fermentation was complete, Carla demonstrated how to shape the loaves, then the loaves went through the final proof and were baked and left to cool.

Carla is working on a cookbook of Einkorn breads so these loaves were used in the photo shoots. There was so much going on that I didn’t get photos of all of the loaves, but I did get a shot of the Ciabatta and the crusty no-knead boule.

After the photo shoots were finished each day, we got to taste test the breads. In addition to the loaves we prepared, Carla also made muffins, Tuscan bread, bagels, crackers and a few coffee cakes, among other things. All of the breads and cakes I tasted were great!  

Making Einkorn Bread in Tuscany Making Einkorn Bread in Tuscany


Baking Pizza in the Food-Fired Oven

I love Pizza so my favorite session was making the pizza dough and baking it in the wood-fired oven.

After we made the pizza balls in the kitchen, we took everything outside to the brick oven. Each of us prepared our own pizza using the toppings of our choice. Then Clay (29Villa San Lorenzo) would bake the pizza quickly in the wood-fired oven.

I made a marguerita-style pizza. It seemed only fitting since I was in Italy. I forgot to take a photo of it, but it sure tasted good.

I’ve always wanted to learn how to use a wood-fired oven. However, after seeing how it’s done, I think I’ll wait a little while longer before I try it myself.  I’m not sure my recovering tennis-elbow arm is strong enough yet to handle the long paddle (or the fire) without getting burned. For now, I’ll stick to pizza-on-the-grill or on the baking stone.

It was interesting to watch Clay handle the wood-fired oven. He’s a pro at it. In fact, I heard it through the grapevine that he has a pizza cookbook coming out soon. He’s also a renowned photographer and took all of the photos for Carla’s Einkorn Bread Book which will be coming out next year.  I don’t know the titles of either book but look for them soon.

Making Einkorn Pizza in Tuscany Making Einkorn Pizza in Tuscany


Spending time in Tuscany was a great way to recharge and recalibrate. The fact that I also got to learn more about baking with Einkorn was icing on the cake. It was a delightful and informative learning experience. I plan to do a lot more experimenting now that I have some more insight into how to work with Einkorn.

Happy Baking!

Cathy

Sunday, 30 March 2014

Ancient Grain Tartine: Spelt, Einkorn & KAMUT

The Bread of the Month (BOM) for the Artisan Bread Baker’s FB group is Spelt-Wheat Sourdough (modified from a Tartine recipe).

I wanted to make my version exclusively with ancient grains so I substituted Einkorn for the regular whole wheat, and 50/50 all-purpose KAMUT/Spelt flour for the bread flour. I used my Einkorn sourdough starter and mixed it with all-purpose Spelt to create the levain. 

Ancient Grain Tartine

I baked the loaves in a Cast Iron Dutch Oven Combo like the method outlined in Chad Robertson’s book. However, I used a slightly different proofing, scoring and baking technique.

I let the dough retard in the refrigerator for the bulk fermentation and the final proof (after placing the loaves in the banneton baskets). I did this in order to accommodate my schedule over the weekend, but I also wanted to see how it would affect the bread. For the final proof, I placed the loaves seam side up in the proofing baskets and when it was time to bake them, I took the baskets out of the refrigerator, and carefully flipped the loaves over onto a round piece of parchment paper cut to fit the bottom of the combo-baker.

Ancient Grain Tartine

I scored the loaves on the parchment paper and used a pizza peel to transfer them to the hot combo-baker instead of flipping them directly onto the bottom of the baker and scoring them at that time. This proved to be much easier on my arms and reduced the chance of being burned while flipping or scoring the loaves.

spelt-sourdough-einkorn-kamut_412 spelt-sourdough-einkorn-kamut_456
spelt-sourdough-einkorn-kamut_431 spelt-sourdough-einkorn-kamut_455


Ancient Grain Tartine

Adapted from Tartine Book No. 3 by Chad Robertson

Makes: 2 Loaves

Ingredients:

  • 300 g whole grain spelt flour
  • 300 g all-purpose spelt flour
  • 300 g all-purpose KAMUT flour
  • 150 g Einkorn flour
  • 150 g Refreshed Levain (100% hydration) *
  • 770 g Warm Water (80ºF or 27ºC) **
  • 25 g sea salt
  • 30 g warm water

* You only use 150 g of the refreshed starter in this bread so you’ll have some left over. You can use that as your starter and feed it like you normally would going forward. However, since I used a mixture of Einkorn and spelt, I didn’t plan to keep this mixture as my starter. I used the remaining levain to make sourdough crackers instead.

** The original formula calls for 800g of warm water. If you use regular bread flour and whole wheat flour (instead of ancient grains), you’ll probably need the additional water, but Einkorn and Spelt do not absorb water the same way regular wheat does.

Method:

Build your Levain

For the best results, you should start by refreshing, or building your starter. To do this, take 50 g of your favorite starter. I used my Einkorn starter (aka EK) and to that, added 200 g water, 100g all-purpose spelt flour, and 100 g whole grain Einkorn flour. Mix well, cover, and let stand at room temperature overnight (or until bubbly and active). It can take anywhere from 12 – 18 hours.  It took mine about 14 hours.
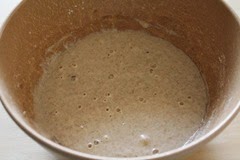
spelt-sourdough-einkorn-kamut_202


Mix the Dough:

In a large bowl whisk together the flours.

In a separate bowl combine the refreshed starter and the warm water.

Combine the wet and dry mixtures and mix with your hands or with a Danish dough whisk until no dry bits remain.

Autolyse: Cover and let the dough rest (autolyse) for at least 30 minutes.

After the autolyse, add the salt and 30 g of warm water.

Mix well to incorporate into the dough.Transfer dough to large bowl, and cover for bulk fermentation.

Bulk Rise: During the bulk rise (3 to 4 hours, depending on temperature), fold and turn the dough every 30 minutes for the first 2 ½ hours. To do a fold, scoop the underside of the dough up and stretch it over itself towards you. Rotate the container one-quarter turn and repeat three to four times. Keep dough covered between folding. After 3 hours and six folds, the dough should feel aerated, billowy, and softer. You will see a 20-30 percent increase in volume. If not, continue bulk rising for 30 minutes to 1 hour longer.

spelt-sourdough-einkorn-kamut_205 spelt-sourdough-einkorn-kamut_206
spelt-sourdough-einkorn-kamut_207 spelt-sourdough-einkorn-kamut_208


At this point, I retarded my dough in the refrigerator overnight. You can continue with the dividing and shaping and the bench rest if you prefer.

Dividing & Shaping: The next day, or after the bulk rise, turn out the dough onto a clean, un-floured work surface. Lightly flour the top surface of the dough and cut into two pieces. Pre-shape each piece gently into a round by working the dough in a circular motion. Take care to work the dough gently and not de-gas.

Bench Rest: Lightly flour the tops of the rounds, cover with a kitchen towel, and let rest on the work surface for 20-30 minutes. Line two medium baskets or bowls with clean, dry kitchen towels and dust generously with a 50/50 mixture of any wheat and rice flours.

Final Shaping: Refer to the Tartine (Chad Robertson) method for shaping wet dough (here is a helpful video link: http://youtu.be/cIIjV6s-0cA, the shaping starts at the 3:09 minute mark)

Final Rise: Transfer the dough to the floured baskets, flipping the dough over so that the seam side is facing up and centered. If you want to coat the loaf in seeds or cracked grain, roll the smooth side of the dough in the coating before transferring it to the floured rising baskets, placing the dough coated-side down, seam-side up. Cover with a clean, dry kitchen towel and let rise at warm room temperature for 3 to 5 hours or overnight in the refrigerator (bake directly from the refrigerator, if using this option).

I opted to place the baskets in the refrigerator overnight. As I mentioned, I wanted to see how they performed with the double retardation in the refrigerator.

spelt-sourdough-einkorn-kamut_213 spelt-sourdough-einkorn-kamut_214
spelt-sourdough-einkorn-kamut_215 spelt-sourdough-einkorn-kamut_220


To Bake: Pre-heat the oven to 500F/260C, adjust the oven rack to its lowest position, and place a cast iron Dutch oven, or any other heavy ovenproof pot with a tight-fitting lid into the oven. Pre-heat for at least 30 minutes.

Carefully transfer one dough round into the preheated Dutch oven, tipping it out of the basket into the pot so it is now seam-side down. Score the top of the dough, Cover the pot and return to the oven. After 20 minutes, reduce the oven temperature to 450F/230C. Bake another 10 minutes, then carefully remove the lid (a cloud of steam will be released). Continue to bake for another 20 to 25 minutes, until the crust is a deep golden brown.

This is where I deviated from the instructions.  Instead of tipping the loaves directly into the hot Dutch oven bottom, I flipped the loaves onto round parchment paper cut to fit the bottom of the Dutch oven. Then I scored the loaves on the parchment paper and transferred them to the bottom of the Dutch oven using a pizza peel.

spelt-sourdough-einkorn-kamut_402 spelt-sourdough-einkorn-kamut_403
spelt-sourdough-einkorn-kamut_416 spelt-sourdough-einkorn-kamut_409

When the loaf is done, turn it out onto a wire rack to cool.

To bake the second loaf, raise the oven temperature to 500F/260C, wipe out the Dutch oven with a dry kitchen towel, and reheat with the lid on for 15 minutes. Repeat the baking procedure as with the first loaf.

Cool completely, then slice, and enjoy!  

I think I may have proofed the loaves a bit too much, but they sure were good.  They were chewy and flavorful due to the sourdough levain.

Ancient Grain Tartine


This was a fun bake.  Thanks to Nancy for choosing and providing the instructions and inspiration for this bread.


Happy Baking!

Cathy