
Sourdough Rye with Walnuts
Makes: 2 large loaves
The formula for this Sourdough Rye bread can be found on page 208 of Bread: A Baker’s Book of Techniques and Recipes by Jeffrey Hamelman.
You can find a modified version on Living in the Kitchen with Puppies.
The formula included raisins, but I omitted them because I wanted to use this bread in a savory dish. I also only added a handful of walnuts rather than a full cup as the recipe suggests. I was very pleased with the results. This sourdough rye has a slightly nutty flavor and chewy crust. It tastes great warm with butter and goes really well with cheese. We served it for dinner with a salad and pasta and homemade roasted vegetable pasta sauce. The flavors went together very nicely.
Preparing the Sourdough
The night before I planned to make the bread (Friday night), I mixed up the sourdough using my fed starter, medium rye flour and water. Then I let it ripen for 16 hours. I used the starter we created in the Bread Bakers Apprentice Challenge.

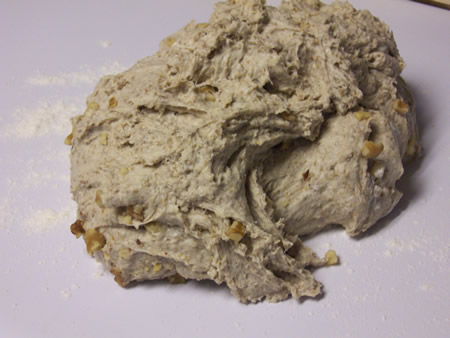
Mixing the Dough
The next day, after 16 hours, I mixed all of the ingredients (except the walnuts) in my spiral mixer.

I kneaded in the walnuts by hand.
Fermenting the Dough
Then placed the dough in the bowl and let it ferment for 1 hour.


After the dough had doubled in size, I placed it on the counter sprinkled with flour.

Then divided it into two pieces using my bench scraper.

Shaping the Loaves
I thought about proofing the loaves in my bannetons, but opted to do freeform loaves instead. I decided to shape the loaves into my favorite shape - the torpedo. I took photos of the process but they turned out fuzzy. For directions on shaping a torpedo loaf, refer to my New York Deli Rye post.
I placed the loaves on parchment paper sprinkled with cornmeal and let them ferment for an hour.

After the loaves had fermented for an hour, I scored them using a serrated knife. I made 3 slashes in one loaf and one slash down the middle on the other loaf. I wanted to see the difference when they were baked.

After the oven had preheated to 475 degrees, I placed the loaves in the oven on my rectangular baking stone with a steam pan underneath. I spritzed the walls of the oven three times with water during the first 15 minutes of baking. Then turned the oven down to 450 degrees.

I baked the loaves for about 15 more minutes at 450, but the bottom was beginning to darken so I turned the oven down to 425 degrees and let the loaves finish baking.

This rye bread was really easy to make. I am pleased with the way the scoring turned out.

I especially like the loaf with the slash down the middle. I decided to send these loaves to be YeastSpotted. Please visit Wild Yeast to view all of the lovely breads in the roundup.

As I mentioned, we enjoyed a few slices of one of the loaves for dinner with pasta.

I saved the rest for Sourdough Strata with Tomatoes and Greens. It was delicious!

Please check out what the other bakers have been up to in the Mellow Bakers group.
 The Mellow Bakers group was started by Paul at Yumarama. We’re baking breads from Bread: A Baker’s Book of Techniques and Recipes by Jeffrey Hamelman.
Thanks for joining us in the Bread Experience bread-baking blog. Please join us again soon.
Happy Baking!
Cathy
No comments:
Post a Comment