Showing posts with label jam recipes. Show all posts

Friday, 3 August 2012

Peach-Orange Marmalade

It’s hard to believe it’s August already. It’s been a hot and busy summer. I usually visit my favorite farm a couple of times during the summer to get peaches, but due to my hectic work schedule, I’ve only been once this year.  Thankfully, I got a bunch of peaches the last time I went and was able to put up several jars of peach butter, marmalade and canned peaches.

I keep hearing that canning is a lost art.  I’m so glad I found it. I started canning a few years ago so now I’m able to put away some of the flavors of summer to enjoy when it’s not so sunny and bright out side. Although I live in the South and we don’t get much snow, it’s still nice to be able to enjoy Georgia peaches in the off season.

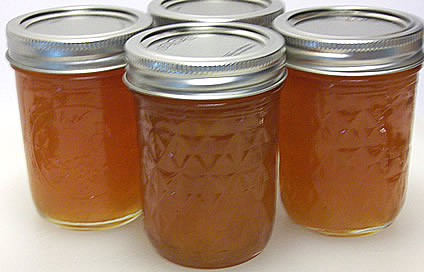
This peach and orange marmalade is a special treat.  It’s not like regular marmalade made with strips of orange peel.  This marmalade is made with finely grated orange peel which provides a delicious orange flavor without the bitterness. Just pure sunshine.

orange-peach-marmalade0004


Peach Orange Marmalade

Yield: About six or seven 8-ounce (250 mL) jars

Adapted from: Keeping The Harvest: Discover the Homegrown Goodness of Putting Up Your Own Fruits, Vegetables and Herbs by Nancy Chioffi & Gretchen Mead


Ingredients:

  • 4 pounds fully ripe peaches (about 5 cups)
  • 2 medium oranges (1 cup)
  • Peel of one orange, grated very fine
  • 3 cups sugar
  • 2 tablespoons lemon juice


Directions:

Step 1. Prepare the peaches for canning.

To prepare the peaches for canning, I followed the same method I used when making the Spicy Peach Butter. I learned it from Sherry Brooks Vinton’s book “Put ‘em Up!”  Basically, you take a really ripe peach and blanch it to remove the peel, cut it in half and remove the pit, and then smash it with your hand. You don’t even need to cut it up.  Just blanch it, peel it, pit it, smash it, boil it, then can it!  It’s that easy!


Step 2. Remove the peel and seeds from the oranges.

Peel the oranges. Be sure to leave some of the white rind on the oranges. This is the part of the fruit that contains most of the pectin.

I used my micro zester to zest the peel to make sure it was grated as finely as possible. Chop or grind the oranges up finely. I used a knife for this part.

orange-peach-marmalade001


Step 3. Add the ingredients to a large non-reactive pot. Measure 5 cups of peaches and 1 cup of oranges into the pot.

orange-peach-marmalade006


Step 4. Add the sugar and lemon juice. Mix thoroughly.

orange-peach-marmalade007


Step 5. Bring the mixture to a boil. Boil rapidly over high heat, and stir constantly. Boil until the mixture thickens, or until it reaches nine degrees above the boiling point of water.  Remove it from the heat, then skim off the foam.

orange-peach-marmalade008


Step 6. Ladle into clean jars. Ladle the marmalade into clean, sterilized jars, leaving 1/4-inch headspace. Remove air bubbles if necessary with a bubble remover and headspace tool. Wipe the edges clean. Center lid on jar.  Then screw the band down until resistance is met, then increase to fingertip-tight. 

orange-peach-marmalade009


Step 7: Process in a water-bath canner. Place the jars in the canner, ensuring they are completely covered with water. Process in the boiling-water bath for 5 minutes, up to 1,000 feet altitude.

If you live in a higher altitude or need more detailed instructions on water-bath canning, please refer to the instructions at the National Center for Home Preservation.


Step 8: Let jars rest on counter overnight. Remove canner lid. Wait 5 minutes, then remove the jars, and let them sit on the counter for 24 hours to cool and ensure they are sealed correctly. You should hear the lids pop if they are sealed properly.


Step 9: Store jars in a cool, dry place. Place the sealed jars in a cool, dry place for storage for up to a year. If any of the jars do not seal properly, place them in the refrigerator. They will last for a couple of months in the refrigerator.

orange-peach-marmalade0012


I had a little bit left, but I ate it before I got the chance to take a photo.  It was so good!  This marmalade tastes great by itself, on a slice of toast or over ice cream. It’s up to you how you want to enjoy it.


Happy Canning!

Cathy

Friday, 13 July 2012

Spicy Peach Butter -- smooth and easy!

I don’t know about you, but I’m finding more and more reasons to put away the fruit of the harvest from my garden and from local farms.

I grew up in the suburbs of Atlanta and back then we weren’t into canning so much, but my mom did can some fruits and vegetables. These days, she’s into canning and freezing the bounty from her beautiful gardens. I get my gardening inspiration from her.  It was my Grandmother, from South Georgia, that canned a good bit while we were growing up. Although I did not learn the art from her, it must’ve rubbed off on me. It’s in my veins now and once the bug hits you, there’s no turning back.

I’m glad the bug hit me. Homemade jams taste so good and definitely enhance the bread experience. This Spicy Peach Butter is a delicious reminder of summer. It goes down really easy.

peach-butter046


I got some Georgia Loring peaches when we visited a farm last week. Loring peaches are freestone peaches, the perfect peach for canning. They taste great, and are really easy to work with.

peach-butter004


To prepare the peaches for canning, I referred to the method in Sherry Brooks Vinton’s book “Put ‘em Up!”  Basically, you take a really ripe peach and blanch it to remove the peel, cut it in half and remove the pit, and then smash it with your hand.  You don’t even have to cut it up.  Just blanch it, peel it, pit it, smash it, boil it, can it!  It’s that easy!


Spicy Peach Butter

Adapted from: Ball Complete Book of Home Preserving and Put ‘em Up! by Sherry Brooks Vinton

Makes: About 8 or 9 cups (Half-Pints)

Ingredients:

  • 2 1/4 cups water
  • 1/4 cup bottled lemon juice
  • 9 pounds peaches
  • 2 1/4 cups sugar
  • 1 1/4 teaspoon ground cinnamon
  • 3/4 teaspoon ground nutmeg


Preparation:

Step 1: Place the water and the lemon juice in a large nonreactive pot. Then prepare an ice-water bath by placing ice cubes and cold water in a large bowl or you can use a clean and sterilized sink.

Step 2: Fill another large pot with water and bring it to boil. Carefully drop 2 peaches at time into the boiling water and blanch them for 30 seconds to loosen the skins.

peach-butter009


Step 3: Using a slotted spoon, remove the peaches from the water and place them in the ice-water bath.  Repeat the process with the remaining peaches. Let them drain in a colander.

peach-butter010


Step 4: Peel the peaches, which should be really easy now that they been blanched, then cut them in half and remove the pit. 

peach-butter011


peach-butter012


Take the peach and smash it with your hand, then add it to the large pot with the lemon juice mixture.  Repeat this process with the rest of the peaches.

peach-butter013


Step 5: Bring the peach mixture to a boil, then reduce the heat and let it simmer until the peaches are soft, about 10 minutes or so. 

peach-butter016


Step 6: Cool the mixture slightly, then puree with a stick blender. The Ball Book of Canning recommends that you don’t liquefy the mixture when you puree it, but I got carried away so my mixture was liquefied.  I wondered if this would keep it from reaching the gel stage, but it did okay.

peach-butter020


Step 7: Place the pureed mixture back in the pot and add the sugar, cinnamon, and nutmeg.  Simmer this mixture over medium-low heat until it thickens.  This could take anywhere from 45 minutes to an hour or so. I placed a dollop on a plate that had been placed in the freezer to check if the gel was set. If the butter doesn’t spread around it’s perimeter, then it is ready.

peach-butter026


Step 8: Remove the butter from the heat and ladle into clean, sterilized, hot half-pint jars.  Leave 1/4 inch headspace.  Remove air bubbles if necessary with a bubble remover and headspace tool. Wipe the edges clean. Center lid on jar.  Then screw the band down until resistance is met, then increase to fingertip-tight. 

peach-butter029


peach-butter032


Step 9:  Place the jars in the canner, ensuring they are completely covered with water. Process in a boiling-water bath for 10 minutes in altitudes up to 1,000 feet.

peach-butter035

If you live in a higher altitude or need more detailed instructions on water-bath canning, please refer to the instructions at the National Center for Home Preservation.


Step 10: Remove canner lid. Wait 5 minutes, then remove the jars, and let them sit on the counter for 24 hours to cool and ensure they are sealed correctly. You should hear the lids pop if they are sealed properly. Place the sealed jars in a cool, dry place for storage for up to a year.  If any of the jars do not seal properly, place them in the refrigerator. They will last for a couple of months in the refrigerator.

peach-butter034


I ended up with more jam than would fit in the 7 jars I had sterilized so I filled 2 extra jars that didn’t go in the boiling-water bath. They went in the refrigerator after they cooled down and posed for this photo.

peach-butter045


I love the way this peach butter tastes and the texture is, well buttery… smooth and easy!

Happy Canning!

Cathy

Thursday, 5 July 2012

Old-Fashioned Blackberry Jam

My taste tester and I visited one of my favorite farms on the 4th of July. I got a flat of blackberries and a peck of peaches. You know what that means?  It’s time to jam!

I started my jam session with this Blackberry Jam. It is made the old-fashioned way with no pectin, just fresh fruit and sugar and a little lemon juice to assist in the gel-setting. It’s a good thing we got a whole flat because I ate a bunch before I ever got around to making the jam. The berries and the jam are exceptional!  I look forward to enjoying this jam when berry season is over.

Old-Fashioned Blackberry Jam

This jam is considered a long-boil soft spread, similar to the strawberry jam I made in June. For these types of jams, it’s best to use three parts fully-ripe fruit to one part slightly under-ripe fruit so that the under-ripe fruit (which usually has a higher pectin content), will help the gel set.


Old-Fashioned Blackberry Jam

Yield: About seven or eight 8-ounce (250 mL) jars

Adapted from: Ball Complete Book of Home Preserving and Keeping The Harvest: Discover the Homegrown Goodness of Putting Up Your Own Fruits, Vegetables and Herbs by Nancy Chioffi & Gretchen Mead

Ingredients:

  • About 10 cups crushed blackberries (3 quarts berries)
  • 6 3/4 cups granulated sugar (about 3/4 cup for each cup fruit) I used about 6 1/4 cups
  • 4 T lemon juice
  • 2 tsp organic butter (optional, to reduce foam)

blackberry-jam0009


Directions:

1) Prepare canner, jars and lids. For detailed instructions on water-bath canning, refer to the instructions at the National Center for Home Preservation.

2) Crush and measure the berries. Place the berries into a large, deep, stainless steel pot or kettle. Add the sugar and lemon juice (if using). Bring to boil over medium heat, stirring constantly to dissolve the sugar. You can remove some of the seeds using a sieve, if desired.  I just crushed the berries seeds and all.

blackberry-jam001


3) Boil until gel sets. Boil rapidly, stirring frequently until the mixture thickens (or for a firm jam, boil until the mixture reaches nine degrees over the boiling point of water).  I used the plate-in-the-freezer method to determine when the gel was set.  With this method, you place a plate in the freezer and test the gel periodically by placing a drop of gel on the plate.  When the jam doesn’t run, the gel is set.

4) Remove from heat and skim off the foam. I added a couple of teaspoons of organic butter to the gel at this stage to reduce the foam.  I forgot to take a photo but before I added the butter, the foam was covering the pot.  In the photo below, the foam is almost gone.

blackberry-jam004


5) Ladle the jam into hot, sterilized canning jars. Leave 1/4 inch headspace.  Remove air bubbles if necessary with a bubble remover and headspace tool. Wipe the edges clean. Center lid on jar.  Then screw the band down until resistance is met, then increase to fingertip-tight. 

6) Process in a boiling-water bath. Place the jars in the canner, ensuring they are completely covered with water.  Bring to a boil and process for 10 minutes in altitudes up to 1,000 feet.

If you live in a higher altitude or need more detailed instructions on water-bath canning, please refer to the instructions at the National Center for Home Preservation.

I had 7 full jars and 1 jar that was 3/4 full so it didn’t go in the boiling-water bath. It went in the refrigerator after it cooled down.

blackberry-jam007


7) Remove the jars and store. Remove canner lid. Wait 5 minutes, then remove the jars, and let them sit on the counter for 24 hours to cool and ensure they are sealed correctly. You should hear the lids pop if they are sealed properly. Place the sealed jars in a cool, dry place for storage for up to a year.  If any of the jars do not seal properly, place them in the refrigerator. They will last for a couple of months in the refrigerator.

blackberry-jam011


I enjoyed some of the jam in the unprocessed jar, then placed it in the refrigerator. The rest of the jars are going in my jam cabinet to give away as gifts.

Old-Fashioned Blackberry Jam


Happy Canning and Baking!

Cathy

Tuesday, 5 June 2012

Strawberry Vanilla Jam

I love strawberries and making jam.  So, I set out to make some strawberry jam, but not with just any strawberries, mind you. I went straight to the source – the strawberry patch -- at Washington Farms.

Strawberry season started early this year, and I didn’t get there until mid-May, but I still managed to pick two buckets full of berries. I froze a bunch in zip lock bags so they wouldn’t go bad before I had time to make the jam.

I found a recipe that was easily adaptable to the amount of strawberries I have on hand. This is the first batch of strawberry jam for the season.  It’s a beautiful color and tastes great, with just a hint of vanilla.

strawberry-vanilla-jam04


Strawberry Vanilla Jam

Adapted from: Put 'em Up! by Sheri Brooks Vinton

Makes: About 4 1/2 Cups

To provide the right amount of pectin and flavor to the jam, it is recommended that you use a combination of ripe strawberries and not so ripe strawberries.  Fortunately, I was able to find some of each.

vanilla-strawberry-jam_0001


Ingredients:

  • 10 cups strawberries, hulled and halved if large
  • 2 1/2 cups sugar
  • 1/4 + 1 T lemon juice
  • 1 vanilla bean


Directions:

Toss the strawberries with the sugar in a large bowl and let the mixture sit overnight to coax out the juices. 

I started this process with frozen strawberries and put the bowl in the refrigerator overnight. 

strawberry-vanilla-jam0002


I took the berries out of the refrigerator the next morning and left them on the counter to thaw completely.

strawberry-vanilla-jam0004


Here are the thawed strawberries with all of their juices.

strawberry-vanilla-jam0005


Transfer the fruit mixture to a large nonreactive pan.  I used my stainless steel Dutch oven.

strawberry-vanilla-jam0009


Place a plate in the freezer to use to test the gel.

Bring mixture to a boil. Crush the berries to release the juices. Slit the vanilla bean, scrape out the seeds and add the seeds and the pod to the jam mixture along with the lemon juice.

strawberry-vanilla-jam0011

Continue to cook the mixture, stirring frequently, until the jam reaches the desired gel stage, about 20 minutes. To check if the gel is set, remove the plate from the freezer and place a spoonful of jam on it.  The jam is ready when it doesn’t spread on the plate.

Remove the jam from the heat and let it rest for 5 minutes, stirring occasionally to release air bubbles. Skim off any foam. I added a little bit of butter to the jam while it as boiling so it didn’t foam anymore. You can see the difference in the photos.

strawberry-vanilla-jam0012


Remove the vanilla pod.  Then ladle the jam into hot 8 oz. jars, leaving 1/4 inch of headspace.  

strawberry-vanilla-jam0014


Release the trapped air, wipe the rims clean; center lids on the jars, and screw on the jar bands.

strawberry-vanilla-jam0016


Process the jars for 10 minutes in the water-bath canner. If you live in a higher altitude or need more detailed instructions on water-bath canning, please refer to the instructions at the National Center for Home Preservation.


Turn off the heat, remove the canner lid, and let the jars rest in the water for 5 minutes.  Remove the jars and set aside for 24 hours.  Check seals, then store in a cool, dark place for up to 1 year.


strawberry-vanilla-jam01


Happy Canning and Baking!
Cathy


Here are some of the references I use in my canning adventures.

Friday, 21 October 2011

Sweet and Chunky Apple Butter

chunky-apple-butter_1067

I got a bunch of apples on my apple-picking excursions and after I made the apple starter, I decided to make some apple butter.

As the name suggests, this Sweet and Chunky Apple Butter has chunks of apples in it. It takes apple butter to a whole new level. You can serve it as dessert or on bread or toast. Or, you can do what I’ve been doing and just eat it right out of the jar.  It’s that good!  I think it would also taste great on waffles or pancakes. I’ll have to try that next.

The recipe uses Granny Smith and McIntosh apples. However, I didn’t have any McIntosh apples so I used Granny Smith apples and a combination of other apples I had picked.

chunky-apple-butter_0919


Sweet and Chunky Apple Butter Recipe

Makes: 7 cups (1.75 L)

From: The Complete Book of Small-Batch Preserving by Ellie Topp and Margaret Howard. 

Ingredients:

  • 2 lb  (1 kg) McIntosh apples, peeled and cored (6 large apples)
  • 2 lb  (1 kg) Granny Smith apples, peeled and cored (6 large apples)
  • 1 cup (250 mL)apple cider
  • 2 cups (500 mL) granulated sugar
  • 2 tablespoons (25 mL) lemon juice


Directions:

  1. Cut McIntosh apples into 1-inch pieces. Cut Granny Smith apples into smaller dice.
  2. Combine apples and cider in a very large stainless steel or enamel saucepan.  Bring to a boil over medium-high heat, stirring occasionally.  Reduce heat and boil gently for 20 minutes or until mixture is reduced by half.
  3. Stir in sugar and lemon juice.  Return to boil, reduce heat and boil gently for about 25 minutes or until mixture is very thick.  There should still be some tender apple chunks remaining.  Remove from heat.
  4. Ladle into hot jars and process for 10 minutes. If you live in a higher altitude or need more detailed instructions on water-bath canning, please refer to the instructions at the National Center for Home Preservation.


chunky-apple-butter_1006


To make Spiced Apple Butter:

Add 2 tablespoons (10 mL) ground cinnamon and 1/2 teaspoon (2 mL) each ground cloves and all-spice with the sugar.


You might also enjoy these Apple Butter recipes:


    Canning resources:

    Monday, 13 September 2010

    Nothing beats a Georgia Peach ... Jam that is!

    They say nothing beats a Georgia Peach! I agree! In fact, I'm considered a Georgia Peach myself, having been born and raised in Atlanta, but that's another story altogether. For this post, I'm referring to the fruit. 


    Over the past couple of months, I've made several trips to my favorite farm to get peaches. Jaemor Farms is located in the Georgia Mountains, about an hour and a half from me, and it's one of my favorite places to go for peaches, apples and pumpkins. These are Georgia peaches at their finest! I tried three different types of peaches this season and I liked each one.

    The peaches ripened so quickly, we couldn't eat them fast enough. So, I made jam, Peach Cobbler and more jam. I also cut up and froze some for later use. Then, I went back and got more peaches and made something different with them.  I'll be posting about that for the tigress can jam.

    I sent a jar of this Peach Lavender Jam to my Jam Exchange Partner for Steph Chows’ 2nd Annual Jam Exchange. I wanted to send a special jam and this one fit the bill.  I also sent some Cherry Preserves and Cantaloupe Preserves.


    Peach Lavender Jam
    Makes: 6 cups
    Recipe from The Complete Book of Small-Batch Preserving by Ellie Topp and Margaret Howard.


    I think you'll like this jam. It is very fragrant and tasty as well.  I was a little concerned that the lavender would overpower the flavor of the peaches, but it actually enhances it.  The aroma was heavenly while this jam was cooking. In fact, I made the recipe twice and wanted to make more because it smells and tastes so good, but then my practical side decided that 13 half-pints was plenty.

    Ingredients:
    2 tbsp dried lavender flowers
    1/2 cup boiling water
    4 cups finely chopped peaches (about 5-6 medium peaches)
    2 tbsp lemon juice
    6 cups granulated sugar
    1 pouch liquid fruit pectin

    Directions:

    Place lavender flowers in a small bowl.   Pour boiling water over flowers and steep for 20 minutes. 


    Strain and discard flowers.


    Combine lavender liquid, peaches, lemon juice and sugar in a very large stainless steel or enamel saucepan.


    Bring to a full boil over high heat and boil hard for 2 minutes, stirring constantly.


    Remove from heat and stir in pectin.


    Ladle into hot jars and process for 10 minutes. If you live in a higher altitude or need more detailed instructions on water-bath canning, please refer to the instructions at the National Center for Home Preservation.


    Turn off the heat, remove canner lid, and let jars rest in the water for 5 minutes.  Remove jars and set aside for 24 hours.  Check seals, then store in a cool, dark place for up to 1 year - that is, if it lasts that long.


    Happy Canning and Baking!
    Cathy


    Here are some of the references I use in my canning adventures. You might enjoy them as well: