Saturday 31 July 2010

Noon Rogani: Artisan Bread Bakers

I was delighted when I found out that Noon Rogani was the July Bread of the Month (BOM) for the Artisan Bread Bakers.  I had seen this bread in a KAF email and thought it was a very interesting and unique bread so I put it on my list to try.  I just hadn't gotten around to it yet.  It's been a busy month but I finally got the chance to make this bread.  I'm so glad.  It's a fun, beautiful and delicious bread.


Noon Rogani
Recipe from:
http://www.kingarthurflour.com/recipes/noon-rogani-recipe 

Makes: 1 10-12" Spiral Loaf

This loaf is formed from a 5 foot long rope of cinnamon filled dough, coiled to resemble a turban.

Ingredients:

  • 4 1/2 cups all-purpose flour
  • 1 teaspoon instant yeast
  • 1 1/4 cups warm water
    2 teaspoons salt
  • 1 tablespoon sugar
  • 1 tablespoon vegetable oil

Filling & Topping

  • 4 tablespoons melted butter, divided
  • 1/4 - 1/2 cup sugar to taste
  • 2 teaspoons cinnamon

In a large bowl or your bread machine bucket mix the flour, water and yeast to a thick shaggy mass. Let rest for 10 minutes.


After 10 minutes add the salt, sugar and vegetable oil and extra flour as needed to create a dough that is not sticky to the touch but still slightly tacky. Knead by hand, mixer or bread machine until the dough is smooth and elastic.


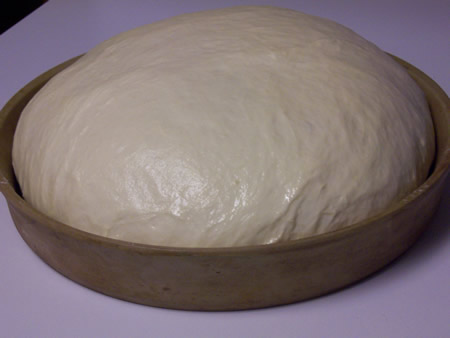
Place the dough in a greased bowl and cover. Let rise until puffy, about 30-40 minutes.


Turn out the dough onto a well floured surface. Gently deflate and shape into a square pillow.


Roll the square to approximately 23" square and 1/8th" thick.


Mix the cinnamon and sugar in a small bowl. Brush the dough with half of the melted butter. Generously sprinkle on the cinnamon sugar mixture. Use more or less sugar to taste.

Roll up the dough jelly roll style.


Pinch the seam well and continue to roll the rope until it reaches a length of 5 feet.


Don't worry about small tears in the outer layers, that is normal.  If you look closely in this photo, you'll see a tear in the dough on the left side.  They said not to worry about it, so I didn't.


Twist the entire length of the rope similar to wringing out a towel, but much more loosely.   This part was a little bit tricky. To make sure I rolled it to 5 feet, I took the rope and held it up to myself.  I'm about 5' 5" so that was my gauge.  The dough snapped back a little bit so it probably wasn't quite 5 feet, but I decided not to worry about it.


On a greased baking sheet or parchment paper, coil the rope into a round spiral, turban style.


Don't wrap too tightly, keep the coil slightly loose to aid in the final rise.


Brush with the remaining melted butter.


Set aside, covered, to rise until puffy 40-45 minutes.


Bake the loaf in a preheated 400°F oven for 30-45 minutes or until deeply golden brown. Cool slightly on a rack before serving.


I made the bread last night and we had it for breakfast today before going tubing down the river.  It is delicious by itself but especially warm with butter. All you do is break off part of the coil and eat it.  It made for a delicious and no fuss breakfast.
 
Some of the other bakers glazed their bread to make it more like a giant cinnamon roll, but it didn't need a glaze.  I think it tastes great "as is".  Plus, I didn't want to glaze it because I had something in mind for the rest of the loaf.   Check out this delicious Peach Cobbler made with Noon Rogani bread cubes.


BOM (Bread of the Month) is a virtual bread-baking party hosted by Phyl
Of Cabbages & King Cakes


Happy Baking!
Cathy


Wednesday 28 July 2010

Tuscan Bread (Pane Toscano)

Bread Baking Day #32 is being hosted by Andrea of Family & Food & Other things.  The theme is Italian Bread.  I enjoy making Italian Breads because there are so many yummy breads to choose from.


I chose Tuscan Bread because I really enjoyed the Tuscan Bread we made in the BBA Challenge. Only a few of the BBA Bakers liked this bread, but I thought it had a very unique flavor. It's kind of sweet since it doesn't include any salt. 

The legend goes that Italians created bread without salt because of the high tariffs on salt generations ago.

I made a different version this time and baked it in my
La Cloche for a crispy crust.


Tuscan Bread (Pane Toscano)
Adapted from:
Tuscan Bread (Pane Toscano) from King Arthur Flour

Makes: 1 large loaf

Ingredients:

Sponge
  • 1/4 teaspoon active dry yeast
  • 2/3 cup lukewarm (110°F) water
  • 1 1/3 cups unbleached all-purpose flour

Dough

  • 1 1/4 teaspoons active dry yeast
  • 1/3 cup warm water
  • 1 cup room-temperature water
  • 3 3/4 cups unbleached all-purpose flour


Make the sponge the night before you want to make bread. Stir the 1/4 teaspoon yeast into the 2/3 cup warm water. Let stand until foamy, about 10 minutes. Add the 1 1/3 cups flour and mix well. Cover and let stand at room temperature overnight.

The next day, stir the 1 1/4 teaspoons yeast into the 1/3 cup warm water. Let stand until foamy, about 10 minutes. Add the sponge and 1 cup of water. Mix well. Beat in the flour until dough is stiff enough to knead.

Turn the dough onto a lightly floured work surface and knead until smooth and elastic, about 10 minutes.

Place the dough in a well-greased bowl, turning to coat all sides. Cover and let rise until doubled in bulk, about 1 hour.


Turn the dough onto a lightly floured work surface without punching it down or handling it roughly.

Gently form it into a large, round loaf by pulling all the edges underneath, gathering them and squeezing them together, leaving the top smooth.

If you have a baking stone, place the loaf on a sheet of parchment paper; if you're using a pan, sprinkle some cornmeal on the bottom of the pan, and place loaf on it.   I just sprinkled the bottom of the la cloche with cornmeal and placed the dough in it to rise.

Cover with a towel, and set aside to rise until doubled, about 1 hour. I covered it with the la cloche lid.


Preheat the oven to 450°F. Slash the top of the bread in a tic-tac-toe pattern.  I used a serrated knife sprayed with cooking spray to do this part.  It worked really well.

If you're using a baking stone, use a peel to transfer the loaf, parchment paper and all, to the stone in the oven. Otherwise, put the pan of bread into the oven.  After I preheated the oven, I placed the la cloche in the oven; then covered it with the lid to bake.

Bake for 15 minutes, misting bread with water from a spray bottle three times during the 15 minutes. I didn't do this part since I was using the la cloche. 

Reduce heat to 400°F and bake 25 to 30 minutes longer.  The bread was rising so much that I took the lid off after about 20 minutes and let it finish baking with the lid off.


I removed it from the oven and placed the la cloche on a cloth covered wooden cutting board.  If if changes temperature to quickly it might crack so I always do this. 

Then I removed the bread and placed it on a wire rack to cool.

I let this bread sit overnight because I wasn't ready to eat it yet.  The next day, I sliced it and spread garlic over the slices along with some homemade bruschetta that I canned the other day.  Then I broiled it for a little bit and we ate it for dinner.

This bread is good if you like bread with no salt.  The bruschetta definitely gives it a boost in flavor. 


This Tuscan Bread has been YeastSpotted. Please visit Wild Yeast to view all of the lovely breads in the roundup.


Be sure to check out all of the fabulous breads in the
BBD #32 Roundup.


Happy Baking!

Cathy

Tuesday 27 July 2010

Making Jam: Watermelon Jelly

The theme for this month's tigress can jam was curcubits, which includes cucumbers, squash and melons. I couldn't decide between canning pickles or Watermelon Jelly so I decided to make both. I had a watermelon that was ripening very quickly so this seemed like a good use for it.  I submitted the pickles for the can jam, but I decided to continue the theme with this jelly.  I made this jelly during  Can-a-Rama 2010 this past weekend.  I had lot's of fun making jams and pickling.


This is a zesty watermelon jelly.  It calls for lemongrass which I didn't have so I left that ingredient out. 

Zesty Watermelon
Makes: about five 8-ounce jars
Recipe from Ball Complete Book of Home Preserving

Ingredients:
6 cups chopped watermelon, rind removed
1/2 cup white balsamic, white wine or apple cider vinegar (I used white wine vinegar)
4 tbsp lemon juice
5 cups granulated sugar
1 stem lemongrass, chopped (I omitted this ingredient because I didn't have any)
2 pouches (each 3 oz/85 ml) liquid pectin

Directions:
In a large stainless steel saucepan, crush watermelon with a potato masher.  Cover and heat gently over medium-low heat for 5 minutes.  Remove from heat and crush thoroughly.


Transfer to a dampened jelly bag or a strainer lined with several layers of dampened cheesecloth set over a deep bowl.  Let drip, undisturbed, for 2 hours.


Measure 2 cups watermelon juice.  If you do not have the required amount, crush more watermelon or add up to 1/4 cup unsweetened white grape juice.

In the meantime, prepare canner, jars and lids. For detailed instructions on water-bath canning, please refer to the instructions on this site: National Center for Home Preservation.


Transfer watermelon juice to a clean large, deep stainless steel saucepan.  Stir in the vinegar, lemon juice, sugar and lemongrass.


Over high heat, stirring constantly, bring to a full rolling boil that cannot be stirred down.


Stir in pectin.  I put the open liquid pectin pouch in a cup for easy access. 


Boil hard, stirring constantly, for 1 minute.


Remove from heat and quickly skim off foam.


Quickly pour hot jelly into hot jars, leaving 1/4 inch headspace.  Wipe rim.  Center lid on jar.


Screw band down until resistance is met, then increase to fingertip-tight.


Place jars in canner, ensuring they are completely covered with water.  Bring to a boil and process 10 minutes. If you live in a higher altitude or need more detailed instructions on water-bath canning, please refer to the instructions on this site: National Center for Home Preservation.


Remove canner lid.  Wait 5 minutes, then remove jars, cool and store.  Then give some away.  No fair keeping all this deliciousness for yourself. 


Thanks for joining me in the bread-baking blog.  Remember, bread goes really well with jams and jellies.


Happy Canning and Baking!
Cathy


Here are some of the references I use in my canning adventures. You might enjoy them as well:

Sunday 25 July 2010

Can-a-Rama 2010: BreadExperience Canning Party

This weekend is the Can-a-Rama 2010 sponsored by Canning Across America.  In celebration of this event, I decided to have my own canning party.

To begin the weekend, my sister and I visited my mom in the country. My mom had already begun her canning party.  She canned all week long.  I brought her some more jars so she could finish canning her soup starter (tomatoes, green beans and corn).  She has a pretty big garden. She and her husband can't possibly eat all of the vegetables so she gives away a lot and then cans the rest.  Before we got there, she had picked about 72 tomatoes as well as okra, sugar snaps, cucumbers, corn and patty pans.  Patty pans are scalloped, saucer-shaped, summer squash. I had never seen this kind of squash before. 

The best part of this canning party was that we got to taste the bounty before it was canned.  We had creamed corn, green beans, cucumbers, fresh tomatoes and corn bread for lunch.  It was so good. 

When I got back home, I started my own canning party. Here is a preview of what I made. I'll be posting more about these in separate posts so stay tuned...

To begin the party, I made Zesty Watermelon Jelly.


Then I made Hamburger Dill Pickles.


And Salsa Bruschetta-Style


to go with some freshly made Tuscan Bread


I finished the party by making some Blueberry Orange Marmalade.  


Thanks for joining me for my canning party of one. Click on the links to view the recipes and instructions for making all of these delicious canned items and the Tuscan Bread.


Happy Canning and Baking!
Cathy


Here are some of the references I use in my canning adventures. You might enjoy them as well: