Thursday, 29 April 2010

Gluten-Free Olive Oil Bread: HBinFive

I’ve wanted to learn more about baking gluten-free breads for some time now.  I really got motivated when I visited the Hostel in the Forest earlier this month and learned that they were trying to go gluten-free. 

So, after I got back from my mini vacation, I got all of the ingredients together and made a batch of the Healthy Bread in Five Minutes gluten-free olive oil dough. Most of the bakers in the HBinFive baking group made this bread for the April 15th bread braid, but I didn’t have all of the ingredients at that time so I decided to make this one for the May 1st bread braid instead.

gluten-free-bread 037

I was in an experimental mood when I made this dough so I tweaked the recipe a bit.  I’m happy to say I liked it!  It reminded me of a flavor that I couldn’t quite wrap my brain and taste buds around.  At first, I thought it tasted a little bit like cornbread even though it doesn’t contain any cornmeal.  My taste tester said the same thing; without any prompting from me I might add.

It finally dawned on me that the flavor it reminded me of was a toasted biscuit. Not canned refrigerator biscuits, but homemade Southern Biscuits. Growing up, we would toast leftover biscuits for breakfast and this is the flavor that this gluten-free bread brought to mind.  I’m really not sure why because it doesn’t include any wheat flour.  However, I did toast the soy flour so that could be why.  At any rate, I liked it!  As you can see by the photo below, it does look rather toasty. 

gluten-free-bread 045

I made the full batch of dough, but as I mentioned, I tweaked the recipe a bit because the dough was really wet.  It was more like batter than dough and I wanted to be able to shape it.  I used a combination of home-milled brown rice flour, toasted soy flour, tapioca starch, potato starch, cornstarch, and flax seed meal (instead of the xanthan gum). 

To get the consistency right, I ended up using about 1/2 cup more soy flour and added a little bit of potato starch in addition to the cornstarch and tapioca. Not that I really knew what I was doing, I just kept tasting the dough to see what it was like and it tasted terrible!  Even though the recipe didn’t call for it, I added some honey.  I still didn’t like the flavor. It was a little bit bitter so I added some agave syrup.  I finally got the consistency of the dough so that I could at least shape it somewhat once it was refrigerated.  The flavor was still weird, but I decided to leave it alone.

Here is what the final dough looked like.

gluten-free-bread 002

I let the dough sit on the counter for 2 hours.  I transferred it to a bigger container so it wouldn’t overflow.

gluten-free-bread 003

This is what it looked like after sitting on the counter for 2 hours.

gluten-free-bread 004

Then I put it in the refrigerator overnight (actually for 3 days).  After I took it out, it smelled and tasted terrible!  However, I decided to bake with it anyway.

gluten-free-bread 005

I measured out a one-pound blob.

gluten-free-bread 006

Then I shaped the dough into a ball and let it rest on a piece of parchment paper sprayed with oil for a few minutes.

gluten-free-bread 007

Then I shaped the ball into an oval shape.  I had to use wet hands for this part because the dough was pretty sticky.

gluten-free-bread 008

I covered the loaf with plastic wrap and let it rest on the counter for 90 minutes while the baking stone preheated in the oven.

gluten-free-bread 009

While this loaf was resting on the counter, I shaped another loaf into a baguette (or a reasonable facsimile of one) and covered it with plastic wrap to rest on the counter as well.

gluten-free-bread 010

After the loaves had rested for 90 minutes, I placed the first loaf on the baking stone, put hot water in the steam pan and let the loaf bake for about 30 minutes.

gluten-free-bread 013

I rotated the loaf for even baking partway through the baking cycle. Then I removed the parchment paper so that the loaf would bake crisp on the bottom and let it finish baking for a few minutes longer.

gluten-free-bread 016

This is one of the finished oval loaves.  I made two of them.

gluten-free-bread 065

While the oval loaf was baking, I spritzed the baguette with water and sprinkled sesame seeds on top. Then, I made two diagonal slashes in the loaf but they didn’t stay very well since the dough was so wet.

gluten-free-bread 019

Then it was time to put this baby in the oven. I baked it for about 30 minutes and rotated it partway through the baking cycle for even baking. I didn’t remove the parchment paper on this one, but the bottom turned out crispy anyway.  I removed it from the oven after it finished baking.

gluten-free-bread 026

Then placed it on the cooling rack to cool for a little while. 

gluten-free-bread 030

I wish I had only made one loaf at a time because this bread tastes better hot and doesn’t stay fresh very long.

gluten-free-bread 061

I also made pizza with the dough on a different day.  I spread the dough into a round circle with my fingers.

gluten-free-bread 066

Then par baked it for a few minutes.

gluten-free-bread 069

I didn’t use the toppings suggested in the book.  I just topped it with what I had: pizza sauce (sprinkled with Italian seasoning), pepperoni and cheese. 

gluten-free-bread 073

It was okay.  I think we’ve been spoiled with all of these delicious pizzas I’ve been making lately so this was a little bit bland.  We liked the dough as bread but not so much as pizza.  Although my oldest son said it really wasn’t the dough, it was the flavor – or lack thereof.  If I use this dough for pizza crust again, I will add peppers and onions for more flavor.

Although I liked this bread, the main drawback is that it really doesn’t last very long.  It tasted really good fresh from the oven. The next day, it was really dry but still tasted good toasted. The 3rd day it was really dry. The rest may go to the birds since we can’t eat it that fast. 


Happy Baking!
Cathy


About the HBinFive Baking Group

The HBinFive Baking Group, started by Michelle of Big Black Dogs, is baking through all of the breads in the Healthy Bread in Five Minutes book. For more information on the new HBinFive baking group, check out Michelle's blog.

Monday, 26 April 2010

Light Rye Bread: Mellow Bakers

Light Rye Bread is the second bread we made in the Mellow Bakers group this month. The first bread was a Rustic Bread.

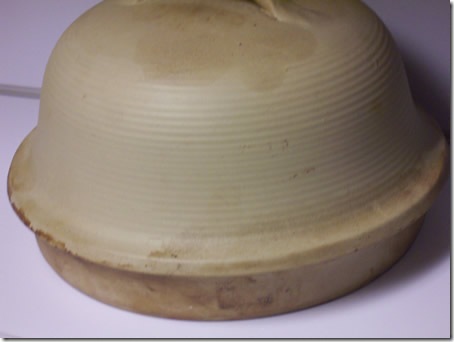
Since we’re baking bread in bread pots for bread baking day, I decided to bake one loaf of the rye bread in my la cloche and the other loaf on a baking stone using a steam pan underneath.

light-rye-bread 037

I was in an experimental mood this weekend so I decided to change the formula around a little bit.


Making the Sourdough Pre-ferment

This rye bread is made with a sourdough pre-ferment of medium rye flour, water and 2 teaspoons of mature sourdough starter.  I used 1/4 cup (rather than 2 teaspoons) of sourdough starter that I had fed and fermented the day before. 

light-rye-bread 001

Prepare the sourdough and let it ripen for 14 to 16 hours.  I let it ripen for 16 hours.  Here is what the ripened sourdough looks like.  It didn’t look very bubbly to me but it sure smelled like sourdough.

light-rye-bread 004


Here is the formula I used for the dough

The actual formula can be found on page 197 of Bread: A Baker’s Book of Techniques and Recipes by Jeffrey Hamelman.

  • 3 cups clear flour (from white whole wheat & whole wheat flour)
  • 3 1/8 cups bread flour
  • 2 1/8 cups water
  • 2 teaspoons caraway seeds for the dough
  • 1 tablespoon salt
  • 1 teaspoon yeast (It probably didn’t need this but I included it anyway. The original formula called for 1 1/2 teaspoons)
  • All of the sourdough (minus 2 teaspoons)
  • Additional caraway seeds for sprinkling on the loaves


Making the Dough

I didn’t have any high-gluten flour so I used a mixture of clear flour and bread flour.  Clear flour is whole wheat flour sifted once to remove the bran.  To make the clear flour, I used a mixture of home-milled whole wheat flour and white whole wheat flour.  Normally, I would just use whole wheat flour to make the clear flour, but I had already mixed the two flours together (for another project) so I decided to try it and see what happened.

I mixed all of the dry ingredients using a regular whisk.

light-rye-bread 003

Then, I used my Danish dough whisk to incorporate the liquid ingredients.

light-rye-bread 006

Then, I sprinkled flour on the counter and kneaded the dough for about 8 to 10 minutes.  It took awhile for the gluten to develop, but the dough finally became soft and supple.

light-rye-bread 009

Once the gluten was sufficiently developed, I transferred the dough to a bowl oiled with spray oil and covered it with plastic wrap.

light-rye-bread 011

The dough fermented for 1 hour.  It doubled in size during the bulk fermentation.

light-rye-bread 012 

After the dough had fermented for an hour, I divided it into two equal pieces using my dough scraper.

light-rye-bread 013

Then, I shaped one loaf into a round ball (boule) and placed it in the greased la cloche sprinkled with cornmeal.

light-rye-bread 014

I covered the boule with the dome of the la cloche and let it proof for about an hour.

light-rye-bread 018

I shaped the other loaf into a torpedo shape and placed in on parchment paper greased and sprinkled with cornmeal.

light-rye-bread 016

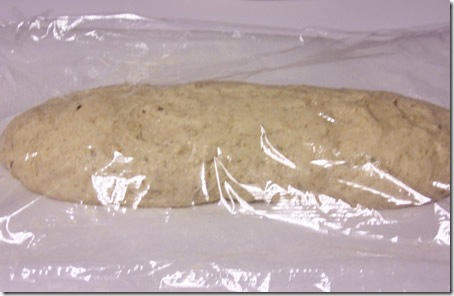
Then, I covered it with plastic wrap and let it ferment for an hour.

light-rye-bread 017


Baking the Loaves

I decided to bake the torpedo loaf first since the baking stone needs to preheat in the oven and the la cloche doesn’t.

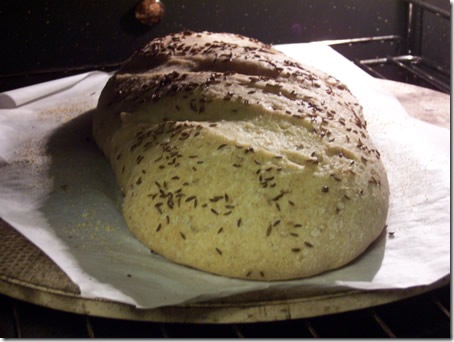
While the baking stone was preheating in the 450 degrees oven, I sprinkled the first loaf with caraway seeds.  The instructions in the book say to preheat the oven to 460, then lower it to 440, but I don’t have that option on my oven.  So, I set it to 450 degrees.

light-rye-bread 019 

I scored the loaf by making 3 cuts across the surface.  The slashes are supposed to be perpendicular to the length of the loaf, but they ended up a little bit off.

light-rye-bread 020

When the oven was sufficiently preheated, I placed the loaf on the hot stone using my pizza peel.  Then I baked the loaf for 20 to 25 minutes until it was brown and sounded hollow when I thumped the bottom of the loaf.

light-rye-bread 023

Halfway through the baking cycle, I rotated the loaf to make sure it baked evenly on the stone.

light-rye-bread 026

Once the 1st loaf finished baking, I removed it to a cooling rack to cool while I baked the other loaf.

light-rye-bread 029

While the other loaf was baking, I spritzed the second loaf with water, then sprinkled caraway seeds on top.

light-rye-bread 022 

Then, I scored the loaf using a serrated knife.

light-rye-bread 025

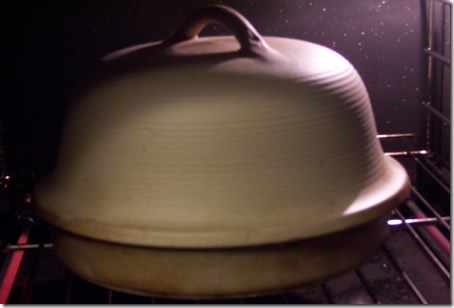
Then I placed the baker in the 450 degrees preheated oven and covered the la cloche with the lid.

light-rye-bread 028

I baked the loaf for about 15 to 20 minutes.  Then removed the lid and let it bake for another 10 to 15 minutes or so until it was crispy and brown on top.

light-rye-bread 032

When I removed the baker from the oven to cool the bread, I placed it on a towel because extreme temperature changes could crack the la cloche.

light-rye-bread 036


The finished loaves of Rye Bread

Here is the version that was baked in the la cloche.

light-rye-bread 035

This is the loaf that was baked on the baking stone.

light-rye-bread 044

This light rye bread tastes really good, but I forgot to get a crumb shot.


This bread has been YeastSpotted. Please visit Wild Yeast to view all of the lovely breads in the roundup.


Be sure to check out the other bakers in the Mellow Bakers group.


Would you like to bake bread at an easy pace? Join us! Mellow Bakers was started by Paul at Yumarama. We’re baking breads from Bread: A Baker’s Book of Techniques and Recipes by Jeffrey Hamelman.


Thanks for joining us in the BreadExperience bread-baking blog.  We hope you’ll join us again soon.

Happy Baking!
Cathy

Friday, 23 April 2010

Southwestern Focaccia/Pizza using Mesquite Dough: HBinFive

A couple of months ago, in the HBinFive baking group, we made breads using the Whole Wheat Olive Oil Dough from the Healthy Bread In Five Minutes book. One of the breads we were supposed to make using that dough was Southwestern Focaccia.  At that time, I decided not to make focaccia. Instead, I made grilled pizza and it was delicious.

The reason I decided not to make the Southwestern Focaccia using the whole wheat olive oil dough was because I read the ingredients for the mesquite dough (page 171) and thought the focaccia would be awesome made with that dough. So I decided to wait until I could get some mesquite flour. 

Well, it just so happens that when I posted about the grilled pizza and mentioned mesquite flour, Peter at Casa de Fruta contacted me to introduce me to their mesquite flour.  It sounded wonderful! The folks at Casa de Fruta graciously sent me a sample so I decided to make this delicious focaccia for the May 1st Bread Braid instead of the Cinnamon Crescent Rolls. I had made and posted about the crescent rolls in November so I already knew they were good.

I’m glad I waited to make the Southwestern Focaccia with the mesquite dough. I love the flavor combinations. The mesquite flour gives the dough a unique flavor and the sauce and toppings on the focacca/pizza are fabulous!

mesquite-bread 024


Mesquite Dough 

The mesquite dough is made with mesquite flour, all-purpose flour, whole wheat flour, corn masa, yeast, kosher salt, vital wheat gluten, water, agave syrup, Serrano peppers (or jalapeños) and chopped cilantro. 

mesquite-bread 006

I used jalapeños because I thought it would be too hot with the Serrano peppers.

mesquite-bread 007

After I made the dough, I let it sit on the counter for 2 hours.

mesquite-bread 008

Then I placed it in the refrigerator overnight.  This dough keeps for up to 7 days which is a good thing because it was almost 5 days before I had the chance to make the focaccia.

mesquite-bread 009


Southwestern Focaccia/Pizza with Roasted Corn & Goat Cheese

To make the focaccia, you take out a grapefruit-size portion of the mesquite dough and shape it into a ball.

mesquite-bread 014 

Then you flatten the dough into a 1/2-to 3/4-inch thick round for focaccia.  I flattened my dough out a little bit thinner so it was more like pizza.

mesquite-bread 015

Although the directions in the book say to add the toppings and then bake the focaccia, I par baked my dough for a few minutes before adding the toppings. 

mesquite-bread 017

Then I topped the focaccia/pizza with a delicious sauce of sautéed onions, poplano pepper, chili powder, cumin and diced tomatoes.  I really like this sauce and will most likely try it again with other pizza dough.  It’s really good!

mesquite-bread 012

Then, I added roasted corn and goat cheese and topped that with grilled chicken.  You can omit the chicken but I liked it.

mesquite-bread 018

Bake the focaccia/pizza on the baking stone until the crust has browned.  

mesquite-bread 020

It was a little hard to tell when the crust was done because the crust was already brown. I probably could’ve baked it a little bit longer.  It was a little bit top heavy, and the toppings kept falling off.

mesquite-bread 019

I was concerned that the pizza would be too hot (spicy) since it had jalapeños and poplano peppers in it, but it wasn’t hot at all.  It had a great flavor!

mesquite-bread 028

I think the only thing I would do different next time is to grill the pizza.  It has a smoky flavor due to the peppers, chili powder and cumin so I think grilling the pizza dough would really enhance the flavors.  It was raining the night I made this so I didn’t have that option, but it was still delicious!


Thanks for joining me in the bread-baking blog.  Check out http://bigblackdogs.net/ to see the May 1st Bread Braid roundup.

Happy Baking!
Cathy


I would also like to thank the kind folks at Casa de Fruta for letting me sample their mesquite flour.  It was a wonderful addition to this pizza.


About the HBinFive Baking Group

The HBinFive Baking Group, started by Michelle of Big Black Dogs, is baking through all of the breads in the Healthy Bread in Five Minutes book. For more information on the new HBinFive baking group, check out Michelle's blog.


Here are some additional bread-making resources:

You might enjoy some of the other breads that have been featured in the bread making blog.