Wednesday 31 July 2013

Crock Pot Blackberry Vanilla Jam

It’s been a while since I’ve participated in the Can It Up! Challenge hosted by Hima at All Four Burners.

I got a new cooktop and I was nervous about messing it up with water-bath-canning. I let several months of jamming pass me by, but when it came time to can berries, I just couldn’t resist any longer. The jam-making bug hit. It was time to make some blackberry jam.

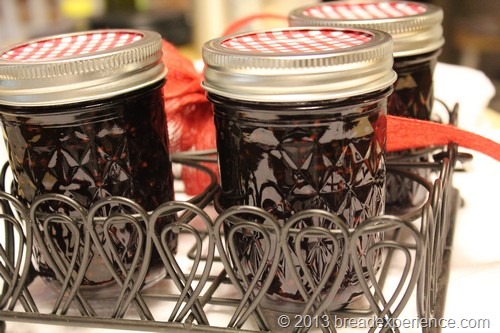
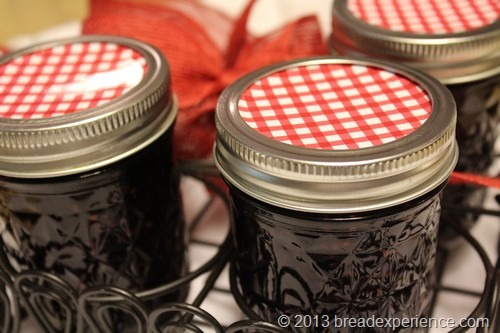
blackberry-vanilla-jam_016


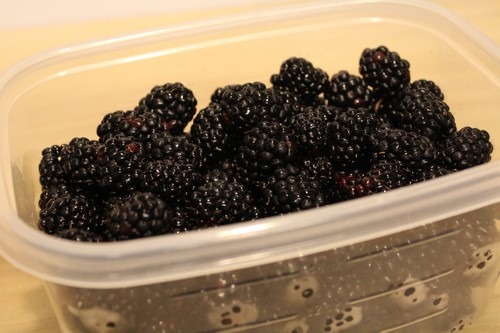
One Saturday, I talked my sister into going to our favorite farm to get some blackberries and peaches. We each got a gallon of blackberries. I ate most of the berries, but I did save some for this blackberry jam and some for another canning project. You’ll have to stay tuned to find out about that one.

blackberry-vanilla-jam03


Since I’ve made blackberry jam a few times, I wanted to do something different this time.  So I decided to make it in a crockpot. I made apple butter in a crockpot with great success so I wondered how it would work with blackberries.

I went to one of my favorite places for inspiration – Pinterest, of course. I found this Crock Pot Blackberry Jam recipe from Repeat Crafter Me. Sarah has some really cute downloadable recipe cards for this jam so you’ll want to check out her post.

I took it a step further and canned it using the water-bath-canning method. I also enhanced it by adding a couple vanilla beans.

Last year, when I made vanilla strawberry jam, we loved it so I thought this would be a nice touch for the blackberry jam. Boy was it ever!  I really enjoy blackberry jam but the vanilla puts it over the top, at least in my book.


Crock Pot Blackberry Vanilla Jam

Adapted from Crock Pot Blackberry Jam and Crock Pot Maple Apple Butter

Makes: 3 to 4 Eight ounce jars

Ingredients:

  • 2 pints blackberries, rinsed and drained *
  • 2 cups sugar
  • 1-2 vanilla beans
  • 3 tablespoons lemon juice

* I used 2 pints of blackberries measured by weight (using kitchen scales) not volume (measuring cups).  But you can use 2 pints from the market to make things easy.

blackberry-vanilla-jam04


Directions:

Gently mash the blackberries in a bowl with a potato masher. They should still be a little chunky.

blackberry-vanilla-jam15


Transfer the crushed berries to a crock pot and add in the sugar, lemon juice and vanilla beans. You can slit the bean and scrape out the pods if you like.  I just split them and placed them in the crockpot.

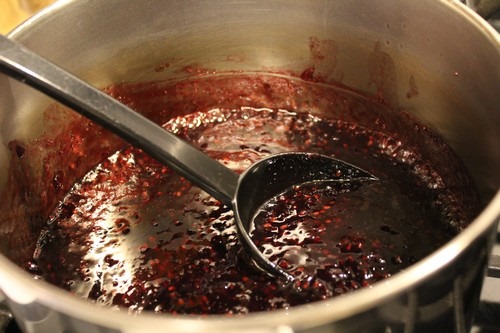
Cook on low for 2.5 hours, stirring twice. Remove the lid and cook on high for 2-3 hours. When the jam is thickened discard the vanilla beans and ladle into canning jars.

The jam didn’t thicken as much as I would’ve liked in the crockpot so I transferred it to a regular pot and brought the jam to a rolling boil while the jars and lids were being sterilized.

blackberry-vanilla-jam_04


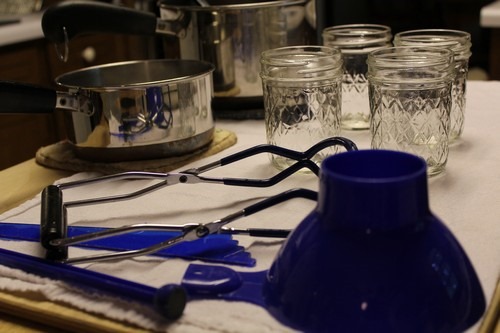
Here is my mise in place. Oh yeah!  That’s for bread making, but having everything ready and in it’s place works really well for jam making too.

blackberry-vanilla-jam_06


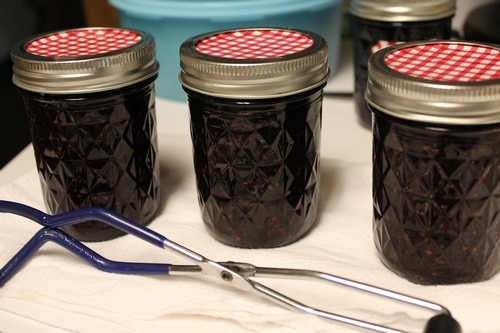
Once the jam reaches the boiling point and passes the cold plate method (i.e. the jam doesn’t run), ladle it into 8 oz jars (leaving 1/4-inch headspace), wipe the rims with a clean cloth, add the lids and rings, and process the jars in a boiling-water bath for 10 minutes.

Refer to the instructions at the National Center for Home Preservation.

blackberry-vanilla-jam_08


Turn off the heat, remove the canner lid, and let the jars rest in the water for 5 minutes.  Remove the jars and set aside for 24 hours. Check seals, then store in a cool, dark place for up to 1 year.

blackberry-vanilla-jam_010


I enjoyed participated in Can It Up! this month.  It felt good to be canning again.   


Happy Canning!

Cathy
Tuesday 30 July 2013

Rheinbrot and the life of a project manager

The life of a project manager can be hectic at times, particularly when several of your projects come due at the same time. This is what happened last week. During the day, I was on back-to-back conference calls and at night, I was brain dead. When Friday rolled around, all I wanted to do was to get my hands on some dough.

I was especially looking forward to making Rheinbrot, the featured bread for the BBBs (Bread Baking Babes). This bread, chosen by Astrid of PaulChen’s FoodBlog, is unique in that it utilizes an overnight sponge of Reisling, sourdough, bread flour and water.

Rheinbrot_002


According to Astrid,

“Rheinbrot got it's name from the fact that there is (Rhein) Riesling used in the bread dough.  A wine widely associated by the Winzers located at the Rhein in Germany. I'd like to add, that Austria has a fabulous  Riesling too and that said by me who is not a huge fan of white wine anyway.”

I like breads that utilize an overnight ferment because they have more depth of flavor than breads made with a straight dough. Plus, it’s nice that you can mix up the sponge the night before and then finish the bread the next day after you’ve rested. Well, that was the plan anyway.

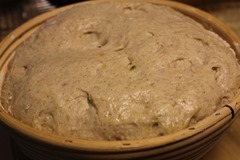
It was cloudy on Saturday, and my brain was cloudy as well. This lovely bread ended up being a winey pain in the brot. The dough was sticky and gave me fits during the final proof.  I had to reshape the loaf three times because it kept sticking to the proofing basket when I tried to remove it to bake it. 

I thought I had dusted the banneton with a mixture of all-purpose and white rice flour, but it didn’t work like it should’ve so my container must have only had all-purpose flour in it instead of the mixture.  After the second attempt, my brain woke up a little, and I mixed some rice flour in with the other flour.

The loaf only stuck a little bit the third time, so I decided to go with it.  It was over proofed and deflated a bit from when I removed it from the proofing basket, but even so, it turned out pretty tasty.

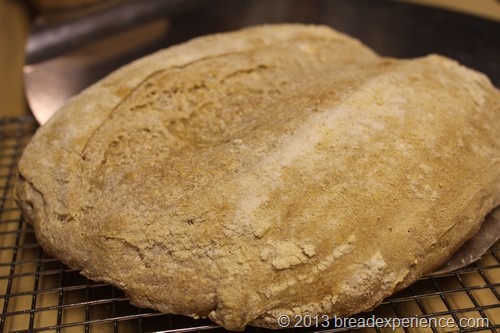
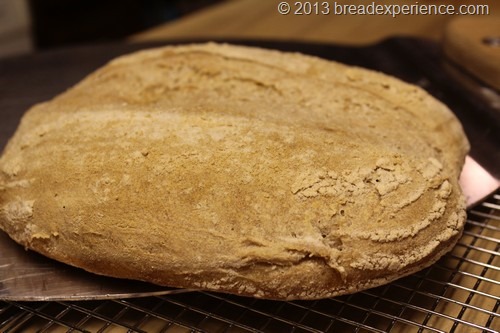
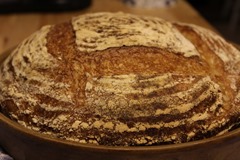
The third time is the charm, right! Well here is the charm with a slight blemish from being stuck to the basket.

Rheinbrot_34


Rheinbrot

The formula for this winey loaf was translated from this forum where the chemics of wine and bread baking are discussed.

Here is my adapted version:

Sponge:

  • 50 grams sweet Riesling
  • 50 grams boiled water, at room temperature
  • 100 grams white bread flour
  • 50 grams sourdough at 100% hydration

Dough:

  • 200 grams white bread flour
  • 50 grams whole wheat flour
  • 135 grams water
  • 6 grams salt


Instructions:

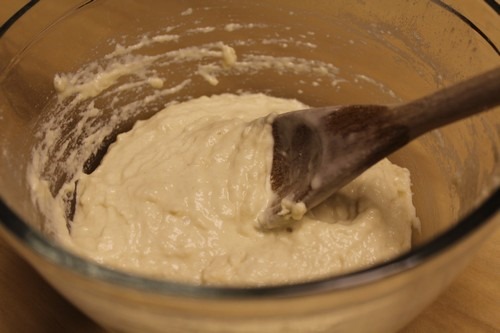
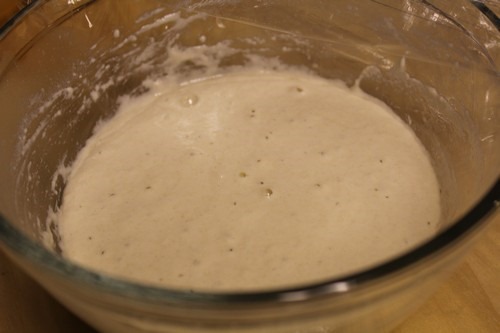
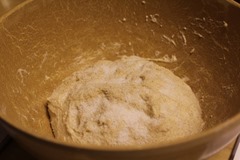
1) Mix wine with water and add the sourdough, whisk thoroughly.  Add flour and mix again.

Rheinbrot_02


2) The dough ferments at 2 stages:

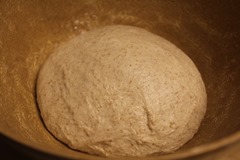
2a) 4 hours at a temperature 70-75°F, it should grow at least twice its size, will be lumpy looking at this stage and have larger and smaller bubbles.

Rheinbrot_03


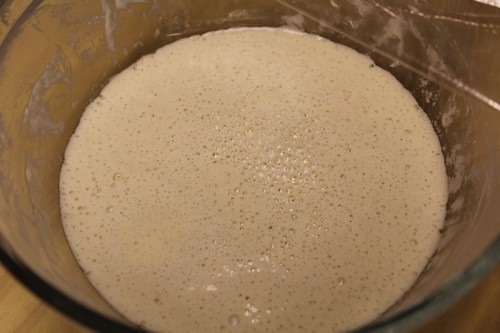
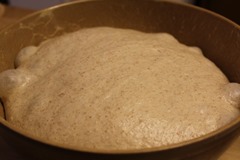
2b) Pour the sponge in a bowl and whisk thoroughly to remove all the gas out of it and fill it with oxygen. Cover and let sit for 10-12 hours (overnight) at room temperature. Dough will rise again in half and very often shows smaller bubbles.

Rheinbrot_06


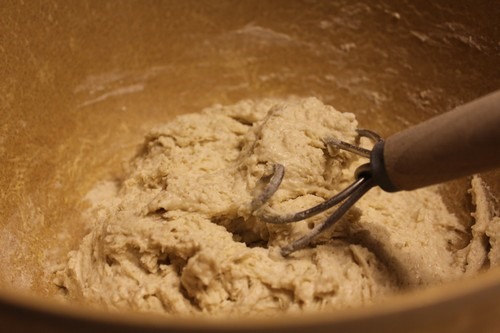
3) Now the sponge is ready for kneading: pour in the water and stir until smooth. Add the flour, mix well and give the autolysis a chance to do it's magic for 40-50 minutes.

Rheinbrot_08


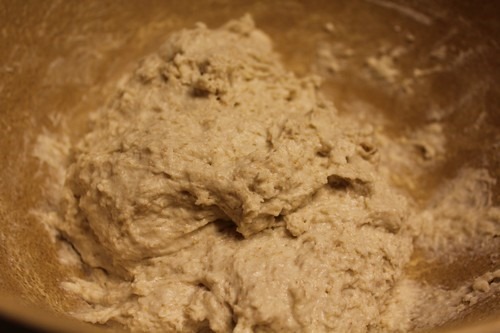
4) Add the salt and quickly knead the dough, if it is too sticky add a little four, but be careful not to add too much.

Rheinbrot_09


5) Let ferment for 2-2.5 hours. Fold twice after 1 hour and 1 1/2 hour.

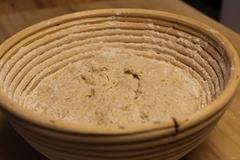
6) Form a loaf and let proof in a basket for 1 1/2 hours (until doubled in size) covered with a towel in a draft free place.

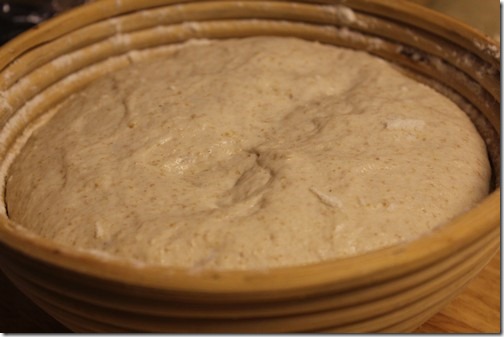
1st try.  I was excited at this point and ready to bake it.  Then poof it stuck to the basket and deflated and I had to reshape and let it proof again.

Rheinbrot_20


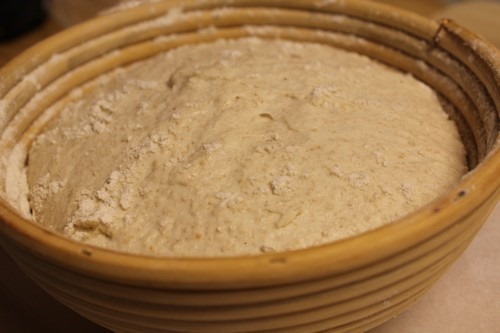
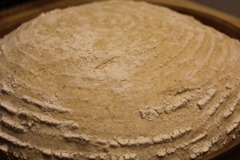
2nd try (an hour later).  I brushed the basket out and dusted it with a lot of flour this time.  The loaf had doubled in size again, and I tried once more to remove it, but it stuck - again. 

Rheinbrot_22


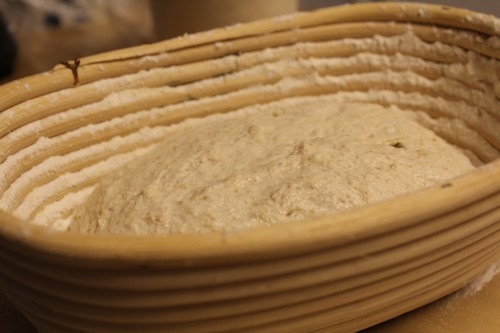
3rd try (another hour or so later).  I switched baskets and dusted it with a lot of rice flour and all-purpose flour.  This seemed to do the trick -  mostly.

Rheinbrot_24


7) Preheat oven to 450°F with a baking stone on the middle rack.  The original formula states to bake the loaf at 240°C which converts to 464°F so I baked it at 450°F.

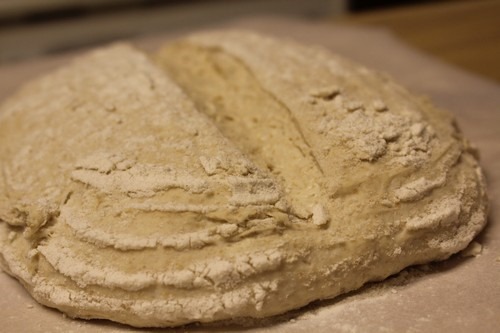
8) Gently flip the loaf over to a piece of parchment paper (or your baking sheet) if you dare. Then score the loaf in the pattern of your choice and transfer it to your baking stone.

You can see where the dough got stuck on the left side. It wasn’t too bad, but still a little frustrating.

Rheinbrot_28


9) Spritz the loaf with water and bake at 450°F for 10 minutes.  Spritz with water 2 more times at 30-second intervals, then lower the temperature to 400°F. and continue baking for an additional 20 minutes.  The original formula states to lower it to 200°C and that converts to 392°F.

10) Let the loaf cool down for at least half an hour before slicing and eating.

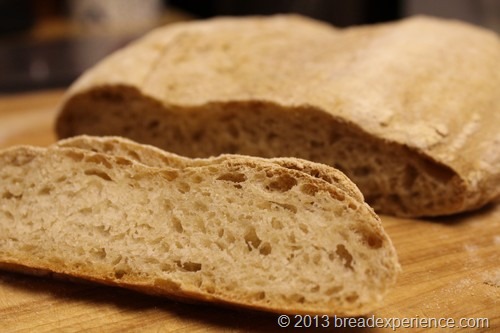
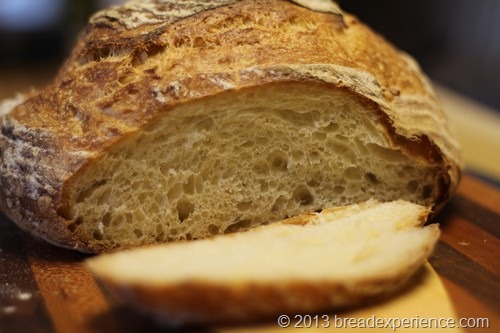
After I reshaped and proofed the loaf three times in a row, I didn’t think it would have nice holes, but it proved me wrong. This bread is very light-colored due to the Reisling, but the crust was chewy and crumb had a delicious texture and flavor. 

Rheinbrot_011


I brought this loaf over to a friend’s house to taste test it and he loved it so much, it didn’t come home with me.  He said it was perfect.  I guess beauty and taste are in the eyes and mouth of the beholder.  I was just pleased that he liked it. 

I enjoyed baking with the BBBs again this month.

 BBBuddies July 2013


Happy Baking!

Cathy

Monday 22 July 2013

Whole Wheat Sourdough & Herb Crackers

I’m hooked on crackers! I can’t believe it took me so long to start experimenting with them. I just love trying different flavor and flour combinations.

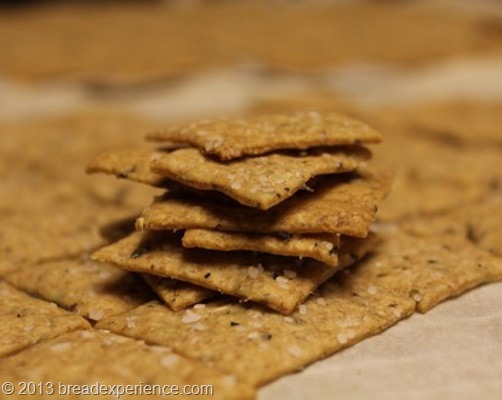
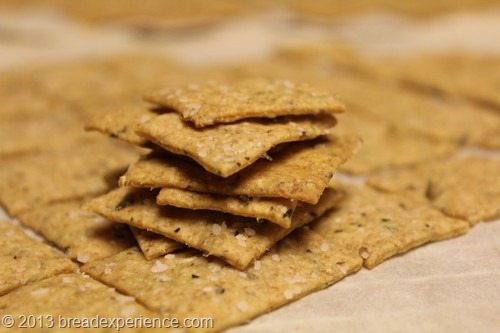
These Whole Wheat Sourdough & Herb Crackers turned out exceptionally well. It took me a couple of tries to get it right, but it was worth the effort. They are crispy and herby deliciousness!

sourdough-whole-wheat-herb-crackers114


I particularly like making crackers with sourdough because it gives them a delightful texture and the dough can last for a couple of days in the refrigerator. And, since you can use discarded sourdough, if you have a hard time discarding a cup when it’s time to feed it, this is a great way to use it up.

I’m currently testing how well sourdough cracker dough freezes. I’ve been making double batches on the weekend and freezing the dough so I have some around to bake (and eat) during the week. I want to enjoy some now and save some for later.

When I’m ready to bake crackers, I just take the dough out of the freezer, let it warm up to room temperature until it’s pliable, then I roll it out, cut the crackers and bake them. I don’t know how long it lasts in the freezer yet because I haven’t let it stay in there long enough to find out.


Whole Wheat Sourdough & Herb Crackers

Adapted from: Kitchen Stewardship’s Sourdough Thin Wheat Crackers

These delightful crackers are made with whole wheat pastry flour, sourdough starter, coconut oil and Herbes de Provence and sprinkled with a little Kosher salt.

Ingredients:

  • 2 cups fed sourdough starter * (I used my apple starter)
  • 1/2 cup coconut oil
  • 1 3/4 – 2 cups cups whole wheat pastry flour
  • 1 teaspoon Sea salt
  • 1 1/2 tablespoons Herbes de Provence (or your favorite blend of dried herbs)
  • Kosher salt, for sprinkling

* This recipe works with discarded sourdough or recently fed sourdough. 


Directions:

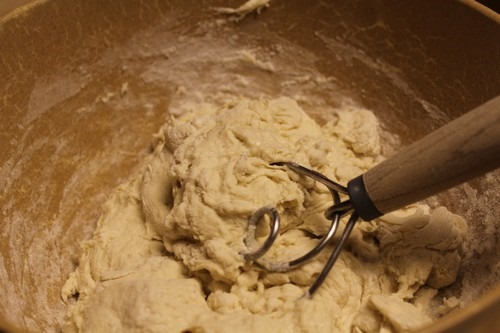
1) In a medium bowl, combine the sourdough starter and coconut oil. Add a cup flour, the Sea salt and herbs and mix thoroughly. Add as much additional flour as needed to make a dough that is workable, but not dry.

2) Cover the dough with plastic wrap or a lid to keep it from drying out and let it rest at room temperature for at least 7 hours. I let mine rest on the counter for a few hours, then I placed it in the refrigerator overnight to develop the flavor.

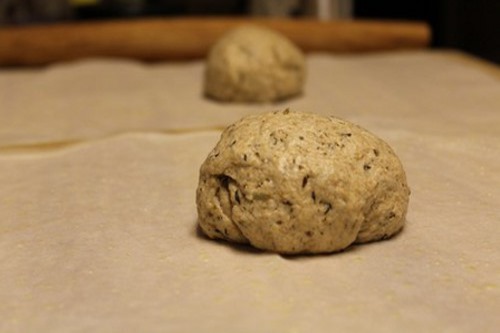
3) Remove the dough from the refrigerator and let it warm up to room temperature before rolling out. Divide the dough into 4 pieces and place each ball on a greased or floured piece of parchment paper, or a nonstick baking mat. I wrapped 2 of the balls in plastic and put them in a freezer bag to freeze for a couple of days.

sourdough-whole-wheat-herb-crackers001


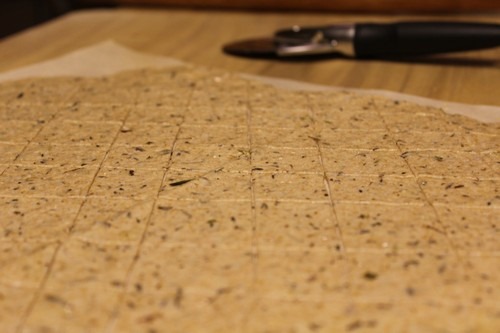
4) Roll the dough out very thinly on the parchment paper. Brush it with olive oil and sprinkle it lightly with Kosher salt. 

Note: A little will go a long way with the salt. You might not taste it when the crackers are freshly baked, but the next day, if you put too much, you’ll know it. Ask me how I know. Ha!

5) Cut the dough into squares or diamonds using a pizza cutter.

sourdough-whole-wheat-herb-crackers04


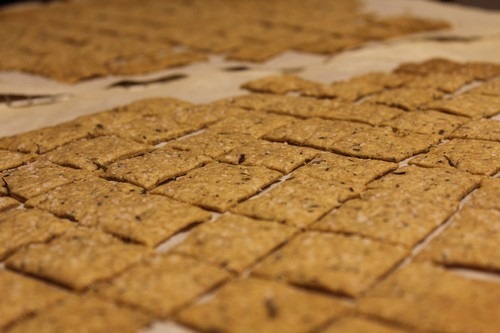
6) Bake the crackers in a preheated 350 degrees F. oven for about 15 minutes until just golden brown. Bake them in batches, rotating the baking sheets if you are baking two at a time.

For crispy crackers: Let the crackers cool down completely in the oven. If you want to do this in an electric oven, leave the door slightly open so the crackers don’t continue baking while the oven is cooling down. 

sourdough-whole-wheat-herb-crackers07


7) Transfer the crackers to a wire rack. They will shrink in the oven and come apart on their own.  Let them cool down if you can.


Enjoy!

sourdough-whole-wheat-herb-crackers15


I’m glad I saved some of the dough for later because I ate all the crackers already. I had some for dinner with cheese and grapes and some for an afternoon snack the next day.


Happy Baking!

Cathy
Saturday 20 July 2013

Sourdough Cinnamon Rolls Surprise

Cinnamon rolls made with sourdough. That’s the Sourdough Surprises’ challenge for July. There were two different recipes we could use as an inspiration for making our sourdough cinnamon rolls. One version used self-rising flour, which I thought was kind of odd, and the other seemed like too much effort for cinnamon rolls. So I opted to use a different method altogether.

sourdough-cinnamon-rolls_011


I had been itching to make the Sourdough Spelt Cinnamon Rolls from Classic Sourdoughs by Ed and Jean Wood for months so this was the perfect opportunity to try them.

sourdough-spelt-cinnamon-rolls_025


Sadly, those cinnamon rolls didn’t turn out so well. I had to throw them away. I hate it when that happens, but I didn’t let that deter me from meeting this challenge head on.


I started over again a few days later and made the cinnamon rolls using regular all-purpose flour and my apple starter instead of all-purpose spelt flour and my spelt starter. I changed the formula to include more milk and flour and use less sourdough culture. I also omitted the raisins. The combination of raisins and sourdough just didn’t do it for me. I may try adding the raisins another time but for this version, I left them out.

I changed the bulk fermentation from 8 to 12 hours at room temperature to 8 to 12 hours in the refrigerator. It was hotter than 70 degrees in my kitchen so letting the dough proof that long at room temperature made the rolls too acidic, at least in my opinion.

The next day, I took the dough out of the refrigerator and let it warm up to room temperature for an hour or so before shaping the rolls. I reduced the final proof from 2 to 4 hours to about 1 hour, at room temperature. I also used a different baking pan and reduced the oven temperature.

I know this is a lot of changes to make all at once, but those were the things I didn’t like about the spelt version. The rolls were too sour, the raisins tasted nasty and the rolls didn’t rise well in the oven. Plus, they got burned on the bottom because the temperature was too high.

I was much more pleased with the second attempt. You can taste the sourdough but it’s not overwhelming. These cinnamon rolls are slightly tangy and are really good warm, especially with the powdered-sugar glaze drizzled over them.

sourdough-cinnamon-rolls_15


Sourdough Cinnamon Rolls

Adapted from: Classic Sourdoughs by Ed and Jean Wood

Makes: 12 to 14 Rolls

Ingredients:

Dough:

  • 1 1/2 cups sourdough culture (using this process)
  • 1 cup almond milk (or whole milk)
  • 1 teaspoon vanilla extract
  • 1 teaspoon sea salt
  • 2 tablespoons sugar
  • 3 1/2 cups unbleached all-purpose flour

Filling:

  • 2 tablespoons melted butter
  • 2 teaspoons ground cinnamon, more if desired
  • 2 tablespoons sugar
  • 1/2 cup raisins (optional)

Glaze:

  • 1 cup confectioners’ sugar
  • 4 teaspoons warm milk
  • 1/2 teaspoon vanilla extract


Directions:

1) Pour the sourdough culture into a large mixing bowl. Stir in the milk, vanilla, salt, and the 2 tablespoons of sugar and mix well using a Danish dough whish or wooden spoon. Add the flour a cup at a time and mix until you have a shaggy dough.

sourdough-cinnamon-rolls01


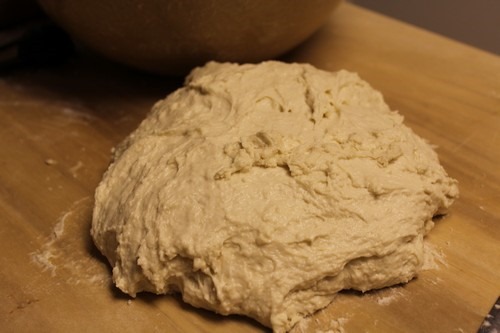
2) Turn the dough out onto a floured surface and knead in the remaining flour until the dough is smooth and satiny.  This is the dough before being kneaded.

sourdough-cinnamon-rolls02


3) Place the dough in a large, clean bowl and cover the bowl with plastic. Let it proof in the refrigerator overnight (8 to 12 hours).

4) The next day, let the dough warm up to room temperature (an hour or so) and then gently transfer it to a floured surface. Let the dough rest on the counter for 30 minutes.  If it flattens a lot during this time, add in additional flour before rolling the dough out.

sourdough-cinnamon-rolls05


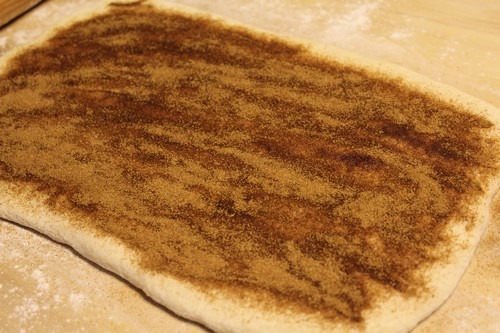
5) Roll the dough into a rectangle, about 1/2 inch thick. Brush it with melted butter. Mix together the cinnamon and sugar and sprinkle the mixture over the top of the dough. If you want to add raisins, now is the time to do it.

sourdough-cinnamon-rolls08


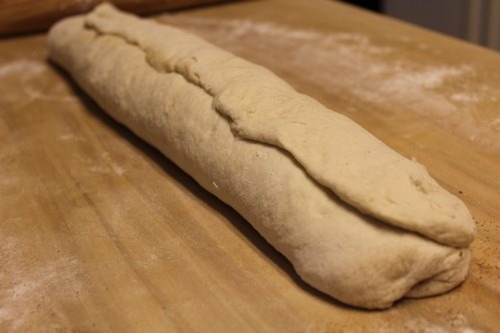
6) Starting from the long end, roll the rectangle up into a log.

sourdough-cinnamon-rolls09


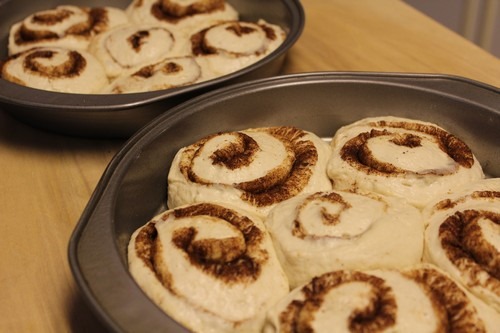
7) Cut the log into 1-inch thick rolls. I used a knife, but you could also use floss. Place the rolls close together on a baking sheet or in cake pans and proof for an hour or until doubled in size. It’s hot in my kitchen right now so it doesn’t take long to proof.  If your kitchen is cooler, you might need to let them proof longer.

sourdough-cinnamon-rolls12


8) Bake the cinnamon rolls in a preheated 350 degrees F. oven for 25 to 35 minutes. Watch the rolls to make sure they don’t burn on the bottom.

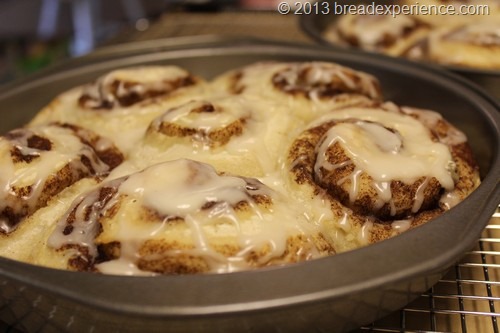
9) Remove the rolls from the oven, and while they are still hot, drizzle the powdered-sugar glaze over them.

sourdough-cinnamon-rolls22


10) Carefully remove the rolls from the pan and serve them warm.

sourdough-cinnamon-rolls_005


Happy Baking!

Cathy

Wednesday 17 July 2013

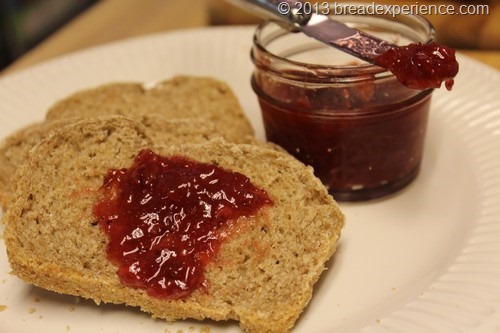
Would you like some bread with your jam?

It’s been raining so much lately, that I haven’t wanted to venture out to the store to get food supplies. I decided it was time to make some comfort food using some grains and other ingredients I had on hand. Can you guess what I made?

multigrain-loaf_10


I’ll give you a clue. I love to make jam during the summer months when berries and stoned fruit are at their peak, and I always end up with a bunch of jars at the end of the season. I decided to make some bread to go with the jam.

If you guessed that the comfort food I was craving was a PB&J sandwich, you’re right!  For this sandwich, I made a multi-grain bread using a mixture of seven grains, and then I spread it with some CranStrawberry Jam. I also added some creamy organic peanut butter (not shown). It was very comforting on a loud and stormy night!

To learn how to make this multi-grain bread, look for my Multi-Grain Bread for a Rainy Day post on the Grain Mill Wagon.


Happy Baking!

Cathy
Friday 12 July 2013
Hogwarts Express & the Crusty Bread Episode

It was drizzling when we arrived in Mallaig, the end of the West Highland Line; where you cross over by ferry to the Isle of Man, in the Scottish Highlands.

We had changed our minds, as we often did on this trip, and decided not to cross over to the Isle of Man because we were running out of time. We would take the Ferry to Ireland instead.

mallaig


This meant we had to take the train back to Ft. William, then to Edinburgh and onto to London, where we would catch the rail to Wales, the land of my ancestors (or so we think). The problem, at the moment, was we had just gotten off the last train. There was no train to Ft. William until the next day. 

mallaig2


The train we rode to Mallaig is commonly known as the Hogwarts Express Train line. My son is a big Harry Potter fan so of course he talked me into doing it. Not that it took much. This route takes you over the Glenfinnan Viaduct as featured in the Harry Potter films when Harry and crew are transported by train to Hogwarts School from King’s Cross Station’s Platform 9 3/4. In the travel brochures, this route is described as one of the greatest train rides of the world. I would have to agree. It was awesome! 

hogwarts_express_train_ride


This is the view of the viaduct from the train. Unfortunately, there was a glare from the window, but it’s still a cool view.

hogwarts_express_viaduct


Most of the other places we stayed, we were able to book ahead, but there wasn’t any Wi-fi on this train so we had to find a room once we got to Mallaig. Although we had to go to plan B, the train ride was worth it and the place we did end up staying turned out to be one of our favorites. The room was quiet, no Wi-fi, but it had a reading corner with books and a kitchen stocked with coffee, tea, and shortbread.

This is the view from our room that evening. Pretty cool for a last minute option, don’t you think?

mallaig3


You’re probably wondering what all of this has to do with crusty bread. I’m getting to that, but I had to set the stage.

So we’re in Mallaig. It’s cold and rainy, but we found a warm and comfy place to stay. Now that the basics were taken care of, it was time to eat. We surveyed the town and found a couple of pubs. We chose the one right across the street from our room because it was still drizzling and we knew we could make a run for it if necessary and not get soaked.

mallaig4

I didn’t write down the name of the pub so of course, I forgot, but it was a quaint little place and we liked it.

The tomato and basil soup sounded really comforting on a cold and rainy day so that’s what I ordered. My son ordered fish and chips. When she took our order, the hostess asked if we wanted crusty bread. I said sure. I thought I would take a photo and show a sample of the meal on my blog.

This is what I had in mind when she said crusty bread.


But what we got was sliced bread with crusts. Like a commercial loaf of bread from the grocery store. My son and I just laughed, quietly, after the hostess had left of course. This happened more than once actually while we were in the UK.  It just goes to show that we have a difference of opinion of what constitutes crusty bread. This little episode has become an inside joke and we laugh about it every time the subject of crusty bread comes up.

That’s okay! I thoroughly enjoyed the tomato and basil soup. It was some of the best soup I’ve had. I even ate the bread with it. We had a nice dinner and a walk afterwards, then we rested for the train ride back to Ft. William.  The next day, we got to experience the Hogwarts Express Train Ride all over again. It was the train ride of a lifetime. No crusty bread, but a pretty nice adventure indeed!

I hope you enjoyed my adventure.

The bread in the photo is White Bread with Overnight Poolish. Click on the image or click here for the directions.

Tuesday 9 July 2013

Baking Bread on Saturday in a La Cloche

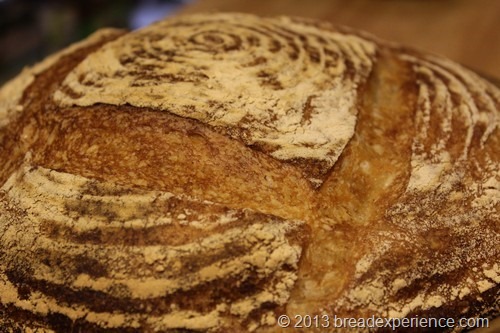
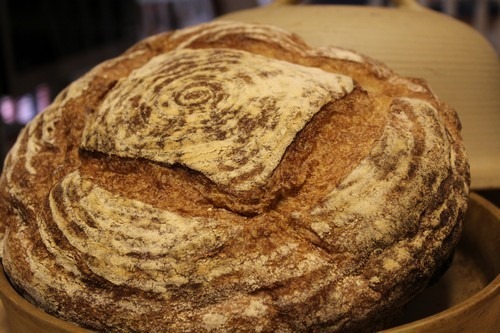
The bread of the month for the Artisan Bread Bakers is The Saturday White Bread from Ken Forkish’s book Flour, Water, Salt & Yeast.

10-percent-whole-wheat-loaf_013_thum

The idea behind Saturday Bread is that you can make it from start-to-finish in one day. A lot of the breads in the book are made using the long, slow fermentation-in the-refrigerator method, but Mr. Forkish included this one for homebakers who want to start a bread in the morning and serve it for dinner that same evening. I like that!  Most homebakers, including me, could easily fit this bread in their schedule, especially on a Saturday or Sunday.

Although I like the idea of a Saturday bread, I didn’t think an all-white bread, without an overnight fermentation in the refrigerator, would have enough flavor so I included 10% whole wheat flour to give it a more rustic appeal.

10-percent-whole-wheat-loaf08_thumb2

As I’ve mentioned before, one of the things I really like about this book is that all of the formulas can easily be scaled up or down and adapted to suit your needs or appetite. I only wanted one loaf so I scaled the formula down to make one loaf instead of two.

I also adapted the method a bit. I’m still dealing with tennis elbow so I have to be careful about picking up things that put a strain on my wrist or elbow. It’s a bit tricky sometimes to find a pot I can lift and twist without dropping it, especially if the pot is hot.

With these limitations in mind, I decided to bake the loaf in my La Cloche instead of a Dutch oven, bread pot, or my combo baker because: 1) it’s easier to transfer the risen dough from the proofing basket to the La Cloche; 2) the La Cloche doesn’t have to be preheated; and 3) it simulates a brick oven so the bread comes out crispy on the outside and rises really well, and 4) I just love the bell-shaped dome.


10% Whole Wheat Saturday Bread

Adapted from: Flour Water Salt Yeast: The Fundamentals of Artisan Bread and Pizza by Ken Forkish

Makes: One loaf (about 1 1/2 pounds)

If you want to see what this bread looks like baked in a pot, visit Karen’s Kitchen Stories. Karen made this bread a few weeks ago and it looks fabulous.

This dough can be used for bread, pizza or focaccia. I think it would make great focaccia.  Next time, I’ll make the full amount so I can have some left over to use for pizza or focaccia.

Ingredients:

  • 400 grams unbleached all-purpose flour
  • 100 grams whole wheat flour
  • 360 grams warm water (90 degrees F. to 95 degrees F.)
  • 11 grams fine sea salt
  • 2 grams instant dried yeast


Directions:

1) Mix the flour and water

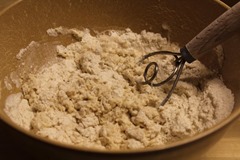
Combine the all-purpose and whole wheat flours and water and mix by hand using a wooden spoon or a Danish dough whisk until thoroughly incorporated.

10-percent-whole-wheat-loaf_01


2) Autolyse (rest the dough)

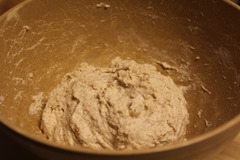
Cover the dough and let it rest for 20 to 30 minutes.

10-percent-whole-wheat-loaf_02


3) Mix in the Salt and Yeast

After the dough has rested, sprinkle the salt and yeast over the top of the dough. Mix by hand until the salt and yeast are fully incorporated into the dough. Using wet hands for this part makes it really easy. Continue to wet your hands as necessary throughout the mixing process.

10-percent-whole-wheat-loaf_03


4) Fold and Turn the Dough

Instead of kneading the dough, Mr. Forkish uses the pincer method.  I love the name of his method, but I’m more proficient with the fold-and-turn method from Chad Robertson’s Tartine Bread so that’s the method I used for this dough.

With the fold-and-turn method, you basically do a series of turns and folds in the bowl to develop the gluten structure.

Refer to my Tartine Bread post for a photo tutorial on performing the fold-and-turn method.

10-percent-whole-wheat-loaf_05


5) Bulk Fermentation

Cover the dough and let it rise. Do two folds during the first 1 1/2 after mixing. The first fold should be done about 10 minutes after mixing and the 2nd fold should be done within the next hour.  When you see the dough spread out in the bowl, you’ll know it’s ready to be folded  It’s actually pretty cool.

You can fold the dough a little later if necessary, but be sure to let the dough rest during the last hour of rising. The dough should be triple it’s size in volume after about 5 hours after mixing. I started this process at 11 am and the dough was ready at 4 pm.

10-percent-whole-wheat-loaf_08


6) Shape the Dough

I only made one loaf so I didn’t need to divide the dough. I just shaped it into a ball and placed it in a well-floured banneton basket. A mixture of all-purpose and rice flour works really well for this purpose.

10-percent-whole-wheat-loaf_10


7) Proof the Dough

Lightly flour the top of the dough. Cover the basket with plastic wrap or a kitchen towel. Let the loaf proof for an hour to an hour and a half. My kitchen was warm so it only took an hour.

Use the finger dent test to see when the loaf is fully proofed and ready to be baked.  Watch a demonstration by Ken Forkish of the finger-proof test.

10-percent-whole-wheat-loaf_001


8) Prepare the Oven for Baking

45 minutes to an hour before baking the loaf, preheat the oven to 500 degrees F.  If you are using a La Cloche, you don’t need to preheat it.  Just remove the middle rack from the oven so you can place the La Cloche on the bottom rack.


9) Score the Loaf

Sprinkle the bottom of the La Cloche with cornmeal. When the loaf is fully proofed, gently invert it onto the bottom of the La Cloche.

10-percent-whole-wheat-loaf_002


Score the loaf in the pattern of your choice using a lame or serrated knife.

10-percent-whole-wheat-loaf_006


10) Bake the Loaf

Place the La Cloche on the bottom rack of the oven and cover it with the lid. Turn the oven down to 450 degrees F. Bake the loaf for 20 minutes with the lid on.

10-percent-whole-wheat-loaf_009


Remove the lid and bake for an additional 20 minutes or until the loaf is a medium dark brown.  Just be careful not to burn the bottom of the loaf. 

10-percent-whole-wheat-loaf_014


Remove the loaf from the La Cloche to a wire rack to cool. You’ll also want to place the La Cloche lid and bottom on a towel to cool down. This will keep them from cracking due to extreme temperature change.


11) Slice and Enjoy

After the bread has cooled completely, slice and enjoy it. The bottom of my loaf was burned in a couple of places, but I just sliced that part off with a knife.

10-percent-whole-wheat-loaf_0010_thu


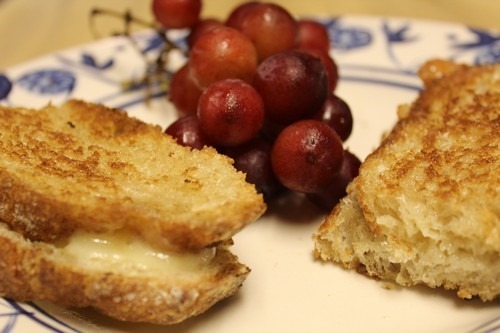
The moment we were waiting for. We enjoyed it as a toasted cheese sandwich on Sunday. Delish!

10-percent-whole-wheat-loaf005_thumb


Happy Baking!

Cathy