Monday 30 June 2014

Rustic Pain de Pecan for BBD#69

The theme for Bread Baking Day #69 is Regionale Brote / Local breads. The host of this month’s challenge, Thomas from Der Gourmet, invited us to bake modern breads with adventurous names, or old classics, or perhaps breads that have been forgotten.

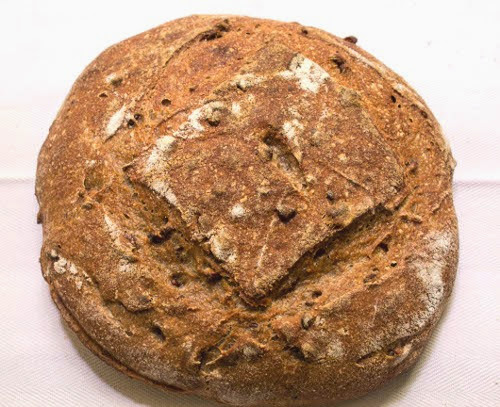
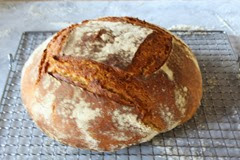
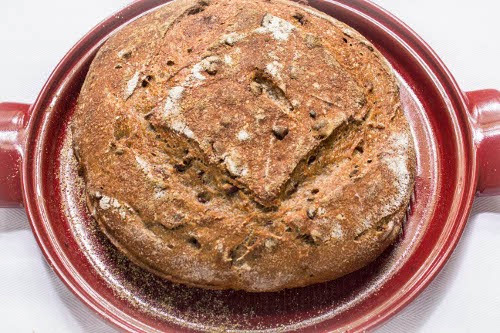
Rustic Pain de Pecan

He reminded us that each region has its own charm and this brings with it great breads. He mentioned breads like Paderborner, Basel bread, Munich house bread, and SF Sourdough as examples. 

None of those breads are from my region. In the Southern region of the U.S., we are known for biscuits and cornbread, both charming in their own rite, but not too adventurous, or yeasted for that matter. It was time to get creative.

As I was pondering what bread to make for this challenge, I remembered that Pain de Pecan was the BOM (Bread of the Month) for the Artisan Bread Bread Bakers FB Group. Well now, if there is anything more local to Georgia than pecans, I don’t know what it is, except maybe peaches.

I grew up in metro Atlanta, but both of my parents are from South Georgia. My grandparents on my dad’s side had huge pecan trees growing in their yard. When we visited them, we would gather the nuts that were scattered around the yard and bring home big brown grocery bags full of pecans. They were whole pecans so we had to shell them, but that was part of the fun. We didn’t know how good we had it back then getting loads of pecans so cheaply.
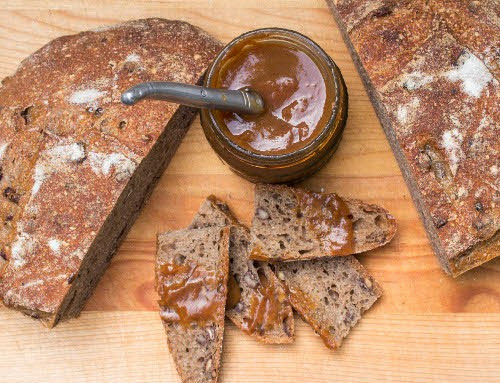
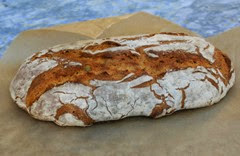
Rustic Pain de Pecan with Spicy Peach ButterRustic Pain de Pecan with Homemade Spicy Peach Butter


I wanted this loaf to be a truly local/regional bread so in addition to the pecans, I used Bolted Red Fife Bread Flour milled at Anson Mills in South Carolina, and Hard Red Spring Wheat milled in my kitchen. I think flour milled in your own kitchen is about as local as you can get unless of course, I grew the wheat myself.


Rustic Pain de Pecan

Makes: One Loaf

Adapted from: David of Hearthbakedtunes 75% hydration loaf

Sourdough Build:

  • 120g Water *
  • 114g Home-milled whole wheat flour (from Hard Red Spring Wheat)
  • 22g Levain (sourdough) **

Final Dough:

  • 277g Water, hold back 25g for mixing with salt after autolyse *
  • 228g Red Fife Wheat Bread Flour (hand milled style rustic)
  • 114g Home-milled Whole Wheat Flour
  • 9g Salt
  • 90g Pecans, toasted until fragrant

* Home-milled flour absorbs more water so if you make this bread using commercially-milled whole wheat and bread flour, you’ll probably need less water.  The original recipe is 75% hydration, my version is more like 87% hydration.

** I used my apple starter, but you can use any kind of sourdough starter for this bread. Just make sure it’s been fed and ready to go.  Refer to this post on how to activate a starter or feed your starter according to your feeding schedule.


Make the Sourdough Build:

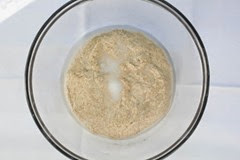
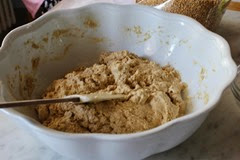
Combine the water and levain and mix until combined, add the whole wheat flour and mix again until a single consistency is formed. Cover, and allow to rest in a warm place 8-10 hours.

pain-de-pecan-1-1

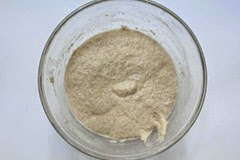
It can take up to 12 hours for the sourdough build to be ready to use. To test for doneness, take a spoonful of the levain and drop it in a glass of water.  If it floats, it’s ready, if it sinks to the bottom, let it ferment a little longer.


Autolyse:

Combine the flour and water and starter and stir until combined but still somewhat shaggy. Allow to rest for 30-40 minutes.

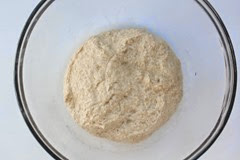
Add the salt and 25 grams water. Knead it into the dough by hand for about 8-10 minutes. After about 6-7 minutes add the pecans and knead until combined. Place the dough in a clean bowl, cover and let rest for 2.5 hours. Fold the dough in thirty minutes increments (four folds total).

Proof the Loaf

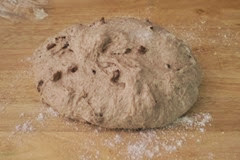
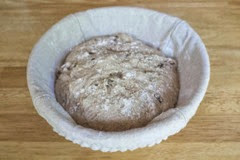
Ease the dough out of the bowl onto a floured working surface. Preshape the dough into a boule, let it rest 30 minutes. Then shape the dough into a tight round loaf and place it seam side up in a lined or unlined floured banneton basket. Allow the loaf to proof for two hours.
pain-de-pecan-1-2 pain-de-pecan-1-3
pain-de-pecan-1-5 pain-de-pecan-1-6


Score and Bake the Loaf

Preheat the oven to 500 degrees F. for 40 minutes with the Emile Henry Bread Cloche on the bottom rack.

Take the cloche (lid and bottom) out of the oven and place them both on surfaces where they won’t crack. I use cloth-covered bread boards for this purpose.

Sprinkle the bottom of the cloche heavily with corn meal or corn flour. Gently flip the loaf out of the basket and onto the bottom of the bread cloche. 

Score the loaf using the pattern of your choice. Place the cloche bottom in the oven and cover it with the lid. Immediately reduce the oven temperature to 450 degrees F.

Bake the bread with the lid on for 25 minutes. Remove the lid and finish baking 10-15 or until desired crust is produced.

Let it cool completely on a wire rack.

Rustic Pain de Pecan

This bread has been Yeastspotted.


Bread Baking Day #69


Thanks to Thomas from Der Gourmet, for choosing Regionale Brote / Local breads as the theme for Bread Baking Day #69.  And many thanks to Zorra for creating this event many years ago.

Happy Baking!

Cathy
 

Tuesday 24 June 2014

Einkorn & Wheat Tartine

They stayed in their designated corner of the garage for a long time. The white winter wheat berries, along with the buckets of rye, hard red winter and spring wheat berries waited patiently for me to open their sealed containers once again and measure some of the berries into the grain mill to process into flour.

Einkorn and Wheat Tartine

Like a child with a new toy who forsakes all of her other play things, I had relegated all of my modern grains to their resting spot while I experimented with the grains of the ancients.

Once I started baking with ancients grains, I wasn’t sure if I would come back, but my old friends in the garage kept beckoning to me to give them another chance.

The romance of working with ancient grains and the fact that they are more easily tolerated than modern wheat appeals to me immensely so I will continue to incorporate them into my breads. However, I still like regular wheat. I’ve missed working with it.

So when one of the bakers in the Artisan Bread Baker’s FB group posted about her experiments with the Einkorn/Wheat Tartine from Tartine Book No. 3, it peaked my interest. I have the book, of course, but I haven’t tried very many breads. I decided to remedy that.

Einkorn and Wheat Tartine

I like the way Chad Robertson, the author of Tartine 3, blends flours and grains in his loaves. He uses ancient grains, but he also incorporates whole wheat and bread flour in his breads. I decided if he can do it, so can I.


Einkorn and Wheat Tartine

This Einkorn and Wheat Tartine is a marriage between old and new grains; milled and sifted.

Makes: 1 Loaf

Adapted from Tartine Book No. 3 by Chad Robertson

Ingredients:

  • 200g white winter wheat, sifted (I used home-milled flour, then sifted it once to remove some of the bran)
  • 150g whole grain einkorn flour
  • 150g all-purpose einkorn flour
  • 75g refreshed levain (100% hydration) *
  • 425g warm water (80ºF or 27ºC), reserve 50g to mix with salt
  • 12g sea salt

* To make one loaf, you only use 75g of the refreshed starter so you’ll have some left over.  See directions below.


Method:

Build your Levain

For the best results, you should start by refreshing, or building your starter. To do this, take 25g of your favorite starter. I used my einkorn starter (aka EK) and to that, added 100g water, 50g all-purpose einkorn flour, and 50g whole grain einkorn flour. Mix well, cover, and let stand at room temperature for 4 – 6 hours.

If you’re making this bread in a colder climate, it might take longer for the levain to be ready for use. To test for doneness, take a spoonful of the levain and drop it in a glass of water.  If it floats, it’s ready, if it sinks to the bottom, let it ferment a little longer.


Mix the Dough:

In a large bowl whisk together the flours.

In a separate bowl combine the refreshed starter and the warm water.

Combine the wet and dry mixtures and mix with your hands or with a Danish dough whisk until no dry bits remain.

Autolyse: Cover and let the dough rest (autolyse) for at least 30 minutes.

After the autolyse, add the salt and 50g of warm water.

Mix well to incorporate into the dough. Transfer dough to large bowl, and cover for bulk fermentation.

Bulk Rise: During the bulk rise (3 to 4 hours, depending on temperature), fold and turn the dough every 30 minutes for the first 2 ½ hours. To do a fold, scoop the underside of the dough up and stretch it over itself towards you. Rotate the container one-quarter turn and repeat three to four times. Keep dough covered between folding. After 3 hours and six folds, the dough should feel aerated, billowy, and softer. You will see a 20-30 percent increase in volume. If not, continue bulk rising for 30 minutes to 1 hour longer.

Dividing & Shaping: The next day, or after the bulk rise, turn out the dough onto a clean, un-floured work surface. Lightly flour the top surface of the dough and cut into two pieces. Pre-shape each piece gently into a round by working the dough in a circular motion. Take care to work the dough gently and not de-gas.

Bench Rest: Lightly flour the tops of the rounds, cover with a kitchen towel, and let rest on the work surface for 20-30 minutes. Line two medium baskets or bowls with clean, dry kitchen towels and dust generously with a 50/50 mixture of any wheat and rice flours.

Final Shaping: Refer to the Tartine (Chad Robertson) method for shaping wet dough (here is a helpful video link: http://youtu.be/cIIjV6s-0cA, the shaping starts at the 3:09 minute mark)

Final Rise: Transfer the dough to the floured basket, flipping the dough over so that the seam side is facing up and centered. Cover with a clean, dry kitchen towel and let rise at warm room temperature for 3 to 5 hours or overnight in the refrigerator (bake directly from the refrigerator, if using this option).

I placed the baskets in the refrigerator overnight.

To Bake: Pre-heat the oven to 500F/260C, adjust the oven rack to its lowest position, and place a cast iron Dutch oven, or any other heavy ovenproof pot with a tight-fitting lid into the oven. I used a Dutch oven combo baker to bake this loaf. Pre-heat for at least 30 minutes.

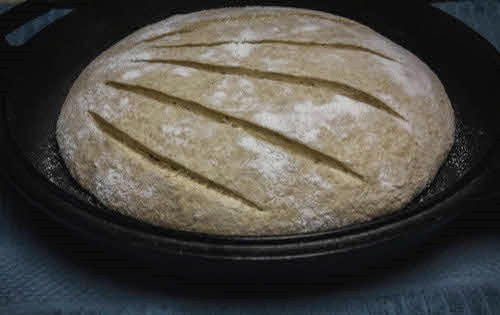
Carefully transfer the dough round into the preheated Dutch oven, tipping it out of the basket into the pot so it is now seam-side down. Score the top of the dough in the pattern of your choice. Cover the pot and return it to the oven.

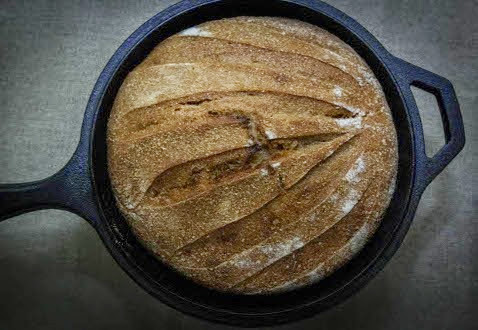
Einkorn and Wheat Tartine

After 20 minutes, reduce the oven temperature to 450F/230C. Bake another 10 minutes, then carefully remove the lid (being careful of the cloud of steam). Continue to bake for another 20 to 25 minutes, until the crust is a deep golden brown.

When the loaf is done, turn it out onto a wire rack to cool.

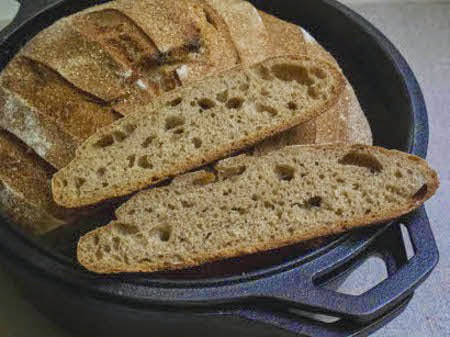
Cool completely, then slice, and enjoy!  


Happy Baking!

Cathy

Thursday 19 June 2014

Got Sourdough … Make Crackers

When it’s time to feed your wild-yeast starter, what do you do with the discarded sourdough?  By discarded, I’m referring to the cup of starter you’re supposed to pour out before you feed it to reduce the acidic level and keep the organisms alive and kicking.

Do you throw the excess sourdough in the trash or wash it down the sink?  Does the thought of wasting all of that flour (and your energy) make you uncomfortable? 

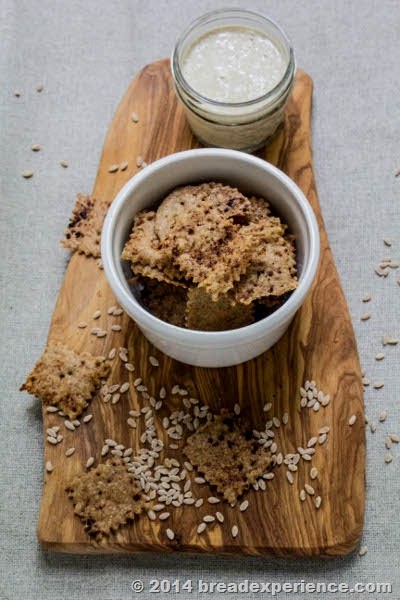
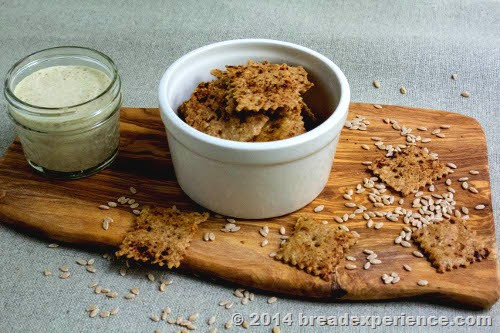
Sourdough Einkorn Chili Crackers

I always had a hard time throwing out half of my starter when it was time to feed it. So I’ve tried different methods for using it up instead of pouring it out.

One weekend, I made six loaves just to keep from wasting it. I took the discarded sourdough, placed it in a separate container and fed it, along with the starter I planned to keep. I ended up with a double batch of fed sourdough starter and more loaves than I knew what to do with.

Needless to say, that was an effort in futility. If you need six loaves of bread, that’s one thing, but I didn’t. My freezer thanked me and so did my friend who likes sourdough bread, but even sourdough lovers can grow tired of a good thing.

I finally found a solution that I really enjoy. Making crackers.

Making sourdough crackers has become one of my favorite ways to use discarded starter because it’s so easy and pretty much failsafe.

You can use any type of starter and almost any combination of flours and toppings for the crackers. You can also vary the type of fat used. Sometimes I use coconut oil and other times I use olive oil.  You can even use butter.

I have different sourdough starters for each type of flour that I bake with. At the moment, I have an Einkorn starter, a KAMUT starter, a rye starter, and two white starters – my original starter which is made from a recipe from Boudin Bakery and my apple starter which is made from hazy apples. I keep all of my starters in the refrigerator and feed them as if they were my pets. Well, actually, they are my pets.

When it’s time to feed them, I have a good bit of discarded starter, but now I don’t dread throwing it out. I actually look forward to feeding my starters because I know I get to make (and eat) some crackers.

Sourdough Chili Crackes with Einkorn


Sourdough Einkorn Chili Crackers

These are not your average crackers. They are healthy crackers that don’t contain any preservatives. The sourdough ferments the dough for several hours which makes them more easily digestible than crackers made without sourdough.

This batch has a hint of chili powder sprinkled on top to give the crackers some added flavor. You can add extra chili powder if you like more heat.

Ingredients:

  • 1 cup fed sourdough starter * (I used this Einkorn starter)
  • 1/4 cup coconut oil
  • 1 – 1 1/4 cups all-purpose Einkorn flour **
  • 1/2 teaspoon Sea salt
  • Chili powder, too taste, for sprinkling on top

* This recipe works with discarded sourdough or recently fed sourdough. For the best results, let the starter warm up to room temperature before mixing with the oil so that the oil doesn’t harden and make the dough clumpy.

** Depending on the hydration level of your starter, you may need to add more flour.

Directions:

1) In a medium bowl, combine the sourdough starter and coconut oil. Add a cup flour, the Sea salt and herbs and mix thoroughly. Add as much additional flour as needed to make a dough that is workable, but not dry.

2) Cover the dough with plastic wrap or a lid to keep it from drying out and let it rest at room temperature for at least 7 hours.

Refrigerate Overnight: Another option is to let the dough rest on the counter for a few hours, then place it in the refrigerator overnight, or until you are ready to bake. It will keep in the refrigerator for a couple of days. The dough will harden a little in the refrigerator so when you’re ready to bake the crackers, let it warm up a bit before rolling. If it’s hot in your kitchen, don’t let it warm up too much or it will be too sticky to roll out.

3) Divide the dough into 2 pieces and place each ball on a greased or floured piece of parchment paper, or a nonstick baking mat.

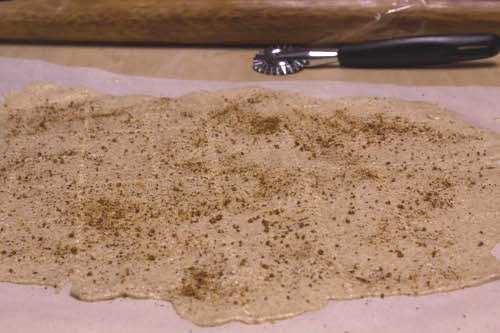
4) Roll the dough out very thinly on the parchment paper. Brush or spray with olive oil and sprinkle with chili powder, to taste. 

5) Cut the dough into squares or diamonds using a pizza cutter.  I used a pastry wheel to cut the jagged edges.

einkorn-chili-crackers-3-1

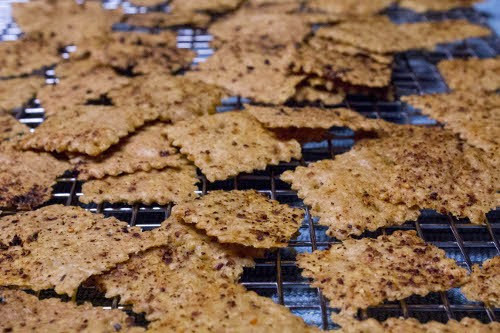
6) Preheat the oven to 350 degrees F. Place one baking sheet (of crackers) on the middle shelf of the oven and the other one on the bottom shelf. Bake the crackers for about 5-7 minutes, then rotate the baking sheets top-to-bottom and front-to-back for even baking. Bake for a total of 12-15 minutes, or until golden brown.

7) Transfer the crackers to a wire rack. They will shrink in the oven and break apart fairly easily. 

For crispy crackers: Let the crackers cool down completely in the oven. If you want to do this in an electric oven, leave the door slightly ajar so the crackers don’t continue baking (and burn) while the oven is cooling down. 

Sourdough Einkorn Chili Crackers


Next time you feed your sourdough starter, don’t throw out the excess starter; make crackers with it. You’ll wonder why you never tried this before.


Happy Baking!

Cathy
Monday 16 June 2014

Burgundy Grape Cluster Bread

The Bread of the Month for the Bread Baking Babes is Beaujolais Bread from A Passion for Bread by Lionel Vatinet.

Beaujolais Bread

Beaujolais is a red wine from the Beaujolais Region of France. Beaujolais is part of what’s considered the Burgundy wine region, but instead of using Pinot Noir grapes like the rest of the region, Beaujolais is made from the fruity Gamay grape.

Every year, on the third Thursday in November, at one past midnight, over a million cases of Beaujolais Nouveau are shipped around the world. This event marks the first fruits of the harvest of Beaujolais Nouveau.

These wines are barely given time to ferment so they are easy-to-drink, fruity wines that are as close to white wine as you can get. The wines go well with food, especially ham and cheese and even Thanksgiving fare (the event falls close to Thanksgiving in the U.S.)

In his book, Lionel shares how he spent his youth surrounded by a vineyard at his grandparents’ lovely stone house near the Rhone region of France. He created Beaujolais Bread, which is shaped like a grape cluster and filled with salami, to pay homage to the first grape harvest of the year.

To celebrate the release of Beaujolais Nouveau each year, Lionel recommends that you serve this bread and invite guests to pull off a “grape” to enjoy with their glass of wine.


Burgundy “Grape Cluster” Bread

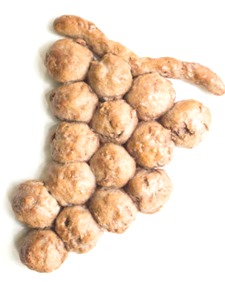
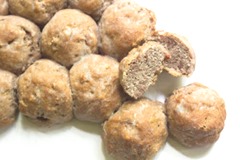
Beaujolais BreadI called my version Burgundy Grape Cluster Bread because I used Pinot Noir instead of Beaujolais. I couldn’t find any Beaujolais. The Pinot Noir was described as “lush and velvety” so I pictured a lush and velvety, burgundy-colored dough.


Adapted from A Passion for Bread by Lionel Vatinet

Makes: 1 large cluster of rolls

Ingredient Volume Weight Baker’s %
Home-milled white whole wheat flour* ~3 1/2 cups 550 grams, sifted = 452 grams 100%
Fine Sea salt 1 1/2 teaspoon 9 grams 2 %
Instant yeast 1 1/4 teaspoon 4 grams 1 %
Honey 1 tablespoon 21 grams 5%
Beaujolais Wine 1 1/4 cups, plus 2 tbsps. 320 grams 71%
Salami, room temperature, cut into 1/4 cubes ~1 cup 113 grams 25%

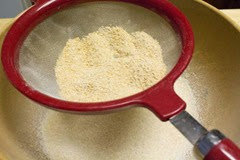
* I used 82% extraction flour. Extraction means the bran and germ are extracted from the whole grain flour to get to a lighter flour that is closer to the coarseness of regular bread flour. To do this, I milled white whole wheat berries into bread flour, then I took 550 grams and sifted it twice using a sieve. I ended up with 452 grams of flour.

Beaujolais-Bread-5-1


Mixing the Dough:

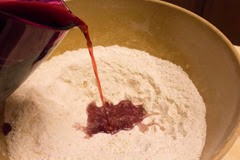
Mix together the flour, salt & yeast in a large bowl. Add in the honey and incorporate into the dry ingredients using your hands or a Danish dough whisk. Make a well in the center of the dough and gradually add in the wine, in a slow, steady stream. 

Beaujolais-Bread-6-1

Rotate the bowl as you add in the wine and mix the dough using your other hand. It might seem like you need three hands for this but it comes together fairly easily. Use a dough scraper to scrape the dough off your fingers and to gather all of the ingredients into a dough.  It will be slightly wet and sticky.

Transfer the dough to a clean work surface. The dough will be sticky, but resist the temptation to add flour to the work surface or the dough.

Lionel’s method for kneading wet dough:

He always says, “Your hands are your memory!”  If you use a stand mixer, you won’t know how the dough feels. You need to pay attention to how it feels as it comes together.

Hold hands, palms facing up, at opposite sides of the dough mass. Slide your fingers under the dough and lift the dough an inch or so from the surface. Squeeze your thumbs and index fingers together to form a tight OK sign through the dough.

While holding the OK sign, continue to curl thumbs and index fingers tightly together to pinch off a portion of dough. Working as quickly and smoothly as possible, moving the dough mass in approximately 1 to 1.5 inch increments, until the entire dough mass has been worked through. You should begin to feel the dough coming together.

Turn dough a quarter turn and continue lifting, pinching and turning until it begins to take on an identifiable shape and becomes less and less sticky; taking anywhere from 5 to 15 minutes.  Resist the urge to add flour. A scraper is useful in collecting all the dough off the work area. Consider the dough kneaded when it forms into a ball. The dough should be soft, pliable and hold it’s shape; it should not be stiff and dry.

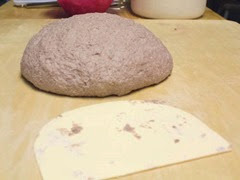
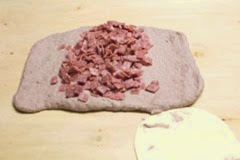
Form dough into ball: using both hands, lift front and fold over, quickly dropping it down to the counter. Repeat 4-5 times until a ball is formed. Use the scraper to ensure all the dough is gathered. Using the palms of your hands, flatten the dough ball into a rectangle. Scatter the salami evenly down the middle. Wrap the sides up and over salami, pinch dough together, turn and repeat until the salami is incorporated.

Form into a ball. Again lifting from the front, fold it over onto itself in one movement then dropping down onto the counter. Repeat 4 to 5 times until ball forms. Using your scraper to be sure all the dough is gathered. The dough should no longer be sticky. If it continues to be sticky repeat the folding process until it is no longer sticky.


Beaujolais-Bread-9-1 Beaujolais-Bread-9-2
Beaujolais-Bread-9-3 Beaujolais-Bread-9-6

Bulk Fermentation

Due to the addition of the wine, the fermentation time is extended to three hours.

Place the dough, seam side down in a large container and cover with plastic wrap. He recommends that you can use a glass container so you can watch the dough will its rising.

Let the dough ferment in a warm, draft-free place for 1 hour.

Dust your work surface lightly with flour. Remove the dough from the container and place it onto floured surface. Pat it into a thick square using your fingers. Lift the two right corners and fold into the center patting the seam lightly. Lift the left two corners and fold into the center lightly patting the seam down. Repeat with the top two corners and the bottom two corners meeting in the middle patting down the seams.

Return the dough to the bowl seam side down, cover and return to a warm draft free place for about an hour. Repeat this process one more time. Total Time: three hours.

Dividing

Scrape the dough onto the counter and allow to rest 30 seconds.

If the dough is very sticky at this point dust your hands with flour but do not add additional flour. Use the bench scraper to lift the dough if it sticks to the counter but do not pull and do not stretch the dough. Press the dough into a rectangle 12 inches x 5 inches. Be sure the dough is not sticking to the counter by lifting it to gently up. Cut the dough into 16 equal pieces with the bench scraper.

Shaping

Line a baking sheet with parchment paper or a silicone liner.

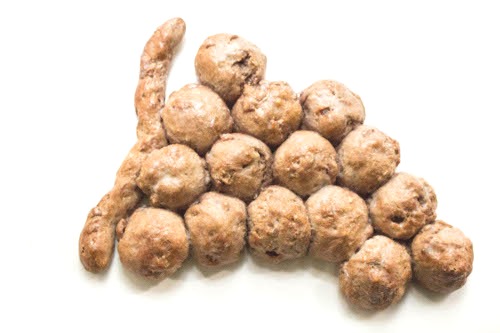
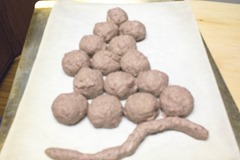
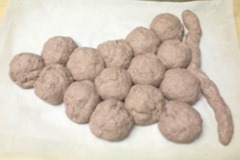
Roll 15 pieces into a small ball shape for rolls, the last piece will become the grapevine. Create a triangle by setting four balls together in a line followed by a line of three balls then two balls and finally one ball. Angle the remaining four balls to one side of the triangle so that the entire piece resembles a large cluster of grapes with the smaller one to the side.

With the last piece of dough roll it into a rope about 10 inches long and shape it into a curved grape vine shape that you attach to the top of the grape cluster. Dust with flour.


Beaujolais-Bread-9-7 Beaujolais-Bread-9-9

Final fermentation

Final fermentation may take anywhere from 60 to 90 minutes. Set the timer so that you can record the time it takes for the final fermentation. If the dough over proofs, it will be unusable.

Place the baking sheet in a warm, draft free place. Determine if the dough is ready to be baked by uncovering and making a small indentation in the center of the role with your fingertip. The dough is ready to be baked if the indentation slowly and evenly disappears.


Baking

Prepare the oven for hearth baking by placing a baking stone on the bottom rack and a iron skillet on the top rack of the oven. 

Preheat the oven to 450 degrees F. for at least 20 minutes.

Carefully slide the parchment paper (with the rolls on it) onto the pre-heated baking stone and remove the baking sheet. Place three to four ice cubes in the iron skillet to generate steam.

Bake until the bread is golden brown and has a thick crust. The total bake time should be about 25 to 30 minutes.

Transfer the cluster to a cooling rack for at least one hour to cool.

Beaujolais Bread


Thanks to Tanna for choosing this beautiful bread for our bake this month.


Check out how the other creative Babes handled the dough:

The Bread Baking Babes (current dozen) are:

Would you like to be a Bread Baking Buddy? Just make the Beaujolais Bread and then send Tanna your link  (refer to the info in her announcement post).  Submissions are due by June 29th.  Once you've posted, you'll receive a Buddy badge for baking along.

I hope you will join us!

Happy Baking!

Cathy
Tuesday 10 June 2014

Baking Einkorn Bread in a Hot Kitchen

I’ve been working with einkorn flour for a couple of years, and as with every other type of grain I’ve experimented with, I’ve had some successes and some flops. It takes a little while to get used to how the grain works, especially when compared to regular bread flour, but that’s part of the fun.

Einkorn Sandwich Loaf


The “Baking with Einkorn” workshop I attended a couple of weeks ago helped me understand more about the nuances of the flour. So after I got home, I couldn’t wait to begin testing this grain again.

Armed with some new tips and techniques, I set out to bake bread. I wanted to jump right in and start converting some of my favorite recipes now that I have a better idea of how to do that, but I opted to make a tested Einkorn bread recipe instead.

Start with the Classic Einkorn Sandwich Loaf

I started with a Classic Einkorn Sandwich Bread using the recipe printed on the bag of all-purpose Einkorn flour (also listed on the Jovial Foods’ site).

I was still getting over jet lag when I started this experiment so I forgot about the adjustments that need to be made when you’re baking in a hot kitchen. It’s 78 degrees F. in my Atlanta kitchen (with the air on and the oven off) so all bets are off when making bread, even if the recipe has been tested.

The first time I made it, I had to add a good bit more water than the recipe called for. I also reduced the yeast a bit, but I kept the amounts of other ingredients the same. The flavor of the bread was good, but the texture was too hard and chewy. Due to the excessive heat (and my foggy brain), the loaf was over proofed. It also didn’t have enough salt, in my opinion.

I baked the loaf at the suggested temperature of 375 degrees F. That temperature was too hot, especially in a ceramic loaf pan. The loaf turned out a bit chewy and harder than I expected. However, it made for a good grilled cheese sandwich. So although the loaf wasn’t optimal, it didn’t go to waste.


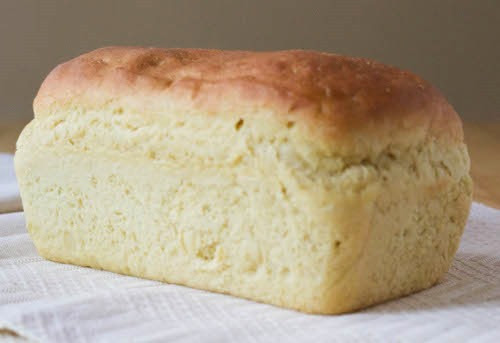
einkorn-sandwich-loaf-14-1This loaf rose too much, was a bit chewy & dry, but still edible


Make Adjustments for Baking in a Hot Kitchen

The second time I attempted this bread, I made several adjustments based on the issues I found with the first loaf. I ended up using more water than the original formula, but not as much as I did for the first loaf. I also reduced the yeast by half and increased the salt to help keep the dough from rising to fast and too much in the heat. I kept the flour ratio and the amount of honey the same for both loaves.

Einkorn is very extensible so the dough came together really easily. However, the gluten structure is weaker so it doesn’t benefit from a long mix like you would with regular bread flour.

This time, I paid careful attention to the bulk fermentation period and the final proof so the loaf didn’t overproof. As a result, this loaf turned out much better. It rose beautifully, but not too much. The extra salt helped with the texture and the flavor. The texture was soft and fluffy like sandwich bread is supposed to be and the flavor was good.

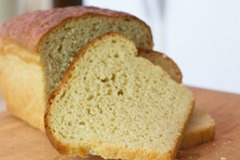
Einkorn Sandwich LoafThis is the version I really liked


Einkorn Sandwich Loaf (in a hot kitchen)

I have not tested this particular recipe in milder weather yet, but this is version that worked for me in my hot kitchen during the summer.

Adapted from: Classic Einkorn Sandwich Loaf by Jovial Foods

Ingredients:

  • 4 cups (480 grams) all-purpose einkorn flour
  • 1 teaspoon (3.5 grams) instant yeast
  • 1 1/2 teaspoons (8.5 grams) sea salt
  • 1 1/8 cups (260 grams) water, lukewarm
  • 1 tablespoon (14 grams) honey

Method:

Whisk together the flour, salt and yeast in a large mixing bowl.

Mix the warm water and honey in a separate container and stir to dissolve.

Add the water/honey mixture to the flour mixture and mix, using your hands or a Danish dough whisk, until there are no dry bits of flour. Add in additional water if necessary.

Transfer the dough to a lightly-floured work surface and knead gently until smooth.

Place the dough in a large, clean mixing bowl and let it rise at room temperature for 45 minutes to an hour.

When the dough has doubled in bulk, remove it from the bowl to a lightly-floured work surface and shape into a loaf. 

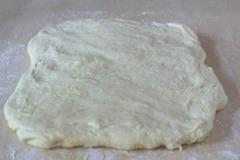
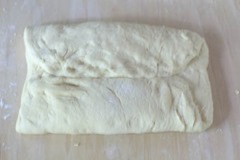
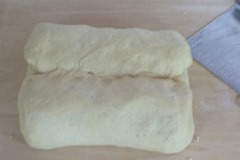
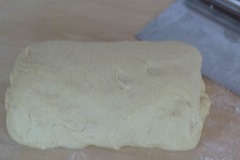
To shape the loaf, press the dough out into a rough rectangle, then fold the bottom and top edges in like a letter, pressing the seams closed so they don’t pop open during the proof cycle. Fold the left and right edges in toward the center; then fold it up again so the seam is enclosed in the center of the dough. Flip the loaf over and roll it gently back and forth on the work surface to elongate it to fit the loaf pan. Use a bench scraper to keep the dough from sticking to the work surface.

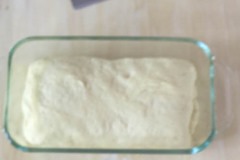
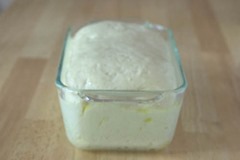
Place the loaf in a greased 8” x 4” loaf pan and cover with plastic. Let the loaf rise at room temperature for 30 minutes or until the loaf crests slightly over the top of the pan.

einkorn-sandwich-loaf-17-2 einkorn-sandwich-loaf-17-3
einkorn-sandwich-loaf-17-4 einkorn-sandwich-loaf-17-5
einkorn-sandwich-loaf-17-6 einkorn-sandwich-loaf-13-8


Bake the loaf for 35-40 minutes in a preheated oven at 350 degrees F. for nonstick pans and 325 degrees F. for glass loaf pans.

Remove the loaf from the oven, and if using glass pans, allow the loaf to rest in the pan for 10 minutes. Then remove the loaf to a wire rack to cool completely before slicing and serving.

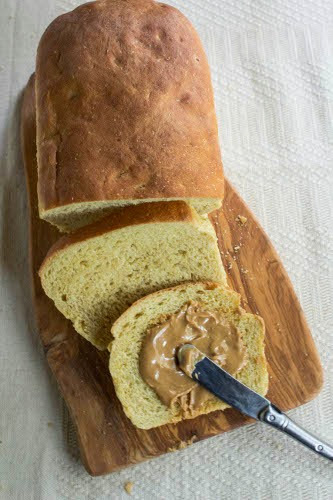
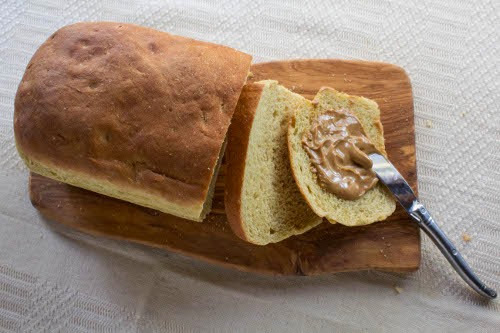
Einkorn Sandwich Loaf with Peanut Butter


I enjoyed slices of this bread with butter and with peanut butter, my favorite taste test for sandwich loaves.  It passed both taste tests.

Happy Baking!

Cathy
 

Saturday 7 June 2014
My Journey with Einkorn in the Hills of Tuscany

I’ve fallen in love with the ancient grain Einkorn so I jumped at the chance to attend a workshop to learn more about baking with it. The event was hosted by Jovial Foods, and the setting was a beautiful villa nestled in the hills of Tuscany.

Einkorn in Tuscany Einkorn in Tuscany

I wanted to get more practice making different types of bread using Einkorn, and what better way to learn than to go to the source, the source of the wheat, that is. 

Jovial Foods is the main grower of Einkorn wheat. Currently, their wheat is only grown in Tuscany. They also produce Einkorn pasta products and olive oil from ancient olive trees as well as gluten-free products.

Carla (one of the partners and our host at the workshop) has recreated almost all types of breads using Einkorn. This interested me because that’s what I’ve been trying to do.  I got to learn from her trials and errors.

I have a lot more experimenting to do, but while I was there, I had the opportunity to immerse myself in the beauty and history of Tuscany and learn more about this ancient grain.


Making Pasta with Einkorn

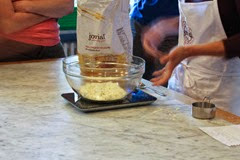
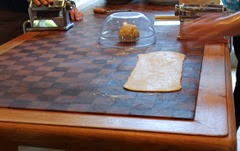
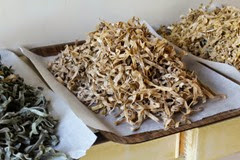
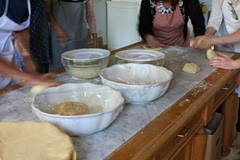
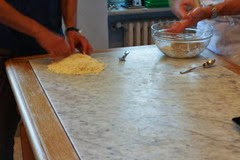
The first evening, we learned how to make pasta. The owner of the factory that produces Einkorn pasta showed us how to mix the dough and run it through the pasta machine to produce long sheets of pasta. The long sheets were placed on the table to dry, then run through the machine again to cut the dough into the appropriate shaped noodles.  Then the noodles were placed on the table to dry until it was time to boil them for dinner.

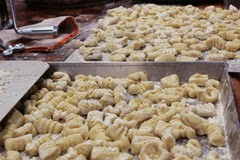
We made regular egg noodles, whole wheat noodles, Swiss chard pasta, and potato gnocchi; all with Einkorn flour. I had never made pasta before. I was amazed at how easy and fun it was to prepare. Of course, it always looks easy when someone else is showing you how to do it, but now that I’ve seen how to do it, I’m going to take the plunge and try it myself.

The gnocchi was soft, like a light and feathery marshmallow that you could flick across the room. I was pleasantly surprised to find out that forming the grooves in the gnocchi didn’t require any special tools. We just pressed a piece of gnocchi dough down with our fingers and slid it across the tines of a fork. Then we gently flicked the piece of dough onto a baking sheet.

We worked late into the night making the pasta and gnocchi and enjoying the fellowship of new friends. When we finally sat down to eat, I was too tired to take any photos of the finished pasta and sauces, but trust me, it was good.

Making pasta with Einkorn Making pasta with Einkorn


Eating and Loafing Around

The next day, we learned how to create different types of loaves using Einkorn. We prepared the dough for sandwich bread, whole wheat bread, ciabatta, and no knead bread.

As we were mixing the dough for each type of loaf, Carla (our host) would give us tips and insight into the nuances of each bread. I watched, listened, participated and soaked up as much knowledge as I could.

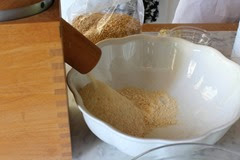
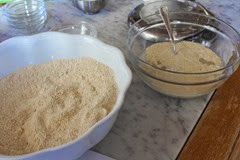
I volunteered to work on the whole wheat dough so I could use their European grain mill to grind the grains into flour. After grinding the Einkorn berries into flour, it was time to mix the dough in one of their beautiful ceramic bowls. When the mixing was complete, we covered all of the bowls and left the dough to bulk ferment. 

Once the bulk fermentation was complete, Carla demonstrated how to shape the loaves, then the loaves went through the final proof and were baked and left to cool.

Carla is working on a cookbook of Einkorn breads so these loaves were used in the photo shoots. There was so much going on that I didn’t get photos of all of the loaves, but I did get a shot of the Ciabatta and the crusty no-knead boule.

After the photo shoots were finished each day, we got to taste test the breads. In addition to the loaves we prepared, Carla also made muffins, Tuscan bread, bagels, crackers and a few coffee cakes, among other things. All of the breads and cakes I tasted were great!  

Making Einkorn Bread in Tuscany Making Einkorn Bread in Tuscany


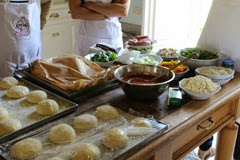
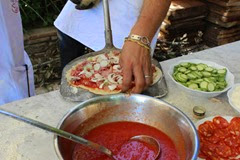
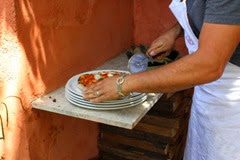
Baking Pizza in the Food-Fired Oven

I love Pizza so my favorite session was making the pizza dough and baking it in the wood-fired oven.

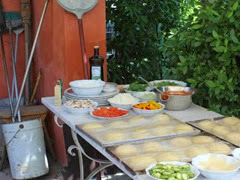
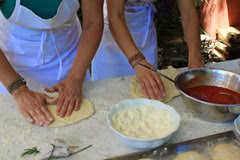
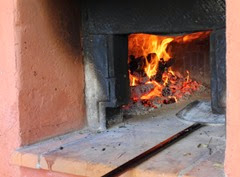
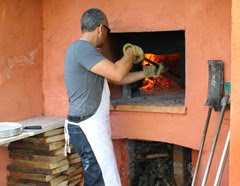
After we made the pizza balls in the kitchen, we took everything outside to the brick oven. Each of us prepared our own pizza using the toppings of our choice. Then Clay (29Villa San Lorenzo) would bake the pizza quickly in the wood-fired oven.

I made a marguerita-style pizza. It seemed only fitting since I was in Italy. I forgot to take a photo of it, but it sure tasted good.

I’ve always wanted to learn how to use a wood-fired oven. However, after seeing how it’s done, I think I’ll wait a little while longer before I try it myself.  I’m not sure my recovering tennis-elbow arm is strong enough yet to handle the long paddle (or the fire) without getting burned. For now, I’ll stick to pizza-on-the-grill or on the baking stone.

It was interesting to watch Clay handle the wood-fired oven. He’s a pro at it. In fact, I heard it through the grapevine that he has a pizza cookbook coming out soon. He’s also a renowned photographer and took all of the photos for Carla’s Einkorn Bread Book which will be coming out next year.  I don’t know the titles of either book but look for them soon.

Making Einkorn Pizza in Tuscany Making Einkorn Pizza in Tuscany


Spending time in Tuscany was a great way to recharge and recalibrate. The fact that I also got to learn more about baking with Einkorn was icing on the cake. It was a delightful and informative learning experience. I plan to do a lot more experimenting now that I have some more insight into how to work with Einkorn.

Happy Baking!

Cathy