Wednesday 30 April 2014

Rustic White, Rye & Spelt Sourdough

The term rustic can mean different things to different people.

When it is used to describe bread, it generally refers to a loaf made with different types and coarseness of flours.

Whole grain flours, such as whole wheat and rye, are typically added to give breads a rustic appeal because they provide more substance and flavor and a coarser texture than breads made completely with white flour.

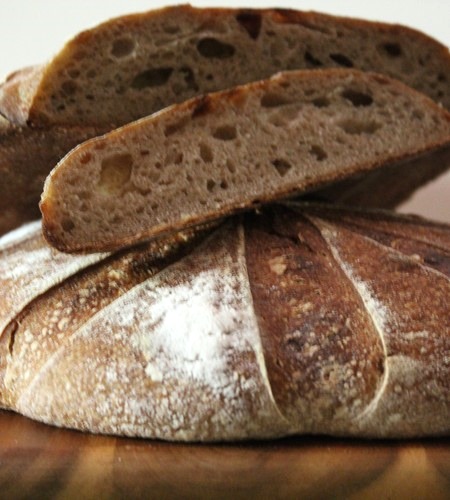
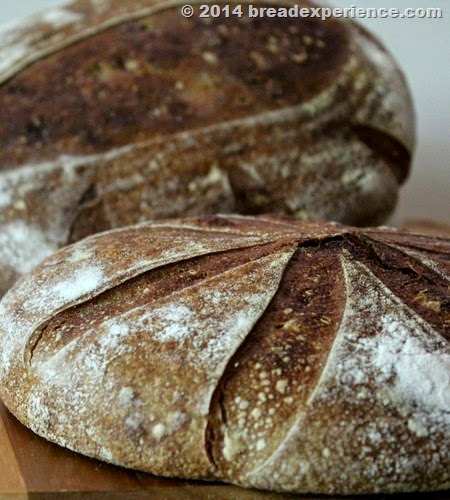
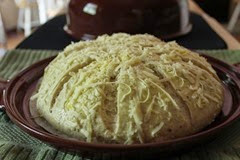
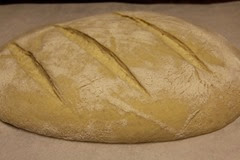
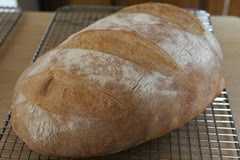
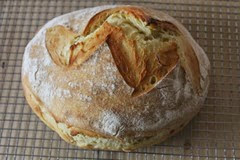
Rustic White, Rye & Spelt Sourdough baked in a La Cloche

Rustic can also be used in a more lenient way as I learned recently when I attended a workshop with Master Baker, Lionel Vatinet, at the Asheville Bread Festival in Asheville, NC.

Lionel is the owner of La Farm Bakery in Cary, NC, and the author of A Passion for Bread. During the workshop, he taught us how to shape different types of loaves using the same ciabatta dough. His teaching style is very funny and engaging and you can tell he really does have a passion for bread.

As he was shaping the loaves, he would give us tips and antidotes on bread baking. When one of the loaves ended up a little lopsided, he joked and said, “If you ever make a loaf that’s not quite the shape you intended, don’t get mad at yourself or discard the bread as a failure, just tell everyone it’s a rustic bread and it’s supposed to look that way.”

I like that approach. It’s very thoughtful and forgiving. I’m sure I’ll find plenty of opportunities to use “rustic” to describe my not-so-perfect breads.


Rustic White, Rye & Spelt Sourdough baked in a La Cloche


Rustic White, Rye & Spelt Sourdough Bread

Makes: 2 large loaves

Adapted from the April Bread of the Month (BOM) for the Artisan Bread Bakers FB group.

My version is made with all-purpose flour, rye and Spelt and includes a little bit of olive oil. The original formula included a long fermentation process, but I extended it even further by retarding the shaped loaves in the refrigerator for two days instead of one. I also baked these loaves in my La Cloche rather than a Dutch oven.

I started the levain Friday evening; mixed the dough on Saturday; shaped the loaves Saturday night; and placed them in the refrigerator to retard overnight. I didn’t have time to bake the loaves on Sunday so I let them stay in the refrigerator another day. I baked the loaves on Monday afternoon, but I didn’t try them until Tuesday afternoon.


Day 1

  • Unbleached All Purpose Flour 150 grams
  • Whole Grain Spelt (or Whole Wheat) 50 grams*
  • Rye 50 grams*
  • 80 degrees F. water 200 grams + 1/4 cup
  • Refreshed Starter 50 grams

* I used home-milled flour

In the Evening
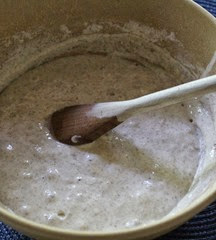
Combine the above ingredients; allow to sit overnight at room temp.


rustic-white-rye-spelt_102

Day 2

  • 80 degrees F. water 700 grams
  • Unbleached All Purpose Flour 700 grams
  • Rye 200 grams
  • Whole Wheat 100 grams
  • Salt 20 grams
  • Olive Oil 2 T, optional
  • Build from the previous day

In the Afternoon

Add the water and olive oil (if using) to the build and mix well, Then add the flours. Combine the ingredients with a wooden spoon or dough whisk till roughly incorporated.

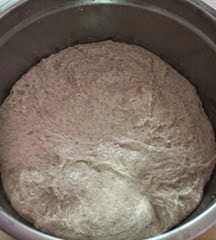
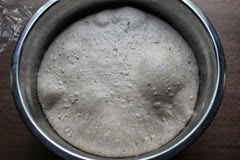
Let the dough rest for 20-30 minutes. Then add the salt. Allow to sit at room temp for 30 minutes. Perform the stretch and fold four times, then allow the dough to sit for 30 minutes. Perform this stretch and fold cycle every 30 minutes for the next 2 hours.

rustic-white-rye-spelt_104

In the Evening

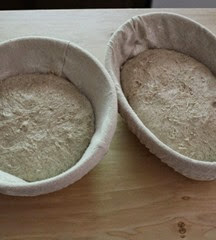
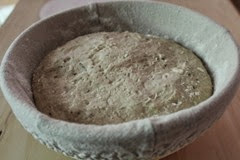
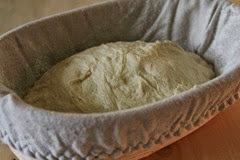
After the four stretch and fold cycles and when the dough has doubled, form into two Boule’s, {develop a taught skin on the boules} place these into rice/wheat floured willow brotforms. This is a fairly wet dough, but it does really well in the bannetons. I shaped my dough into one round boule and one oval loaf. Cover and allow for an hour rise. Place the baskets in the refrigerator over night. As I mentioned, I let the loaves ferment in the refrigerator for two days. The baked loaves didn’t have as much oven spring, but the flavor was wonderful.

rustic-white-rye-spelt_110

Preheat your oven to 500 degrees F. with a Dutch oven, combo cooker or La Cloche on the bottom rack. I hadn’t used my La Cloche in a while so I got it out for this bread. It was interesting to bake an oval loaf in the round bottom, but it worked.

The Next Day or On Bake Day

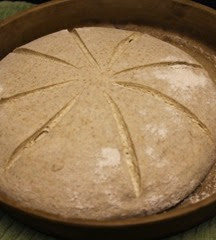
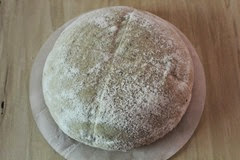
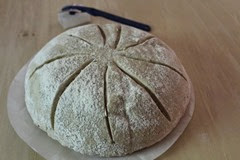
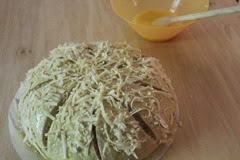
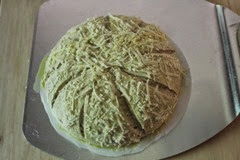
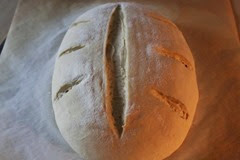
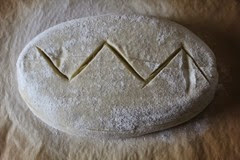
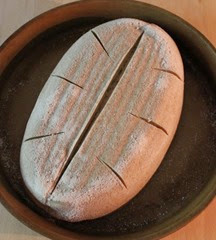
Take the loaves straight from the refrigerator, and place one into the bottom of the La Cloche sprinkled with corn meal or you can use a Dutch oven if you prefer.  Score the loaf in the pattern of your choice. Since these loaves had been retarding in the refrigerator, it was really easy to score them. I used a straight edged lame and got creative with the scoring.
rustic-white-rye-spelt_112 rustic-white-rye-spelt_120


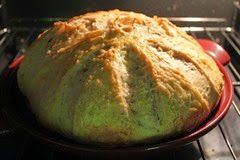
Reduce the oven temperature to 475 degrees F. and bake for 30 minutes at 475. Remove the top of the cloche or Dutch oven and bake an additional 10 minutes at 450 degrees.  The loaf should be deeply browned and crusty, but not burned.

Repeat the process with the other loaf.  Let the cloche preheat again before carefully placing the second loaf in the bottom.

Remove the loaves to a wire rack to cool completely before slicing and serving.

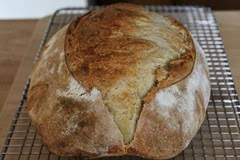
Rustic White, Rye & Spelt Sourdough baked in a La Cloche


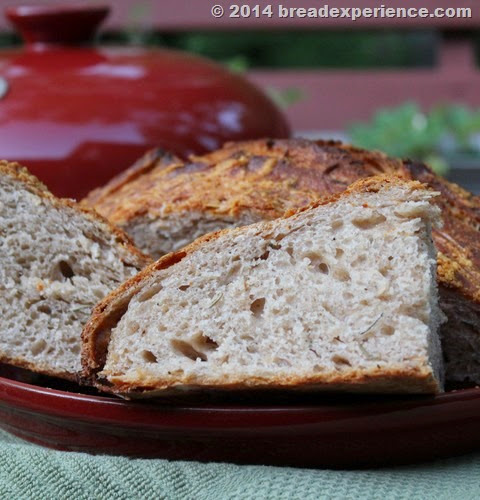
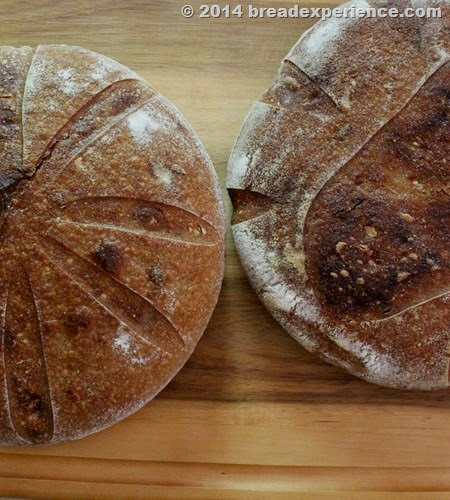
This bread has a unique character. It is chewy, slightly tangy and goes well with cheese and meats. It’s rustic inside and out.

Thanks to David Durr for sharing his formula for Rustic White, Rye & Wheat.

Notes from David:

  • As far as scoring, it has been my experience that with the higher hydration dough’s I get a greater oven spring when I don’t score. Try one with and one with out, then compare.
  • You can substitute Einkorn or Spelt for the whole wheat. For part or all of the unbleached all purpose, you can substitute extra fancy Durham. Feel free to use what you have on hand.


Happy Baking!

Cathy
Sunday 27 April 2014

Sourdough Asiago Rosemary Spelt Bread

The fragrant aroma of rosemary used to greet me every time I walked out my front door and down the walkway. Until this past winter that is, when my huge rosemary bush bit the dust.

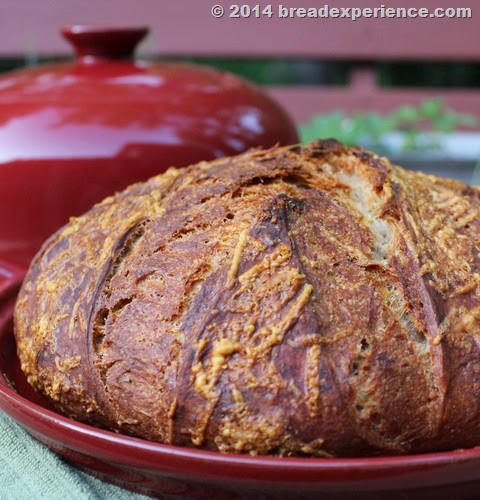
Sourdough Asiago Rosemary Spelt Bread baked in Emile Henry Bread Cloche

The rosemary bush grew beside the rose bush which is right next to the driveway. It started out as a little plant, but kept growing and multiplying until it got huge. I had to prune it and dry the herbs frequently so it didn’t take over the front walkway.

Whenever I baked bread or made a dish that called for fresh rosemary, it was so convenient to just walk out the front door and cut a few springs. The plant had faired well the past several years, but this winter was just too much for it. It froze and never came back to life. I had to let it go. (Sad face)

I miss my rosemary bush so I just bought a new plant. This time, I’m going to plant it in my herb garden so it has plenty of room to grow without my neighbors wondering what has taken over my front walk. The herbs in my raised bed are doing very well so I think the rosemary plant will like it there.

rosemary-plant_103 rosemary-plant_104

Now I’ll have to walk around the corner to cut a sprig or two, but it’ll be nice to go for a walk in the garden even if that garden is just a few raised beds.


Sourdough Asiago Rosemary & Pepper Bread made with Spelt

Adapted from: Asiago Rosemary Pepper Bread from April 2014 edition of Coastal Living Magazine and Rosemary Bread from Classic Sourdoughs by Ed Wood and Jean Wood

Makes: 1 large loaf

I enjoy using rosemary in breads because it enhances the flavor, especially when paired with olive oil.  Ever since we made the Potato and Rosemary Bread in the BBA Challenge, I’ve had a fondness for breads flavored with rosemary.

This bread is infused with flavor due to the fresh rosemary, but it also includes cracked black pepper and Asiago cheese. I super charged it further by making it with sourdough instead of dried yeast.

The dough is filled with cheese and herbs on the inside and sprinkled with more cheese on the outside. This gives it a crispy and cheesy crust and a fluffy crumb.  It tastes great plain or used as a sponge for dipping in olive oil.

Sourdough Asiago Rosemary Spelt Bread baked in Emile Henry Bread Cloche


Ingredients:

  • 2 cups sourdough starter, 100% hydration, recently fed
  • 1/2 cup warm water (105° to 110°) *
  • 1/4 cup extra virgin olive oil
  • 2 cups white Spelt flour, more for sprinkling if necessary
  • 1 cup whole grain Spelt flour
  • 1-2 tablespoons chopped fresh rosemary
  • 1 tablespoon cracked black pepper
  • 1 teaspoon sea salt
  • 1 1/2 cups (6 ounces) shredded Asiago cheese, divided
  • 1 large egg, lightly beaten

* If you use regular bread flour instead of Spelt, you may need to increase the amount of water used, but add it gradually, 1 tablespoon at a time.

Procedure:

Day 1 Morning: Feed your Sourdough Culture

Refer to this post on how to activate a starter or feed your starter according to your feeding schedule.  Just make sure it’s 100% hydration.

Day 1 Evening: Mix the Dough/Bulk Ferment

Combine the active sourdough starter, warm water, and olive oil in a large bowl. Mix with a wooden spoon to break up the starter. 

Stir in the flours and next 3 ingredients until a soft dough forms. Turn dough out onto a lightly floured surface. Knead in 1 cup cheese; knead 5 minutes or until smooth and elastic.

Shape dough into a ball, and place in a lightly greased bowl, turning to grease top. Cover with plastic wrap and let it proof overnight at room temperature, about 70 degrees F. The loaf should double in size during the bulk ferment.

sourdough-asiago-rosemary-pepper-bread_103

Day 3 Morning: Shape & Retard Loaf in Refrigerator

Ease the dough out of the bowl onto a floured working surface. Let it rest for 30 minutes, then shape the dough into a round loaf and place it in a lined or unlined floured banneton basket. Place the basket in the refrigerator to retard for at least 5 hours. I did this in the morning and baked the loaf in the afternoon.

sourdough-asiago-rosemary-pepper-bread_107

Day 3 Afternoon: Score and Bake the Loaf

Preheat the oven to 450 degrees F. for at least 30 minutes with the Emile Henry Bread Cloche on the bottom rack.

Remove the loaf from the refrigerator and gently flip it onto a round piece of parchment paper cut to fit the bottom of the bread cloche. 

Score the loaf using the pattern of your choice. Make 3 or 4 (1/4 inch wide) slices into top of loaf. The dough is really easy to score after it’s been retarded in the refrigerator.

Combine the egg and 1 tablespoon water and brush on top of dough. Sprinkle the loaf with the remaining 1/2 cup cheese.

Carefully remove the bread cloche from the oven and gently slide the loaf (on the parchment paper) onto the preheated cloche base.  I used a pizza peel to do this.

Bake covered with bread cloche dome lid, 30 minutes, then remove the lid and continue baking for 10 to 15 minutes longer, or until loaf sounds hollow when tapped.  Let it cool completely on a wire rack.


sourdough-asiago-rosemary-pepper-bread_109 sourdough-asiago-rosemary-pepper-bread_111
sourdough-asiago-rosemary-pepper-bread_114 sourdough-asiago-rosemary-pepper-bread_120
sourdough-asiago-rosemary-pepper-bread_122 sourdough-asiago-rosemary-pepper-bread_123


This sourdough bread is a cheesy and rosemary delight.  Because of the oven spring, the loaf took over the base of the cloche.

Happy Baking!

Cathy


Sunday 20 April 2014

Sourdough Hot Cross Buns

The monthly challenge for the Sourdough Surprises Baking Group is Hot Cross Buns. As it happens, the 20th of the month (the day we normally post our breads) falls on Easter. And, my youngest son is celebrating his birthday this week. So I made these Sourdough Hot Cross Buns to commemorate both occasions.

Sourdough Hot Cross Buns


I combined the ingredients from two different recipes and came up with my own method for making these delicious buns. I utilized the sponge method from Jeffrey Hammelman’s Hot Cross Buns, but instead of using dried yeast, I added 1/2 cup sourdough starter.

I wanted to take these rolls with me when I visited my son for his birthday so I added an overnight fermentation to the final dough. This allowed me to prepare the dough the evening before and bake the buns the next morning.

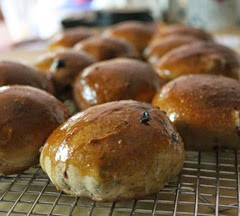
I used icing for the crosses instead of paste because I wanted something sweet to round out the tangy flavor of the candied orange peel and the honey/orange glaze. These Hot Cross Buns turned out to be a very special treat for Easter and a Birthday.

I was able to bake the rolls, glaze and ice them, and let them cool completely before wrapping them up for transport. I wrapped them in aluminum foil to keep the slightly sticky orange glaze from making a complete mess.

Sourdough Hot Cross Buns


Sourdough Hot Cross Buns

Makes: 12 Buns

Adapted from: Bread: A Baker’s Book of Techniques and Recipes by Jeffrey Hamelman and Sourdough Hot Cross Buns by Kresha of Nourishing Joy

Sponge:

  • 1/2 cup active (fed) sourdough starter
  • 1/2 cup milk
  • 1/4 cup all-purpose flour
  • 1/2 tablespoon raw sugar

Dough:

  • 2 3/4 cups all-purpose flour, extra for sprinkling
  • 1/2 teaspoon cardamom
  • 1 teaspoon cinnamon
  • 1/2 teaspoon nutmeg
  • 1/8 teaspoon ground cloves
  • 1/4 teaspoon ground allspice
  • 1 egg
  • 1/8 cup raw honey
  • 3 tablespoons milk
  • 3/4 cup currants or raisins (soak in boiling water for 10 minutes, drain)
  • 1/2 teaspoon sea salt
  • 1/4 cup candied orange peel, finely chopped and packed
  • 4 tablespoons unsalted butter, softened

Crossing Paste:

I used store-bought icing to make the crosses on top of these buns. If you prefer to make a flour crossing paste, refer to the ingredients/directions in this Hot Cross Buns recipe. Or refer to Kresha’s method.

Glaze:

  • 1 T Honey
  • Juice of 1 orange


Prepare the Sponge:

Combine the sourdough starter, milk, all-purpose flour and sugar and mix just until smooth. It will be very thin. The desired temperature is 80 degrees F. Cover the sponge with plastic wrap and let it stand for 1-2 hours. It should be light and bubbly, but it should have some structure.

sourdough-hot-cross-buns_101


Mixing the Dough:

Place the sourdough starter, flour, and spices in a large bowl. Lightly beat the eggs with the raw honey and milk, then add to the sourdough/flour mixture. Mix until completely combined and a very sticky dough has formed. Cover and let sit for 20 minutes.

Sprinkle the salt over the dough.  Knead until the dough begins to look smooth and shiny. The dough will be a rather wet dough, but try not to add any flour at this point. Keep kneading until the dough is developed, then knead in the dried fruit and candied orange peel. I used the bowl scraper to help with this process.  It keeps the dough from sticking to your fingers and keeps the bowl clean.

Add in the butter, a little at a time. Knead until all the butter is fully incorporated. The final dough should be very soft, but not at all sticky. If it’s too sticky at this point, add a little extra flour.

Let the dough sit for 1 hour. After an hour, fold it over on itself a number of times on a floured board or in the bowl, then place it back in the bowl and let it rise another hour. After two hours, you can continue with the shaping below, or place it in the refrigerator to retard overnight. This is what I did.

sourdough-hot-cross-buns_106


If you retarded the dough overnight, take it out of the refrigerator and let it warm up to room temperature (1 –2 hours) before proceeding to dividing and shaping.

Dividing and Shaping:

Divide dough into 12 pieces and shape into a small round balls about 2.7 ounces each. Place the rolls on a greased sheet pan in an even configuration. Cover with plastic wrap to keep crust from developing on the surface. Let them rise at room temperature 1-2 hours. If you retard your rolls in the refrigerator, they probably won’t double in size during the final rise, but they should have pretty good oven spring once they are baked.

sourdough-hot-cross-buns_123

Baking/Glazing the Buns:

As I mentioned, I used icing to make the crosses. I baked the buns, then glazed them with the honey/orange glaze while they were hot. Once the glaze had dried, I piped on the icing.

If you prefer to make a flour crossing paste, follow the directions in this Hot Cross Buns recipe.  Or refer to Kresha’s method. You’ll want to pipe on either one of these pastes before you bake the buns.

Bake the rolls in a 375 degree Fahrenheit oven for 20-30 minutes until the rolls are golden and at least 190 degrees inside.

For the glaze, heat the honey and the orange juice over medium heat until it begins to simmer rapidly. Remove from the heat and brush the glaze over the rolls as soon as they are removed from the oven.

sourdough-hot-cross-buns_125 sourdough-hot-cross-buns_135


This was another great sourdough surprise.


Happy Baking!

Cathy


Check this awesome lineup from the Sourdough Surprises Baking Group: 


Wednesday 16 April 2014

Make these Pretzel Croissants and Smile

I adore soft pretzels and when you pair them with flaky, buttery croissants, what’s not to like about that? 

When I found out we were making pretzel croissants for the Bread Baking Babes, I knew it was going to be good. The problem for me was the timing. I reviewed the directions and wasn’t sure if I could fit these rolls in my schedule. I had to do a bit of planning to make it work, but I’m happy to say I figured it out and it was well worth it!  These pretzel croissants are a flaky, crispy and buttery delight!

Pretzel Croissants made with KAMUT


It’s best to read the instructions all the way through (a couple of times) before you even begin to think about making these croissants. And make sure you’re not rushed or in a grumpy mood when you start. You’ll save yourself a lot of frustration.

I was fussy and grumpy when I started the process of making these croissants. As a result, the dough and I were not in agreement. The dough would not cooperate. I finally realized (or admitted) it was me that wasn’t cooperating. So I took a step back, and told myself to “Smile! Stop complaining and just enjoy the experience.” Once I did that, things went much smoother. Remember, it’s all about the dough. So just relax and work with it not against it.

Pretzel Croissants made with KAMUT


It takes a few days to make these pretzel croissants, but it is worth it when you bite into one of the crispy, buttery rolls. You’ll be transported into another zone and forget all about the time you spent planning.

I was able to fit these delights in my schedule because the dough can be frozen for up to a week. I made the dough one weekend and baked the croissants the next weekend.

If you want to extend the enjoyment like I did, bake half the croissants one day, refrigerate the remaining dough (wrapped in plastic to keep it from drying out), and bake the rest of the rolls the next day. I actually waited two days to bake the remaining rolls so I could share them with a friend and not eat them all myself. Both batches tasted great! My taste tester enjoyed them as much as I did.


Pretzel Croissants made with kamut

yield: 1 dozen

slightly adapted from Pretzel Making at Home by Andrea Slonecker

Note about timing: The dough takes from 24-48 hours from start to the time you form them. The butter block should be formed sometime while the dough is rising. Baked baking soda is an alternative to using lye; it needs 1 hour in the oven (see notes at end).

For the dough:
1/2 cup (120 ml) lukewarm milk (~110° F)
7 g (1/4 ounce / 2-1/4 teaspoons) active dry yeast
3 tablespoons firmly packed brown sugar (golden or dark)
410 g (3-1/4 cups) unbleached AP flour + more for sprinkling
(I used white KAMUT flour instead of all-purpose flour)
2 tsp. fine sea salt 1 ounce (2 T) unsalted butter, cubed, at room temp
1/2 cup (120 ml) cold pilsner-style beer*

*I used water instead of beer. KAMUT flour absorbs more liquid than regular flour so I used 3/4 cups + 2 T of water 

For the butter block:
340 g (12 ounces / 24 tablespoons) cold unsalted butter
2 tablespoons unbleached all-purpose flour

To finish:
60 grams (1/4 cup) baked baking soda (see notes at end)
1 egg yolk beaten with 1 tablespoon milk
coarse salt
sesame seeds and/or poppy seeds, optional

Making the dough:

Stir the yeast and 1 tablespoon of the brown sugar into the lukewarm milk and allow to sit  until foamy, 5 minutes or so.

Whisk the flour, remaining brown sugar, and salt in a large bowl. Use your fingertips to rub the butter into the flour mixture, breaking it up into tiny flour-coated pieces the size of breadcrumbs. Stir in the yeast mixture and the beer using a wooden spoon or rubber spatula to form a shaggy mass.

Turn the dough out onto an unfloured work surface and knead eight to ten times, until all of the flour is just incorporated. You don't want to over work it, because you don't want the butter to melt too much. The dough will not be a smooth mass; you will see some flecks of butter. It should be soft and tacky, but not sticky. Adjust as needed with flour or water.

Place the dough in a large, clean bowl. You can oil the bowl before placing the dough in it, but I found it wasn’t necessary because of the butter in the dough. Cover with plastic wrap. Place in refrigerator for 8 to 24 hours (24 will give you the best flavor).

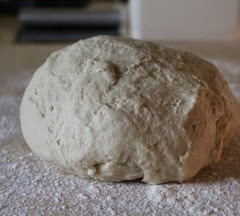
pretzel-croissants_207


Making the butter block:
Beat the butter and flour together in the bowl of a stand mixer, using the paddle attachment until it forms a smooth mass (or by hand, using a lot of elbow grease). This should take about a minute. You want the butter to be pliable without beating air into it or melting it.

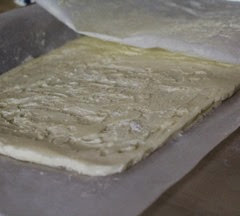
Spread the butter between 2 large sheets of plastic wrap (or parchment or wax paper), and use a rolling pin to shape into a rectangle that is about 8"x9". Use a straight edge to form corners, but work quickly as you want the butter to stay cool. Wrap in plastic and refrigerate until you're ready to roll out the dough.

pretzel-croissants_213

1st turn:
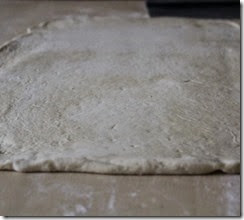
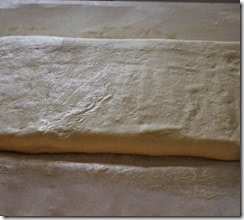
Scatter a little bit of flour on your work surface, then turn the dough out onto it. Roll it out into a rectangle that is 10"x15" and about 1/4" thick. Using your hands, gently pull and stretch the dough to form straight edges and sharp corners. Brush excess flour off of the dough. Set the dough with a long edge facing you.
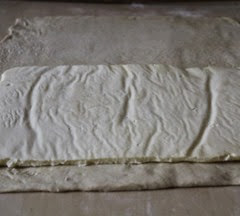
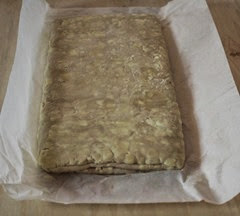
Mentally divide the dough into 3 equal portions. Place the butter block over the right 2/3 of the dough, leaving a 1" border on the outer edges. Fold the empty left portion of the dough over the middle third. Now, lift and fold the right section of dough over that. You should have 3 layers of dough that encase 2 layers of butter. Pinch the outsides and the seams together and lightly press the layers together using a rolling pin. This completes the first turn. Wrap in plastic and refrigerate for 1 hour.

2nd turn:
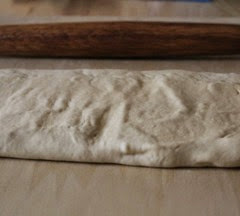
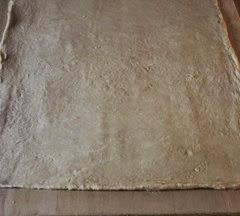
Remove the dough from the fridge and set it on your lightly floured work surface. Roll dough out into a 10"x20" rectangle, pulling and stretching to form straight edges and sharp corners. Brush off any excess flour. Set the dough with a long edge facing you. Fold both of the short ends in to the center, leaving a 1/4" gap where they meet (think of a book jacket). Fold one side of the dough over the other. Lightly press the layers together using a rolling pin, and square and sharpen the edges and corners. This completes the second turn. Wrap in plastic and refrigerate for 1 hour.

3rd (and final) turn:
Lightly dust your work surface and the top of the dough with flour. Roll dough out into a 10" by 15" rectangle. Do another trifold, as done in the first turn (mentally divide into thirds, then fold one third over the center, followed by the last third). Square the edges and sharpen the sides; wipe off excess flour. Wrap in plastic and refrigerate for at least 2 hours, but up to another 24 hours.

(At this point, you can wrap the dough tightly in plastic wrap, slide it into a freezer baggie, and freeze for up to 1 week. Defrost overnight in the refrigerator before proceeding to final shaping.) This is what I did.

pretzel-croissants_208 pretzel-croissants_211
pretzel-croissants_217 pretzel-croissants_220
pretzel-croissants_221 pretzel-croissants_224

Final shaping:
Line two rimmed baking sheets with parchment paper and set aside.
Lightly dust your work surface and top of your dough with flour. Roll out into a 15"x18" rectangle that is ~1/4" thick. Pull and stretch to form straight edges and sharp corners. Patch any holes where butter may have popped through by dusting them with flour.  Brush any excess flour off the dough.

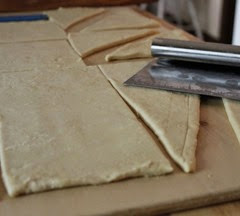
Cut the rectangle in half lengthwise, creating two 15"x9" sheets of dough. Using a pizza cutter or bench scraper, cut each piece of dough into three equal strips, the short way. Then cut each strip in half diagonally, so that you left with 6 triangles. Repeat with other piece of dough.

Beginning at the base, roll the triangles up, tugging on the tip to elongate it slightly, then gently pressing it into the dough. Place on the prepared baking sheets with the tips tucked under, and curve the ends to form crescent shapes.
Cover the croissants with damp, clean kitchen towels and allow to rise at cool room temperature until they have almost doubled in size and feel spongy, ~2 hours.

At this point, slide the croissants into the refrigerator for 20 minutes while you prepare the dipping solution. Preheat oven to 425° F, positioning one rack in the upper third of the oven, and one in the lower third.

Prepare the dipping solution:
Add the baked baking soda in 8 cups of cold water and stir until completely dissolved. One by one, dip the croissant dough into the dipping solution, allow the excess to drip off, then set back on the lined trays.

Finish them off (finally):
Brush the tops with the egg wash, then sprinkle with coarse salt and sesame seeds or poppy seeds, if using.

Slide into preheated oven immediately and bake for 14-18 minutes (rotating pans from front to back and top to bottom halfway through), until they are deeply browned, crispy, and flaky. They should feel light and airy if you pick them up.
Transfer to a wire rack to cool for 10 minutes before serving. They are best enjoyed the day they are made, ideally warm from the oven. Store any extras in a paper bag for a day. You can reheat them by placing them in a 350° F oven for ~5 minutes.

pretzel-croissants_232 pretzel-croissants_236
pretzel-croissants_239 pretzel-croissants_241
pretzel-croissants_244 pretzel-croissants_247
pretzel-croissants_252 pretzel-croissants_261


Notes:
Baked baking soda is an alternative to working with lye that still lends pretzels their dark, burnished crust. To make the baked baking soda, spread 1/4 cup (~70 grams) of baking soda out on a baking tray lined with parchment paper or foil (or in a pie pan). It will decrease in weight, but shouldn't decrease in volume. Slide it into an oven that has been preheated to 250° F/120° C and bake for 1 hour. Cool completely, then store in an airtight container at room temperature. If you see lots of pretzels in your future, make a large batch to store since it keeps indefinitely.

Pretzel Croissants made with KAMUT

Remember to smile while you’re making these. You’ll be rewarded. They are fabulous!

Thanks to Heather of girlichef for choosing these rolls as the monthly challenge for the Bread Baking Babes.

The Bread Baking Babes (current dozen) are:


If you want to join in as a Bread Baking Buddy, just make the Pretzel Croissants (you may adapt) - and then email Heather your link at girlichef (at) yahoo (dot) comSubmissions are due by April 29th.  Once you've posted, you'll receive a Buddy badge for baking along, then watch for a roundup of all of the BBBuddies posts a few days after the close of submissions.


Happy Baking! 

Cathy
Sunday 13 April 2014
A Sourdough Bread for all Seasons and Flours

I set out to make the sourdough sandwich bread that was featured in the Artisan Bread Bakers Facebook group. One of the bakers shared her recipe for a kid-friendly sourdough with a soft crust.  This sounded like a wonderful recipe so I decided to make it immediately.

Somewhere along the way, I got the inspiration to try this formula using three different types of flours. It was a rewarding experiment.

Soft Crust Sourdough


I made three different loaves: one using regular all-purpose flour, another using all-purpose Spelt flour and the other using white KAMUT flour.

I followed the same formula but made slight adjustments to the hydration due to the absorption characteristics of each flour. 

Each loaf is shaped into a batard shape, but scored differently. Each loaf is unique in flavor and texture due to the characteristics of the different types of flour and the scoring method used.

Crumb shot of Soft Crust Sourdough


I call this a sourdough bread for all seasons and flours because it can be made with different types of flours, but it can also be baked as a soft crust sourdough sandwich loaf in a loaf pan (or freeform) to please picky kids or adults or if you prefer a chewy crust, bake it freeform on the baking stone at a higher temperature and reduce the bake time.


Sourdough Bread for all seasons

Adapted from Kid Friendly Soft Crust Sourdough by Nancy Winkelmann

Makes: 1 Loaf

Leaven: This bread uses a 166% hydration starter. Refresh the starter as follows:

In the evening combine:

All-purpose or Bread Flour Spelt Flour KAMUT Flour
1/8 cup starter 1/8 cup Spelt starter 1/8 cup KAMUT starter
7/8 cup water 3/4 cup water 1 cup water
7/8 cup AP or Bread flour 7/8 cup Spelt flour 7/8 cup KAMUT flour
1/2 tablespoon rye flour 1/2 tablespoon rye flour 1/2 tablespoon rye flour

Cover and leave the leaven at room temperature until it is bubbly, active, and passes the float test (8-12 hours). 

It took my all-purpose and Spelt leavens about 14-16 hours to ripen, but it only took the KAMUT leaven 8 hours. I fed all of the starters before I began this process, but the all-purpose and Spelt starters hadn’t been fed for a few weeks before being fed. The KAMUT starter had been fed and used recently so the leaven ripened much quicker.

Formula:

260g refreshed starter (all of above)
108g water (75F) *
88g milk (75F) *
15g honey
8g coconut oil, melted (or vegetable oil)
1 small egg, beaten
465g flour (Bread flour, AP flour, all-purpose Spelt, or white KAMUT)
15g sea salt (after autolyse)

* I used the same amount of liquid in the final dough for each version. 

Water absorption of the three different flours compared to bread flour: 

  • All-purpose flour: The original formula utilizes bread flour. I used all-purpose flour so I had to add a little more flour during mixing to keep it from being too sticky. I used the same amount of water in the levain as you would for bread flour.
  • Spelt flour:  Spelt doesn’t absorb water as well as bread flour so I reduced the amount of liquid in the levain and added a bit more flour to the final dough.
  • KAMUT flour: KAMUT absorbs water better than bread flour so I increased the amount of water in the levain and reduced the amount of flour used in the final dough by 30g. 


Mix and Autolyse: Measure your starter into a large bowl, and set aside. In a separate bowl, combine all the wet ingredients (water, milk, honey, coconut oil, and egg). Pour wet ingredients into starter, and stir to combine. Add flour to the wet mixture, and stir or mix until no dry bits remain. Cover bowl and autolyse for 20 minutes.

After autolyse, add salt, and work into dough using pinch/stretch/fold (if mixing by hand), or by mixer. If using a mixer, mix about 2 minutes. If kneading by hand, turn out onto surface and knead, stretch/fold until smooth (about 5 minutes). Dough is easy to work with, and not overly sticky.

Bulk Ferment: Place dough in a large oiled bowl, cover and bulk ferment about 4 hours, performing 2 stretch/folds during the first 90 minutes. Dough will increase by more than half, and become pillowy.

Turn out dough onto lightly floured surface, shape into a rough round and bench rest 10 minutes.

soft-crust-sourdough_107 soft-crust-sourdough_111


Shaping: Shape dough gently without degassing. These loaves do really well shaped in the batard shape. Or you can shape them into a regular loaf shape and bake in a loaf pan. See variation at the bottom of the post for directions. 

Place the loaf seam side up in flour-dusted, linen-lined basket or banneton.

soft-crust-sourdough_112

Final Proof:  This loaf can be baked the same day, or retarded overnight in the fridge. (You can do this for up to 2 days and still got good results). If you are making two loaves instead of one, you can stagger your baking over two days, rather than baking two loaves at once.

I baked the Spelt loaf the same day, but retarded the all-purpose and the KAMUT loaves overnight. I got good oven spring with all three loaves.

If baking the same day, continue to prove dough (covered) at room temperature for an additional 2-3 hrs. If retarding, this can be baked directly from the fridge, or proofed on the counter for 30-60 minutes.

Preheat oven to 400F with baking stone (at least 30 minutes). Sprinkle semolina on your peel or place the proofed loaf on parchment paper.  If you aren’t using parchment paper, a little flour on the bottom of your loaf helps prevent the dough from sticking to the peel, and lets it slide right onto the baking stone cleanly.

Score Loaf: Invert loaf onto parchment paper and score. As I mentioned, I tried three different scoring methods. I used 3 slashes on the Spelt loaf (first loaf below). I slashed the all-purpose flour-loaf directly down the center (middle photos) and added some slashes along the sides. For the KAMUT loaf (third set of photos below), I used a zig zag scoring method using a straight-edge lame. Each scoring method produced a unique loaf.

soft-crust-sourdough_115 soft-crust-sourdough_207
soft-crust-sourdough_123 soft-crust-sourdough_202
soft-crust-sourdough_144 soft-crust-sourdough_212


Baking: Slide the loaf (on the parchment paper) onto the preheated baking stone, spritz with water (using a spray bottle), and immediately close the door. Bake 20 minutes.

You can cover the loaf with a roasting pan during the first 20 minutes, then remove and follow the directions below. I didn’t use a roasting pan. I just baked the loaf uncovered on the baking stone the entire time. It didn’t take my loaf 40 minutes to bake so adjust the time accordingly.

After 20 minutes, reduce oven to 350F. Bake an additional 20-25 minutes, rotating once for even browning. The bread will have a pale blonde crust.

Cool completely on wire rack. Store bread in plastic bag for soft crust.

Soft Crust Sourdough

Variation: This bread can also be made in loaf pans. Bake uncovered (in the loaf pan without the baking stone) at 350F for 40 minutes. After baking, brush top of hot loaf with butter, if desired.

Thanks to Nancy for sharing her recipe for this wonderful soft crust sourdough.


Happy Baking!

Cathy