Tuesday 26 February 2013

Frosted Cinnamon Rolls for Launch

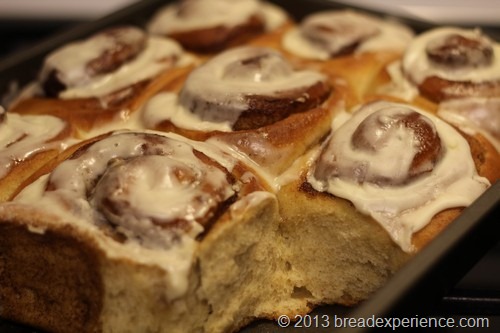
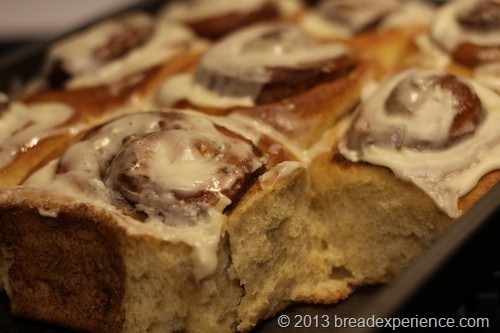
The theme for this month’s Twelve Loaves is “share whatever bread you’d like so I chose cinnamon rolls. Cinnamon Rolls are comfort food at their finest. I try not to indulge in sweet rolls or sweet breads too often, but every once in awhile, it’s nice to treat yourself. 

I had a project launch this past weekend so I made these cinnamon buns as my reward for having to work over the weekend. After focusing intently with my head down for several hours on Saturday, it was nice to take a break and enjoy one of these delicious sweet rolls.

cinnamon-rolls009

Did you know?  Sticky buns (also known as cinnamon rolls) are ancient foods that most likely originated in Northern Europe. These delicious buns definitely owe some of their heritage to English cooking and baking. According to Elizabeth David in English Bread and Yeast Cookery, the Chelsea bun was a “sugary, spicy, sticky, square that was coiled like a Swiss Roll”.  She also states that these rolls are “a pretty hefty proposition.”   Source: Food Timeline

These sweet rolls do not include any honey, currants or raisins so they don’t qualify as Chelsea Buns. However, they would definitely be considered a hefty proposition because they are made with a mixture of white bread flour and home-milled whole-wheat flour and they are plenty big. They are rolled out, spread with melted butter and sprinkled with a brown sugar/cinnamon mixture, then coiled, and sliced before the final proofing.  Finally, they are baked to a golden brown perfection, and slathered with a cream cheese and powdered sugar frosting.  Are you hungry yet?


Cinnamon Rolls with cream cheese frosting

Makes: 12 Large Rolls

Adapted from: Homemade Bread from the Editors of Hobby Farm Home Magazine

Ingredients:

Dough:

  • 1 cup warm almond milk (105 – 115 degrees F.)
  • 2 1/4 teaspoons (1 package) active dry yeast
  • 1/2 cup raw sugar
  • 2 eggs
  • 1/3 cup butter, melted
  • 1 teaspoon salt
  • 3 1/2 cups bread flour, plus more for dusting
  • 1 cup whole wheat flour

Filling:

  • 1/3 cup butter, softened
  • 1/2 cup brown sugar, packed
  • 1 1/2 tablespoons ground cinnamon

Frosting:

  • 4 ounces cream cheese
  • 2 tablespoons butter
  • 1 1/2 cups powdered sugar
  • 1 teaspoon vanilla
  • 1 tablespoons almond milk


Directions:

Lightly butter a 9x13 baking pan and set aside.

1) Mix the Dough

Mix the yeast and warm water in a small bowl and let it stand until it is foamy, about 10 minutes.

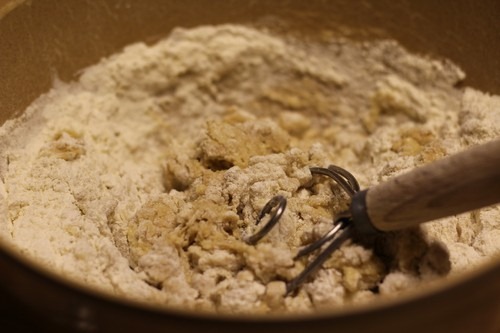
Combine the butter, eggs, sugar and salt in a large bowl, then add the yeast mixture and bread flour and mix until it is thoroughly combined and a dough starts to form.

cinnamon-rolls01


2) Knead the Dough

Transfer the dough to a lightly floured surface and knead until it is soft and pliable, about 10 minutes. 


3) Bulk Fermentation

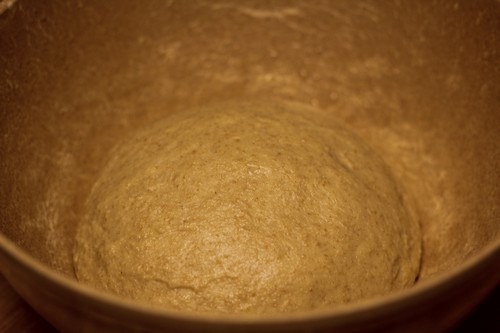
Place the dough in a lightly greased bowl and turn to fully coat it with oil.  Cover it with a kitchen towel or plastic wrap and place in the oven with the light on to proof for one hour, or until the dough doubles in volume.

cinnamon-rolls03


4) Prepare the Filling

In a small bowl, combine the brown sugar and cinnamon and set aside.


5) Shape the Buns

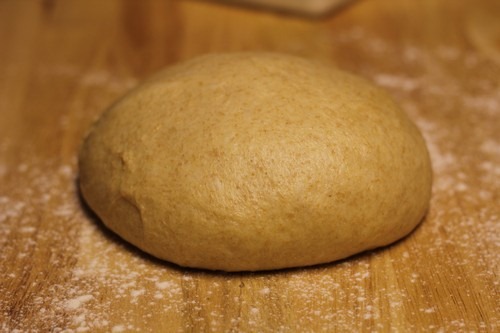
Turn the dough out onto a lightly floured surface.

cinnamon-rolls08


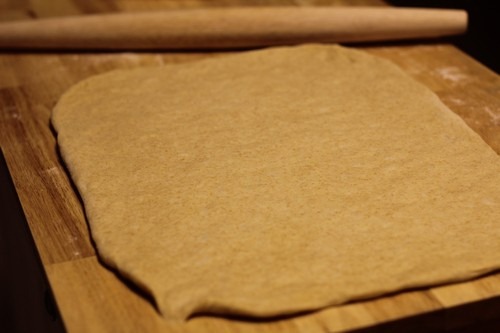
Roll the dough into a rectangle, about 16”x12”. 

cinnamon-rolls11


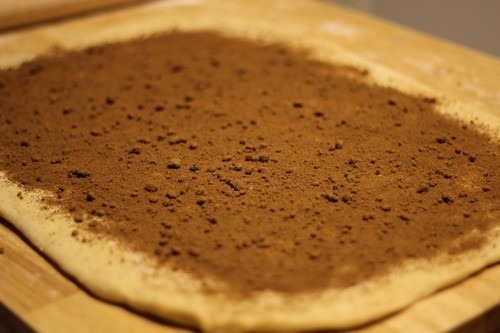
Spread the softened butter on the dough and sprinkle the cinnamon-sugar mixture over the top.  As you can see, I had some clumps in my brown sugar.  It didn’t matter once it was baked though.

cinnamon-rolls13


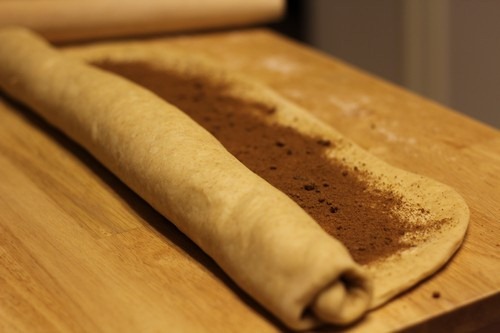
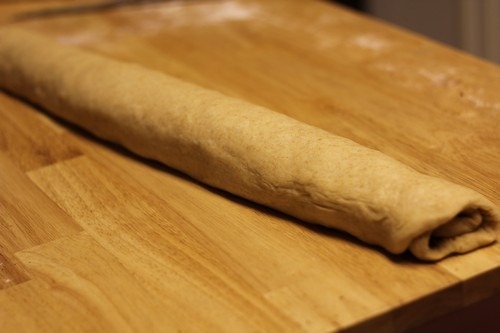
Roll the dough up into a log lengthwise like a jelly roll.

cinnamon-rolls15

cinnamon-rolls16


Cut the log into 12 pieces, about 1 3/4 inches thick each.  Place the buns in the buttered baking pan.

cinnamon-rolls18


6) Proof the Buns

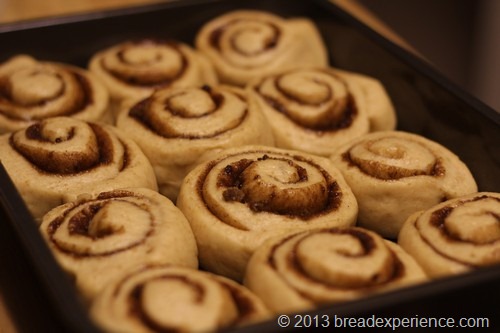
Cover the buns with a kitchen towel or plastic wrap and let them rise for 30 minutes or until they are nearly doubled in size.  I think mine rose a bit too much.

cinnamon-rolls22


7) Bake the Cinnamon Rolls

Preheat the oven to 350 degrees F.  Bake the rolls for 20 to 25 minutes or until golden brown.

While the rolls are baking, make the frosting by combining the cream cheese, butter, powdered sugar, vanilla and milk in a medium bowl.  Mix until smooth. I did this with my small Danish dough whisk, but if your cream cheese and butter aren’t soft enough, you might need to use a mixer for this part.


8) Frost and Enjoy the Buns

When the rolls are finished baking, spoon or spread the frosting over the tops and enjoy them warm.  I used a knife for this part because the frosting is thick.

cinnamon-rolls007


I made these Friday night and they tasted great warmed over on Saturday and for several days in a row.  They have a great flavor and texture. 

Happy Baking!

Cathy
 

TWELVE LOAVES_thumb

Wednesday 20 February 2013

Pita of the Desert Surprise

The Sourdough Surprise for February is Flatbread. Sourdough Surprises is a fun monthly baking group who strive to use their sourdough starters for things other than bread (although they do a lot of that too!)

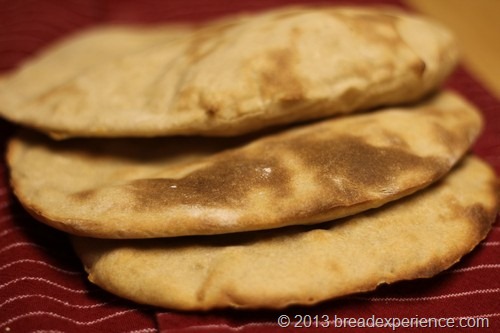
The Middle East is where sourdough was birthed many generations ago so it seemed fitting to make sourdough pita. Khubz Arabi or “Arab Bread” is a soft, round flatbread. It is also known as “Pita of the Desert.” I made my version with a spelt levain and white spelt flour. An ancient grain for an ancient bread.

This pita bread has a delicious sourdough flavor. We were supposed to make a flatbread that you cook on a griddle or stovetop; however, this pita is baked in the oven. It takes a couple of days to make from start-to-finish, including the time it takes to activate the culture and make the culture proof, but it is worth it.

Khubz_Arabi033


Khubz Arabi: Pita of the Desert

Makes: 4 Flatbreads

Adapted from: Classic Sourdoughs by Ed and Jean Wood

Ingredients:

  • 1 cup sourdough culture (refer to process below)
  • 1/2 cup water
  • 1/2 teaspoon salt
  • 1/2 tablespoon oil
  • 2 1/4 cups white Spelt flour


Directions:

1) Create the Culture Proof

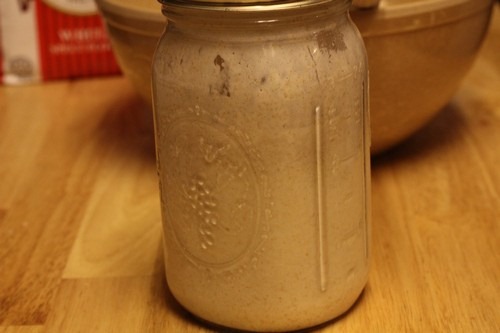
Begin by activating the culture and creating the culture proof. Then use the culture to make this pita bread. 

Khubz_Arabi002


2) Mixing the Dough

Place the cup of culture in a mixing bowl and add the water, salt, and oil and mix well.  Add the flour a cup at a time until a soft dough forms.  I used a Danish dough whisk for this part.  Turn the dough out onto a floured surface and knead in enough flour until the dough is soft and pliable.  My dough was a little sticky but I didn’t want to add too much flour.  It has a long fermentation time so I figured this would give it time to develop the gluten structure.

Khubz_Arabi004


3) Bulk Fermentation

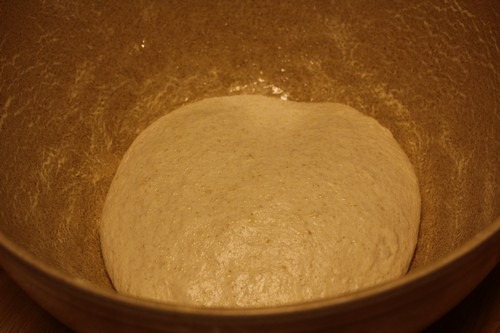
Place the dough in a large bowl and cover with plastic wrap. Proof the dough for 8 to 12 hours at room temperature, about 70 degrees F.


4) Shaping the Pita

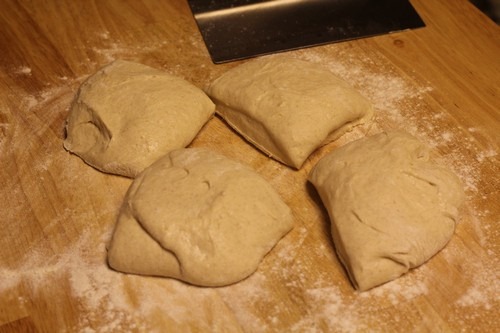
Gently remove the dough from the bowl to a floured surface.  Be careful not to deflate the dough too much. Divide the dough into 4 equal balls.

Khubz_Arabi007


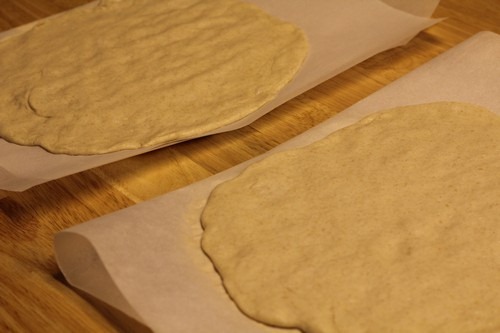
Roll the balls into flat rounds about 1/4-inch thick.  I placed the rounds on greased parchment paper so they wouldn’t stick too much.  Then I stacked them and placed them in a proofer box and proofed them at 85 degrees F. for 30 minutes.

Khubz_Arabi008


When I removed the rounds from the proofer, a couple of them stuck together so I had to reshape them. The rounds that I reshaped baked (and puffed up) better than the ones that had proofed for 30 minutes in the proofer so I’m thinking the proofing box may not be necessary. I think adding a little more flour to the rounds before shaping and letting them proof for 15 to 20 minutes at a warm room temperature on the counter would suffice.


5) Baking the Pita

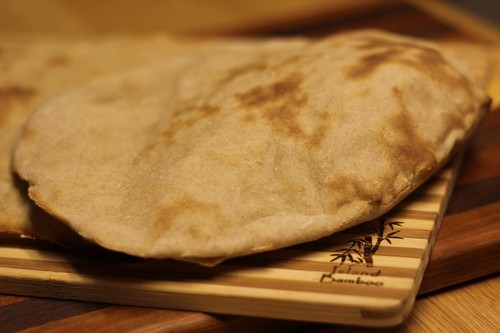
Preheat the oven to 500 degrees F. with a baking stone on the middle rack.  Use a baking peel or the back of a baking sheet to slide the rounds onto the preheated baking stone. Try not to damage the rounds when you’re transferring them to the baking stone or they may not puff up.  This happened to one of my pitas.  It made good crackers though.  Bake each round for about 5 minutes, or until they puff and start to brown. Transfer the pitas to a wire rack for cooling before serving.

Khubz_Arabi025


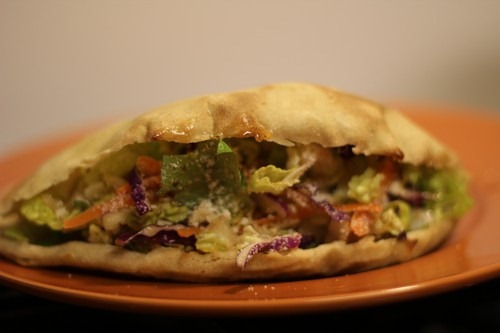
This sourdough pita makes a great pocket for a light dinner or lunch. I filled it with a salad of romaine lettuce, grated carrot and red cabbage that I prepared myself – not from a bag. Then I drizzled balsamic vinegar and olive oil over it and finished it off with shaved parmesan cheese.  Yum!

sourdough_pita11


I enjoyed baking with the Sourdough Surprises again this month.  Be sure to check out the February roundup of the Sourdough Flatbread Surprises.


Happy Baking!

Cathy
Saturday 16 February 2013

Traveling the Kontinentbrot without a road map

When David of hearthbakedtunes.com invited the Artisan Bread Bakers to bake Kontinentbrot with him, he neglected to mention that we would need to navigate the process by ourselves. He gave us the coordinates (the formula that he used), but not the directions on how to get there (make the bread). He did direct us to the original formula, but since it’s in German, I figured I was on my own.

Now, anyone that knows me, knows that I am, ah hem (clears throat), directionally challenged. When I got my jeep a few years ago, my kids were so excited because it had a compass in it. This was before GPS systems were standard in cars. My youngest son said “now you won’t get lost anymore”. Ha! Little did he know. I’m very good at getting lost. I’ve been working at it for years.

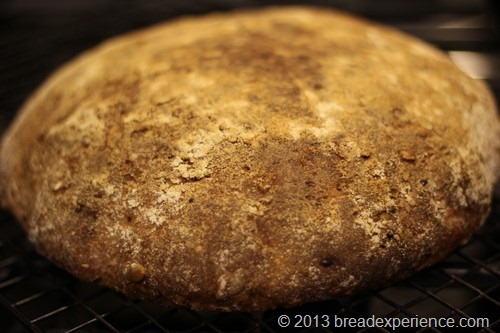
Fortunately, I’m better at navigating the bread-baking process than I am roads. I didn’t get lost. Here is my Kontinentbrot.

Kontinentbrot_05


I used David’s adapted formula for this bread but followed my own process. He did provide some interesting background regarding the different type of soakers you could use. I chose the overnight Quellstück rather than the Brühstück that the original formula called for. David had removed the sesame seeds so I added them back in because I happen to like them thank you very much.


Kontinentbrot: Continent Bread

David described Kontinentbrot as, “…a wonderful heavy rye bread loaded with seeds and flavor, that will certainly help to keep you warm this winter...This bread is referred to as continent bread because it contains seeds from all over the world. Pumpkin Seeds, Sunflower Seeds and Flax Seeds.”

Here is David’s adapted formula:

My slightly revised version is presented below.  I only had whole grain rye flour so that’s what I used. 

Sourdough Build

Rye flour, milled from whole grain rye

110g

German Rye Starter, (I used this rye starter)

11g

Water

85g

Quellstück

Rye flour, milled from whole grain rye

77g

Oats

22g

Pumpkin seeds

35g

Sunflower seeds

20g

Flax seeds

13g

Sesame seeds 15g

water

127g

Final Dough

Rye flour, milled from whole grain rye

73g

Bread flour, I used about 1/4 –1/2 cup more

106g

Salt

10g

Sourdough build

all of the above

Quellstuck

all of the above

Yeast

3.9g

Water

138g


Making the Sourdough Build:

I hadn’t fed my rye starter in a couple of months so I used this process for activating a sourdough starter before I began the process of making the build.

painted-bread012


Make the build by mixing the rye flour, rye starter and water in a small bowl. Cover and let it ripen for 14 to 16 hours at about 70 degrees F.

Kontinentbrot_004


Making the Quellstück

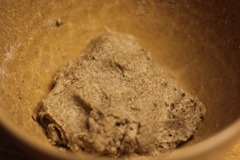
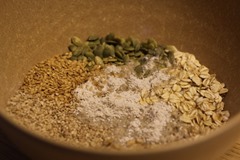
Make the Quellstück by pouring cold water over the rye flour, oats, pumpkin seeds, sunflower seeds, flax seeds, sesame seeds.  Cover with plastic wrap to prevent evaporation.  I used roasted sunflower seeds. I didn’t toast the pumpkin seeds but they probably would’ve tasted better if I had.

Kontinentbrot_001


Let it soak overnight while the build is ripening.

Kontinentbrot_002


Mixing the Final Dough:

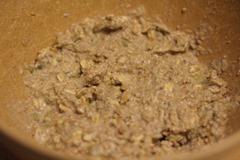
Add all the ingredients, including the sourdough and the soaker, in the bowl of a stand mixer.  Mix on first speed until the dough is thoroughly mixed.

Kontinentbrot_005


Bulk Fermentation:

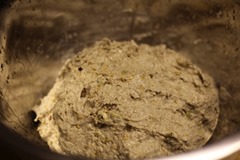
Cover and let the dough bulk ferment 30 minutes at 75 – 80 degrees F.


Final Fermentation:

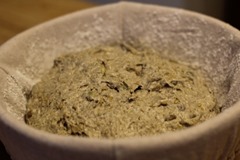
The dough is sticky so you’ll want to use wet fingers for this part. Shape the dough into a rough ball and place it in a proofing basket.  I used a lined banneton basket.

Kontinentbrot_011


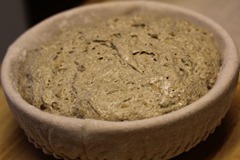
Cover it with plastic wrap and let it proof for about an hour at 82 degrees F. I used my proofing box for this part.

Kontinentbrot_014


Preparing the Loaf for Baking:

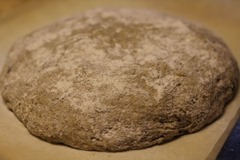
Preheat the oven to 450 degrees F. with a baking stone on the middle rack and a steam pan underneath. Preheat the stone for at least 30 minutes.  Gently remove the loaf from the proofing basket onto parchment paper. It doesn’t need to be scored.

Kontinentbrot_018


Baking the Loaf:

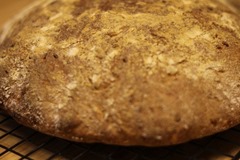
Slide the loaf (on the parchment paper) onto the preheated stone.  Fill the steam pan with water and spritz the walls of the oven with water several times during the first few minutes. Bake the loaf at 450 degrees for 15 minutes, then lower to 425 degrees for the rest of the bake, about 30 minutes. Remove the parchment paper partway through the baking cycle to firm up the bottom crust.

Kontinentbrot_020


Cooling and Slicing the Loaf:

Remove the loaf to a cooling rack to cool completely. Wrap it in a kitchen towel and let it stand for at least 24 hours before slicing.

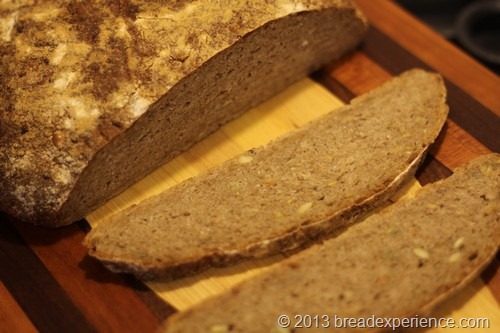
Kontinentbrot_0005


Although this bread has a tight crumb, it’s not really that heavy for a rye bread. It doesn’t have a strong rye flavor either which I found to be rather odd with all the rye flour that’s included in it. I’m okay with that. It has a good flavor especially with all of the seeds. It tastes really good with olive oil and herbs which is not something I would normally say about rye bread. It tastes good with cheese as well.


Happy Baking!

Cathy
Monday 11 February 2013

Celebrating 500 with Painted Bread

This is a special post for me because it’s my 500th post since I started blogging in 2008. I’ve been doing this for almost five years and I’m still going strong.  Thanks to all of my visitors and the community of bakers that keep me motivated to stay the course. Whenever I get discouraged, I’ll get a comment or feedback on my site that let’s me know that it’s all worth it. 

I launched the Bread Experience Memorial Day Weekend in 2008 and started the blog in July 2008. At that time, I just wanted to demonstrate how to make bread as an extension of my site. I had a passion for bread baking and I wanted to share my experiences. Over the years, I’ve grown with my audience and other bakers. I never imagined that the blog would take on a life of it’s own and that I would get the opportunity to interact with and bake with so many fabulous chefs and bakers from all over the world. It’s been a rewarding journey so far and I hope to have many more posts.

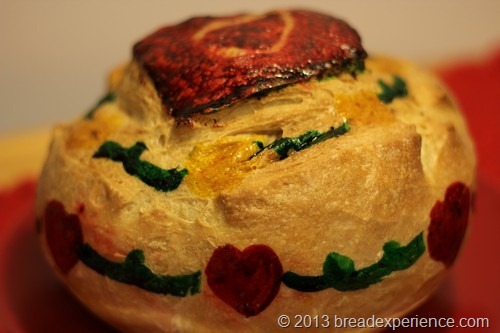
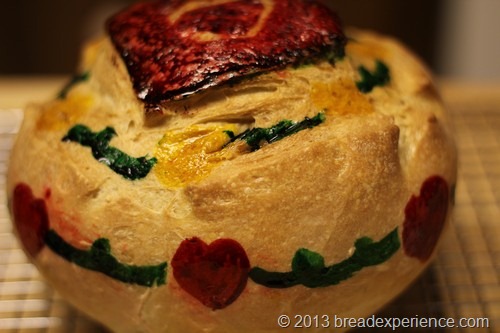
To commemorate this occasion, I decided to do something totally different and create a new tradition. I made Painted Sweetheart Bread to celebrate my 500th post and Valentine’s Day.  I started with a simple, yet Classic French Bread. Then decorated it with edible paint. I got my inspiration from Chef Tess of Chef Tess Bakeresse.

painted-bread10


Painted breads can be created for any special occasion or just because, but I think it’s particularly appropriate for Valentine’s Day. In fact, in many parts of Europe, there is an ancient tradition of giving Lover's Bread. These breads were usually heart-shaped gingerbreads that were elaborated decorated with spun-sugar flowers. This sort of gift disappeared from France around the time of the First World War but in other European countries, the tradition still exists.

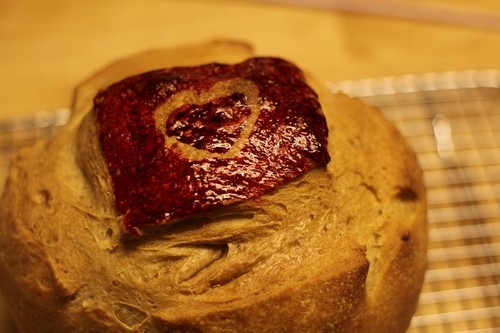
This was my first attempt at painting bread, but I’m very pleased with the way it turned out. I started out using a stencil on top because I hadn’t drawn in so long, I wasn’t sure if I could do it, especially on bread.  The stencil didn’t work exactly the way I expected so I ended up filling the design in by hand and then just creating the rest freehand. It was so much fun!

So how do you make painted bread?

First Step: Make the Bread 

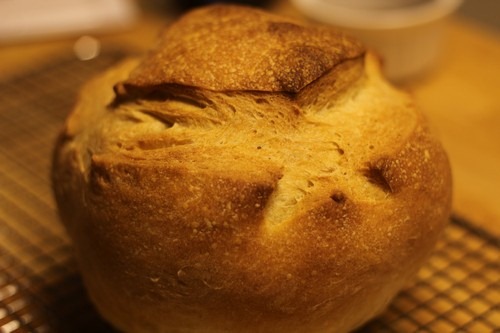
You can make any shape bread you like, but I chose to make a round bread. I thought it would work better with the heart stencil.  I was going to try baking it without scoring it, but I scored it at the last minute because it was looking really plump. Turns out, there was so much oven spring it would’ve cracked at the seams I think if I hadn’t scored it. I’ll have to experiment with different types of bread to see which one works better.

This time I chose an easy and delicious French bread that can be made in an evening so you have time to make the bread and paint it too.


Classic French Bread

Makes: One 8-inch Loaf

Adapted from: Wine, Food & Friends by Karen MacNeil

Ingredients:

French Bread:

  • 3 cups bread flour
  • 1 teaspoon salt
  • 2 1/4 teaspoons instant yeast
  • 1 cup warm water (100 to 110 degrees F.)

Decorating the Bread:

  • 1 large egg white, for egg wash
  • edible paint, different colors


Directions:

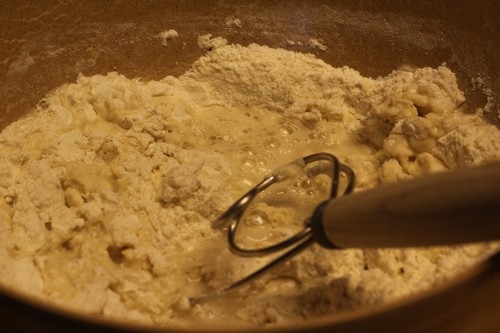
1) Whisk together the dry ingredients.  Then add the water and mix with a wooden spoon or Danish dough whisk.

painted-bread001


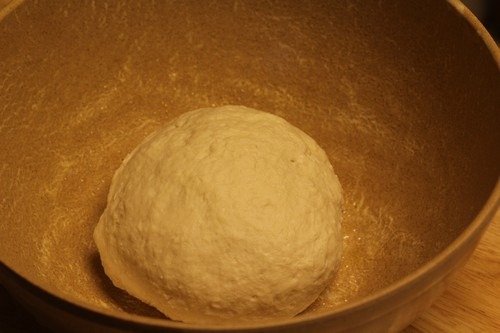
2) Turn the dough out onto a lightly floured surface and knead until it is smooth and elastic. Place the dough in a large greased bowl and turn it to coat the top.  Cover and let it proof in a warm place for 45 minutes or until doubled in size.

painted-bread004


3) Punch the dough down and shape it into a round ball.  Place it on a baking sheet coated with spray oil or onto a piece of parchment.  I decided to bake it on parchment.  Cover the dough and let it rise for 30 minutes or until doubled in size.

painted-bread014


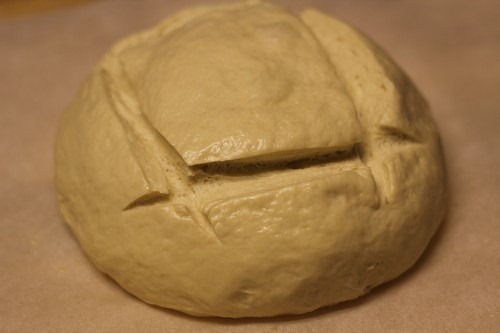
4) Preheat the oven to 450 degrees F.  Score the loaf in the pattern of your choice using a serrated knife or lame. If you just want to bake the bread without painting it, go ahead and add the egg wash.  If you plan to paint the bread, then don’t add the egg wash at this time, you will do that later. I chose this scoring pattern because I thought my heart stencil would fit perfectly in the square.

painted-bread022


5) Bake the loaf at 450 degrees F. until it reaches an internal temperature of 165 degrees on an instant read thermometer if you will be painting it.  If you just want to eat it, then bake for 20 minutes or until the loaf sounds hollow when thumped on the bottom.  I baked this loaf on a baking stone with a steam pan underneath, but you can easily bake it on the baking sheet without the baking stone.

painted-bread026


Next Step: Paint the Bread

After the loaf reaches the correct internal temperature, paint it, then finish baking it.

I learned how to do this on Chef Tess’s blog.  She’s amazing!  You need to check out all of her gorgeous painted breads. She has some demos so be sure to watch them to find out more about her methods.

For the paint, I attempted Chef Tess’s method of roasting the grains and steeping them in water. I used roasted purple barley grains so it turned out to be a beautiful color. However, I had a hard time getting the liquid to cook down to a concentrate. I mixed it with egg yolk, but it was still too runny. I want to try that method again, but for this special bread, I went with plan B and used colorful edible paint.

I used the parchment paper to mix the paint and test the stencil. I was hesitant to start painting because I didn’t want to mess up, but once I got going, it was fun.  I did mess up a little bit and the paint is smudged in a couple of places, but I learned a lot.

painted-bread033


I painted the stencil first.  Then I put the loaf back in the oven for a few minutes to let the paint set.

painted-bread029


Then I painted the design around the top and baked it another minute or so. 

painted-bread034


Final Step: Finish Baking the Bread

I thought I was done so I brushed the loaf with egg wash and baked it a little bit more.  It got a little bit smudged when I brushed the egg wash on it.

painted-bread036


After I baked the loaf the final time with the egg wash, I looked at it and realized it wasn’t complete so I painted a little bit more. I didn’t put it back in the oven because I thought it might burn, but it really needs the time in the oven for the paint to set otherwise it smears.  You can see the smudges in the photo below.

painted-bread043

This bread has been YeastSpotted in the weekly bread roundup hosted by Susan of Wild Yeast.


I had so much fun making this bread.  I’m definitely going to try painting some more breads in the future and giving them away as gifts.

I hope you’ll try painting bread for Valentine’s Day or another special occasion or just to show someone you love that you care.  I think you’ll enjoy it!


Happy Baking!

Cathy
Wednesday 6 February 2013
Cheesy Pepperoni Goodness in a Braid

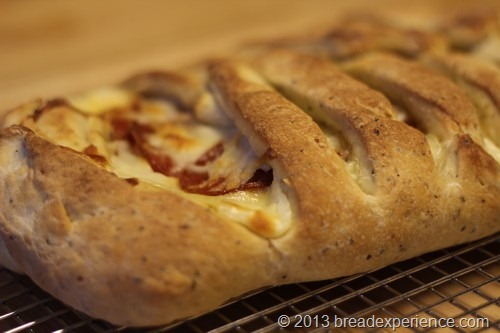
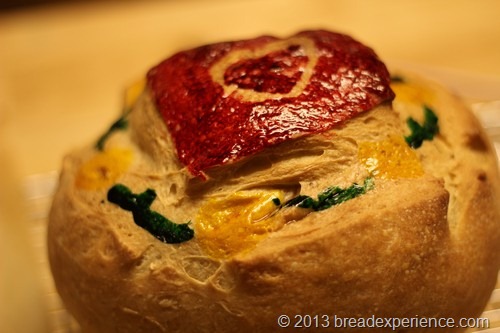
There’s something special about braided breads and when you add pepperoni and cheese to the mix, look out! 

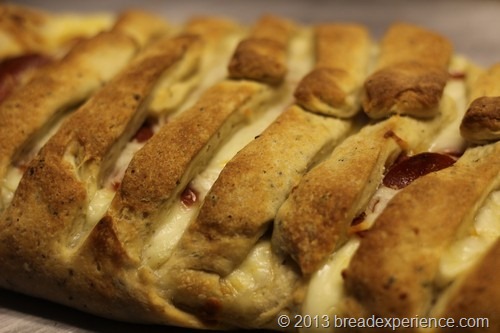
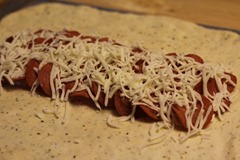
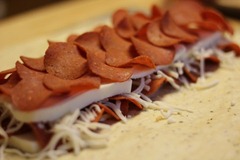
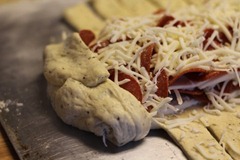
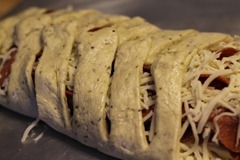
I learned how to make this Pizza Braid last week in the Google hangout Super Bowl Plus Week of Champions: How to Make Pepperoni Bread hosted by Jennifer of PastryChefOnline. I’ve made pizza bread before that you roll into a log, but it was more like bread. This version tastes more like pizza and is shaped using a ladder braid so that all the yummy goodness stays inside – well mostly inside.

I was inspired by the shaping method for this bread so I decided to give a try. I invited a friend over to help me make it on Super Bowl Sunday. To entice him, I told him it oozed with cheesy goodness. He loves cheese so that was all it took.

This cheesy pepperoni bread is very versatile. You can make one big loaf, or two smaller loaves or you can halve the recipe if you prefer. You can change up the fillings and customize it to your hearts’ desire. It can be eaten as the main meal with a salad or as a snack or appetizer and served with pizza sauce on the side. 

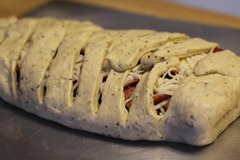
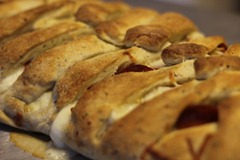
I made one big loaf and we ate it as the main attraction along with a salad.  See the cheese!  I told you it oozed with cheesy goodness.

braided-pizza-bread051


Braided Pizza Bread

Makes: 1 large Loaf or 2 Smaller Loaves

You can find Jennifer’s recipe here. The version in the demo is a little bit different than the recipe on her blog so use the version that suits you.

Here is Jennifer’s demonstration on how to make this bread.  She does a great job!

If you’re unable to view the embedded video, click here.


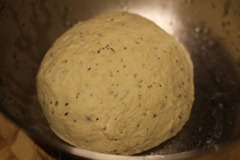
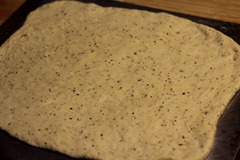
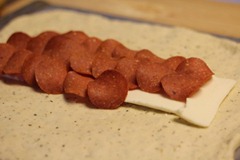
Here is my photo tutorial of the process for making the Braided Pizza Bread.  I used Jennifer’s dough so you can visit her site for the list of ingredients. The dough and the fillings are really flavorful.

braided-pizza-bread008 braided-pizza-bread018
braided-pizza-bread019 braided-pizza-bread020
braided-pizza-bread024 braided-pizza-bread026
braided-pizza-bread028 braided-pizza-bread029
braided-pizza-bread030 braided-pizza-bread032
braided-pizza-bread048 braided-pizza-bread015


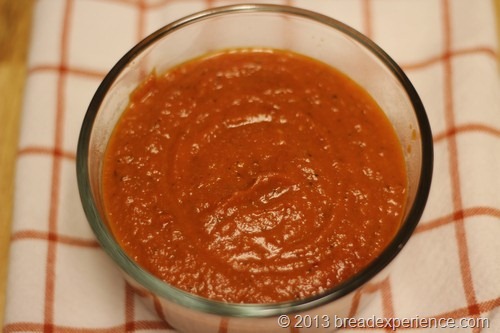
Pizza Sauce

Adapted from: Jennifer’s Pizza Sauce recipe

Ingredients:

  • 3 tablespoons extra virgin olive oil
  • 6 cloves garlic, smashed
  • 1 teaspoon Italian seasoning (more to taste)
  • 1 teaspoon kosher salt (more or less to taste)
  • several grindings black pepper (to taste)
  • 1 (28 oz) can whole Marzano tomatoes (you can use crushed or diced if you prefer)
  • red pepper flakes, to taste
  • 1-2 teaspoons balsamic vinegar


Directions:

  1. Heat a deep saucepan over medium heat.
  2. Add the olive oil, then the garlic and let the garlic cook until it is it a deep golden brown. Be careful because it burns really easily. 
  3. Add the canned tomatoes and break them up with the side of a wooden spoon.
  4. Season the sauce with salt, ground black pepper, Italian seasoning and red pepper flakes.
  5. Turn the heat down to medium low and continue to cook until almost all the liquid is gone. This will take a while. Stir occasionally. This is the part where it’s good to have a deep pot because it will spatter out if you use a shallow pan.
  6. Taste the sauce and adjust the seasoning if necessary.
  7. Add the balsamic vinegar and cook a minute longer.
  8. Puree using an immersion blender or leave chunky if you prefer.
  9. Let it cool to room temperature.


braided-pizza-bread012


When I braided the bread, I had a big gap at the end and I was concerned that the filling would fall out while it was baking, but it didn’t.

braided-pizza-bread059


Instead of dipping the pizza bread slices in the homemade pizza sauce, we drizzled it over the top. The red pepper flakes gave it a nice little kick.

I didn’t take a photo of the sliced bread because we couldn’t wait any longer to eat it.  My taste tester was waiting patiently while I took the photos so I didn’t want to make him wait any longer.  It was delicious!


Happy Baking!

Cathy