Thursday 31 May 2012

Seeded Rye Loaf

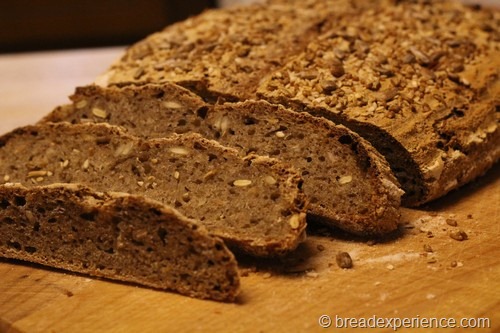
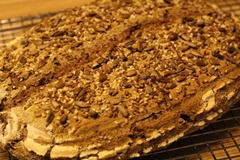
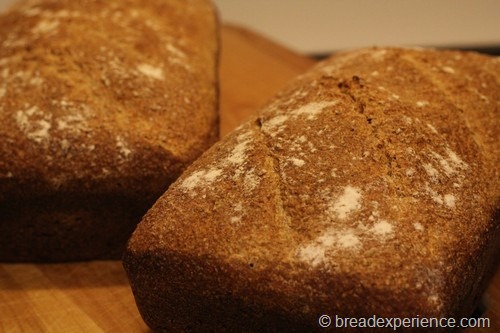
This Seeded Rye Loaf is another one of William Alexander’s breads from the May Issue of Saveur Magazine. This bread takes 11 days to make. However, the time spent each day is negligible. For the first 9 days, you build the rye starter with a mixture of rye flour and water each day, then on day 10, you build a sourdough culture using the rye starter, more rye flour and water. 24 hours or so later, you make the rye loaf. If you already have a rye starter, then you can reduce the time needed to make this bread to less than 2 days. 

seeded-rye-loaf_006

Making this starter was good timing. One of the breads on the list for the Mellow Bakers this month is Whole Grain Rye Bread, and I needed a rye starter for that bread. I could’ve converted my regular sourdough starter to a rye starter or used my existing rye starter; however, I hadn’t fed my rye starter since last December. Oops! 

I decided I would just start all over. If you haven't noticed, I like building starters and having experiments all over the counter.  So that’s what I did. Ten days later, I had this delicious rye bread. Never thought I’d say that.  I definitely have become a rye convert.


Seeded Rye Loaf

Makes: One 2-pound loaf

Look for the recipe in the May 2012 Issue of Saveur Magazine

Here is a photo tutorial of the process for making the Rye Starter and the resulting Seeded Rye Loaf. 


rye-starter_0002
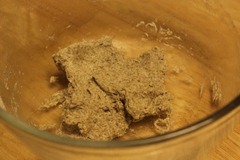
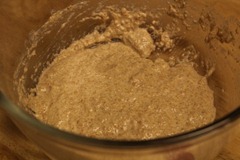
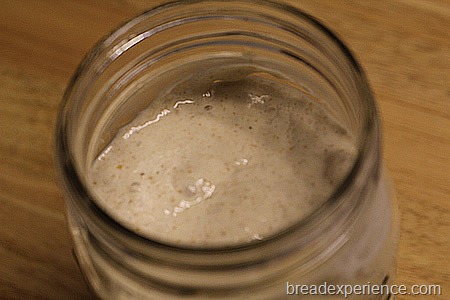
Day 1: Make paste of rye flour, water and yeast and let sit 24 hours.
rye-levain_0026
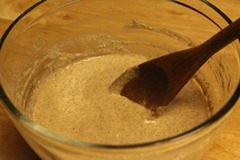
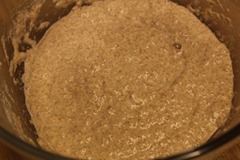
Day 2: Feed starter with additional rye flour and water and let sit for 24 hours.
rye-starter_0007
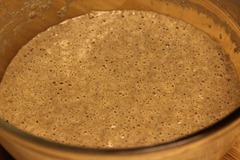
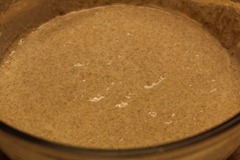
Days 3-9: Feed starter daily and let sit for 24 hours.
rye-levain_0001
Day 10:
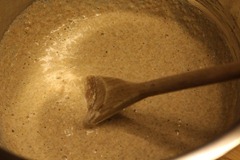
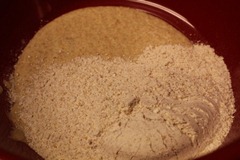
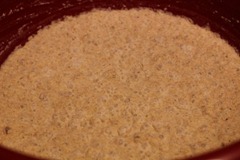
Create the sourdough culture and let sit for 8 – 24 hours.
rye-levain_0003
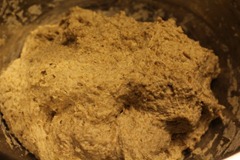
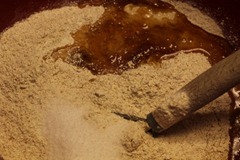
Day 11: Mix the remaining ingredients with the sourdough culture.
rye-levain_0005
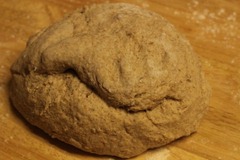
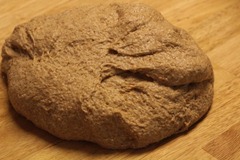
Day 11: Knead the Dough until smooth and elastic.
rye-levain_0007
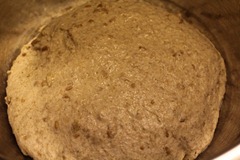
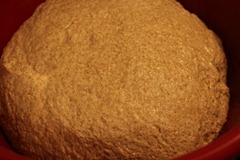
Day 11: Transfer dough to bowl and let dough double in size, about 3 hours.
rye-levain_0011
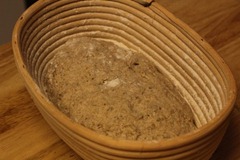
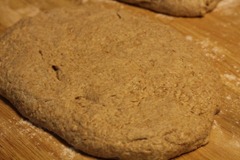
Day 11: Shape dough into oval and place in a banneton basket to proof for 3 hours.
rye-levain_0012
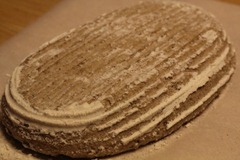
Day 11: Invert the loaf onto parchment paper.
rye-levain_0015
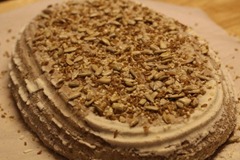
Day 11: Spray loaf with water and cover with remaining seed mix.
rye-levain_0016
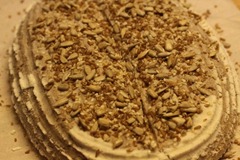
Day 11: Score loaf down the middle or in the pattern of your choice.
rye-levain_0019
Day 11: Bake loaf in preheated oven on baking stone with steam pan underneath. Cool on a wire rack.


I didn’t follow his process completely for proofing and baking the loaf. He puts the loaf in a floured kitchen towel in a colander. I used a brotform basket to proof the loaf instead.  He made a round loaf; I made an oval loaf. I did bake the loaf on the baking stone and tried his method of using an iron skillet underneath with ice cubes in it. I wasn’t sure about the whole ice cube in the iron skillet thing. I didn't want to ruin my skillet so I used one of my small cast iron skillets that I don’t use much. It did okay but I’ll probably stick with the steam pan underneath.

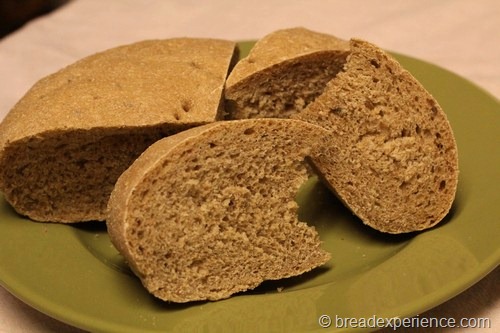
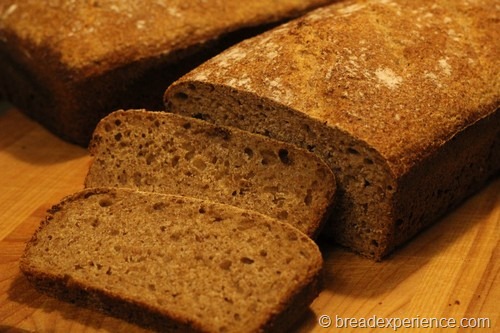
I let the loaf sit overnight before slicing it. This Seeded Rye Loaf has tangy undertones due to the rye levain. Not too sour. I like it!  I like the use of seeds in the dough and on the crust. It provides a unique texture and flavor. I’ve enjoyed it with cheese for a light lunch with a salad or an afternoon snack.

I hope you enjoy it as well.

Happy Baking!
Cathy

Wednesday 30 May 2012

Refrigerator Pickles from Homegrown Cucumbers

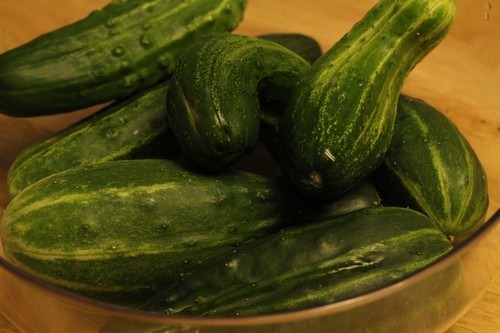
For the past several years, I’ve grown a small vegetable and herb garden in my back yard and in pots on the deck and on the front walkway. Last year I lost the squash plants to the squash borer and squash bugs so this year, I decided to grow most of the cucumbers, and all of the squash and zucchini in big pots rather than in the ground. So far the squash and cucumbers are bug free and doing really well. So well in fact, that it’s only May, and I’ve got cucumbers all over the place.

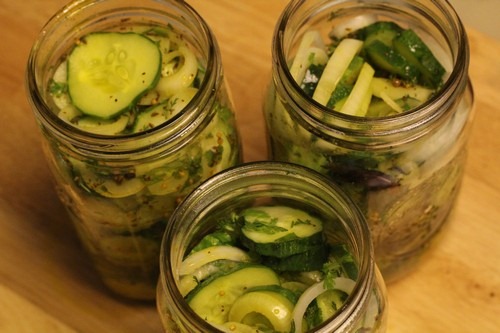
refrigerator-pickles_0001

I like cucumbers and I enjoy eating them fresh from the garden and in salads, but you can only eat so many before you get “cucumbered-out”. So I started looking for creative ways to use them. Although I have more cucumbers than one or two people can eat, I didn’t have enough to make a big batch of pickles. Plus, these aren’t my pickling cucumbers, these are Heirloom Spacemaster pickles. They’re crispy and taste great as cucumbers, but I wasn’t sure how they would hold up as pickles.

I searched and searched through my canning books and online to find a recipe for a small batch of pickles. I learned that slightly overgrown pickles that are too big for pickling whole make great refrigerator pickles. I found three refrigerator pickle recipes that could be scaled to a small harvest. I took what I liked from each recipe and came up with my own version.

refrigerator-pickles_0010


Refrigerator Pickles

Makes: About 3 quarts

Adapted from:

    Adjust this recipe for the amount of cucumbers you have on hand. Most of the recipes I saw used anywhere from 2 medium cucumbers to 6 cups. I used what I had and it ended up being almost 8 cups.

    Ingredients:

    • 7 – 8 cups thinly sliced cucumbers (about 1/4-inch thick)
    • 2 cups onion, thinly sliced
    • 2 3/4 cups sugar or honey
    • 2 3/4 cups vinegar
    • 1 1/2 tsp pickling salt
    • 1 1/2 tsp celery seeds
    • 1 1/2 tsp mustard seeds
    • 1 1/2 tsp turmeric
    • 1/2 tsp pickling spice
    • 3T Cilantro (or to taste) 


    Directions:

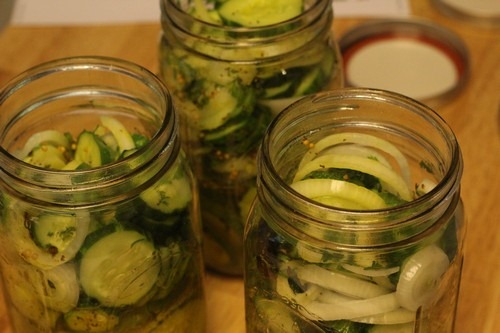
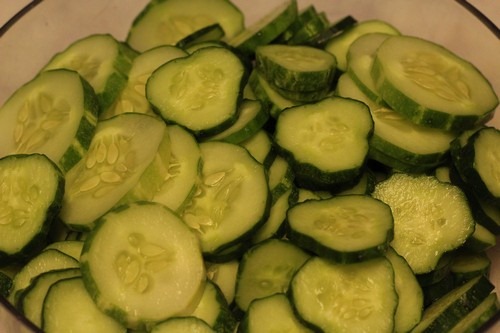
    Slice the cucumbers and onions and layer them alternately in quart-size canning jars. You’re allowed to eat some as you chop.

    refrigerator-pickles_0006


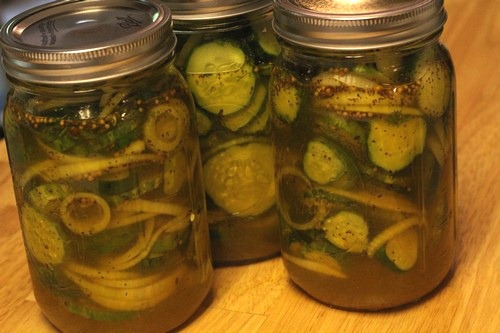
    Combine the sugar, vinegar, salt and spices in a non-reactive saucepan and bring to a boil.  Stir until the sugar dissolves. Pour the syrup over the vegetables completely filling the jars.

    refrigerator-pickles_0012


    Allow the pickles to cool to room temperature before topping off with any remaining pickling liquid. Refrigerate. 

    refrigerator-pickles_0015

    I probably should’ve stuffed the pickles into two jars instead of three so once we ate some of them, I combined the rest into two jars.

    These pickles are so good! They’re sweet, but not too sweet! I was hesitant to add a lot of cilantro but it definitely would’ve enhanced the flavor. I loved the addition of cilantro. I got the idea from Jon of Doughmesstic.com. He used a bunch.

    I’ll definitely make these pickles again.  My taste tester (who doesn’t like raw cucumbers), loved the pickles. But… who doesn’t like cucumbers? 


    Happy Canning and Baking!

    Cathy

    Monday 28 May 2012

    Moroccan Anise Bread and Chicken Tagine

    It was my turn to choose the bread and flavor for the May 30th Baking through Flatbreads and Flavors FB Group. I had a hard time deciding what to pick until I ran across the Moroccan Anise Bread. One of the suggested dishes to accompany the bread was Chicken Tagine. The anise flavor in the bread and the spices used in the Chicken Tagine sounded so different yet tantalizing that I decided this was the dish to try. Moroccan dishes can include up to 30 different spices, but don’t worry, this version only uses 6 different spices, lemon zest, garlic and cilantro.

    moroccan-anise-bread0016


    The day I originally planned to make this meal, I was too exhausted from work and other activities to cook so we went out to eat instead. We ended up eating Thai that night, but during the course of the evening, my taste tester, Joe, started talking about an episode of America’s Test Kitchen he just watched and as it turns out, they made Chicken Tagine. I said, “that’s what I was going to make!”  He’s like “Really!  I didn’t know that’s what you were going to make.”  I guess I hadn’t told him. We decided to make it together another day. 

    We made this meal this past weekend and it was divine. I got the marinade going and did some of the prep work ahead of time and when Joe got there, I put him to work. He cooked the chicken tagine and I made the bread. It was a fun evening! We really enjoyed this dish. I hope the other bakers like it as well.

    chicken-tagine0002


    The recipe in the Flatbreads and Flavors’ book calls for parsley and jalapenos which I didn’t have, and the Test Kitchen recipe called for cilantro which I did have so I used the combination of spices and ingredients that I had on hand and incorporated part of the process from each recipe to create the final dish.


    Moroccan Chicken with Olives and Lemon (Chicken Tagine)

    Adapted from: America’s Test Kitchen and Flatbreads & Flavors by Jeffrey Alford and Naomi Duguid

    Serves: 4 to 6 people

    Ingredients:

    Marinade:

    • 3 pounds chicken (drumsticks, thighs and breasts -cut into two pieces)
    • 1/2 cup lemon juice from 2 to 3 lemons, diluted with 1/4 cup water
    • 2 cloves garlic, chopped

    Broth:

    • 1 1/4 teaspoon sweet paprika
    • 1/2 teaspoon ground cumin
    • 1/4 teaspoon cayenne pepper
    • 1/2 teaspoon ground coriander
    • 1/4 teaspoon ground cinnamon
    • 3 strips lemon zest (about 2 inches by 3/4 inch)
    • 3 tablespoons fresh lemon juice, from 1 to 2 lemons*
    • 5 medium cloves garlic, minced or pressed through garlic press (about 5 teaspoons)
    • Salt and ground black pepper, to taste
    • 1 tablespoon olive oil
    • 1 large onion, halved and cut into 1/4-inch slices (about 3 cups)
    • 1 3/4 cups low-sodium chicken broth
    • 1 tablespoon honey
    • 2 to 3 medium carrots, peeled and cut into 1/2-inch-thick coins (about 2 cups)
    • 1 cup Greek cracked green olives, pitted and halved
    • 2 tablespoons chopped fresh cilantro leaves

    *We used the reserved marinade instead of squeezing more lemons.


    Directions:

    Place the chicken pieces in a large nonreactive bowl, add the lemon juice and garlic, and toss to coat.  Let the chicken marinate in the refrigerator for 1 hour, turning occasionally.

    Meanwhile, combine the spices in a small bowl and set aside.  Mince 1 strip of lemon zest; combine with 1 teaspoon minced garlic and mince together until reduced to a fine paste; set aside. Adding a little bit of kosher salt makes it easier to incorporate the garlic and lemon zest into a paste. Watch this video to see how it’s done.

    Season both sides of the chicken pieces liberally with salt and pepper. Heat oil in large heavy--bottomed Dutch oven (we used my Cast Iron Dutch oven and it worked great) over medium-high heat until beginning to smoke. Brown chicken pieces skin side down in single layer until deep golden, about 5 minutes; using tongs, turn chicken pieces and brown on second side, about 4 minutes more. Transfer chicken to large plate; when cool enough to handle, peel off skin and discard. Pour off and discard all but 1 tablespoon fat from pot.

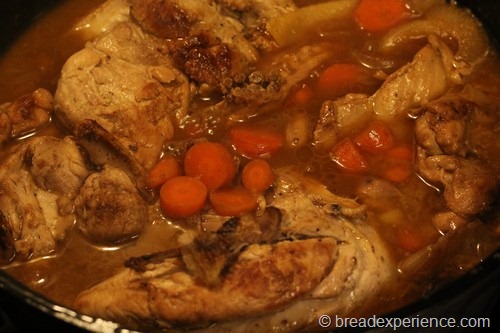
    Add onion and the 2 remaining lemon zest strips to pot and cook, stirring occasionally, until onions have browned at edges but still retain shape, 5 to 7 minutes (add 1 tablespoon water if pan gets too dark). Add remaining 4 teaspoons garlic and cook, stirring, until fragrant, about 30 seconds. Add spices and cook, stirring constantly, until darkened and very fragrant, 45 seconds to 1 minute. Stir in broth and honey, scraping bottom of pot with wooden spoon to loosen browned bits. Add thighs and drumsticks, reduce heat to medium, and simmer for 5 minutes.

    Add carrots and breast pieces (with any accumulated juices) to pot, arranging breast pieces in single layer on top of carrots. Cover, reduce heat to medium-low, and simmer until instant-read thermometer inserted into thickest part of breast registers 160 degrees, 10 to 15 minutes.

    Transfer chicken to plate or bowl and tent with foil. Add olives to pot; increase heat to medium-high and simmer until liquid has thickened slightly and carrots are tender, 4 to 6 minutes. Return chicken to pot and add garlic-zest mixture, cilantro, and lemon juice*; stir to combine and adjust seasoning with salt and pepper.

    Serve immediately.

    We served the Chicken Tagine with yellow squash and zucchini from my garden. 

    chicken-tagine0001


    We sopped up the broth with the Moroccan Anise Bread.  The bread has a little bit of a licorice flavor from the Anise, but it’s not overpowering. 

    moroccan-anise-bread019


    I’m so glad I chose this dish. The flavors of the Moroccan Chicken, squash and onions and the bread tasted really good together. You could also serve couscous with the chicken dish but since we were having bread, we didn’t need another grain.

    If you’re looking for a recipe for the Moroccan Anise Bread, you might try this version from the New York Times  http://www.nytimes.com/2007/06/13/dining/133orex.html.  The NYT’s version is similar to the version in the Flatbread and Flavors’ book in that it includes whole wheat and white bread flour; however, the version in the book also includes some cornmeal.


    Happy Baking!

    Cathy

    Saturday 26 May 2012

    Shepherd's Bread

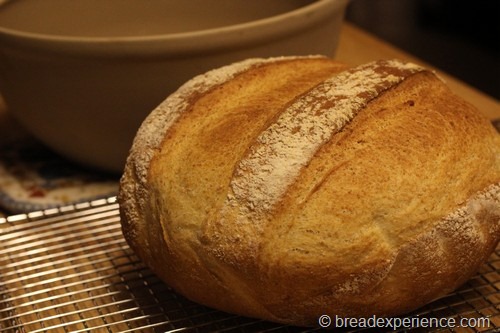
    There’s something very comforting about a simple loaf of bread made with simple ingredients. This Shepherd’s Bread is one of those simple breads that’s a pleasure to make and soothing to eat. It reminds me of simpler times.
    shepherds-bread_0031

    Karen of Bake My Day is hosting the Bread Baking Babes (BBB) and Friends this month and she chose this comfy bread for the monthly bake. Shepherd's Bread is similar to Basque Bread, which originated in the Basque region of Spain. The Basque sheepherders traditionally bake this bread in a cast-iron Dutch oven in a pit in the ground. I think this would be a great bread to take camping and bake in a cast iron Dutch oven over a fire. I would like to try that method sometime.

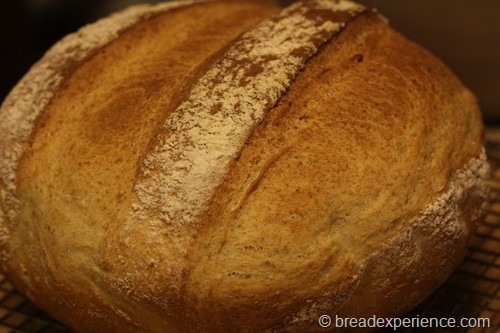
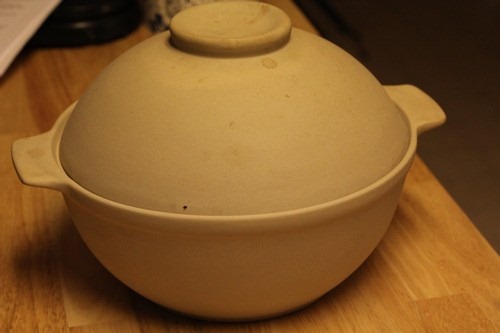
    You can also bake this bread above ground in the comfort of your own home. There are several options for baking this loaf in a conventional oven. You can bake it in a clay baker, (La Cloche, Bread Dome, or other), a cast iron Dutch oven, or even freeform on a baking stone.  Although I have a cast iron Dutch oven, I opted to make this bread in my Bread Dome. I was pleased with the results.
    shepherds-bread_0025


    This is a very versatile recipe. Karen of Bake My Day made an all-white flour version, one with a white flour and rye sponge and another version with amaranth and white flour in the sponge and the final dough. So you can do a lot of substituting, just bear in mind the ratios of half whole wheat (or rye or other grain) and half white bread flour for the sponge and about 25% to 30% whole wheat/other grain to bread flour in the final dough.


    Shepherd’s Bread

    Makes: One 2-pound loaf

    Adapted from: Bread for all Seasons by Beth Hensperger

    The original recipe made a huge loaf so I cut the recipe in half and reduced the amount of sugar. I substituted white whole wheat for some of the bread flour in the dough, but not the sponge. For the dough, my ratio of white whole wheat to bread flour was about 31%, but overall I only used about 24% white whole wheat.

    Ingredients:

    Sponge (take about 2 hours)

    • 1 tsp. active dry yeast
    • 1 cup warm water
    • 1 cup unbleached all-purpose or bread flour 
    • 1/8 cup sugar (you can use a little more sugar if you want a sweeter bread)

    Dough (first rise about 2-3 hours; second only 15 minutes)

    • 1/2 tsp. active dry yeast
    • 1/2 cup warm water
    • 1 1/2 tsp. salt
    • 1/4 cup olive oil
    • 1 cup white whole wheat flour (I used home-milled flour)
    • 2 cups unbleached bread flour
    • 1/4 cup extra bread flour for kneading


    Directions:

    1) Prepare the sponge:

    In a large bowl sprinkle the dry yeast over the warm water, Using a large whisk add 1/2 cup of the flour and the sugar. Add remaining 1/2 cup of flour and beat hard until very smooth, 2 minutes.
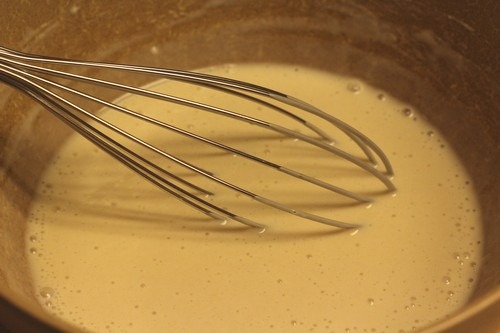
    shepherds-bread_0001


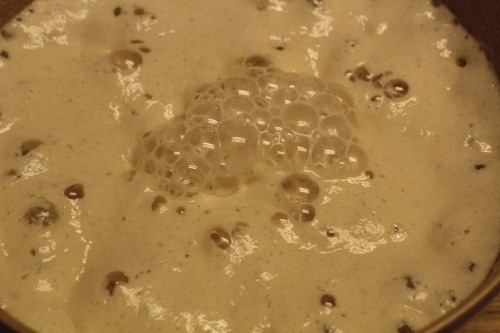
    Scrape down the sides of the bowl and cover with plastic wrap. Let stand at room temp until soft, spongy and pleasantly fermented, 2 hours.

    It was really hot this weekend so my sponge only took about an hour.  As you can see, it’s pretty bubbly.
    shepherds-bread_5515


    2) Prepare the dough:

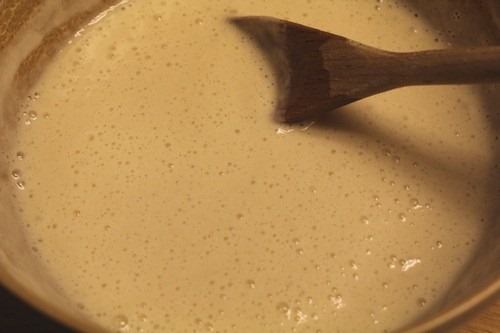
    Using a wooden spoon, beat down the sponge. In a measuring cup or small bowl, stir the yeast into the warm water to dissolve. Add the yeast, warm water, salt and olive oil to the sponge and beat well.
    shepherds-bread_0005


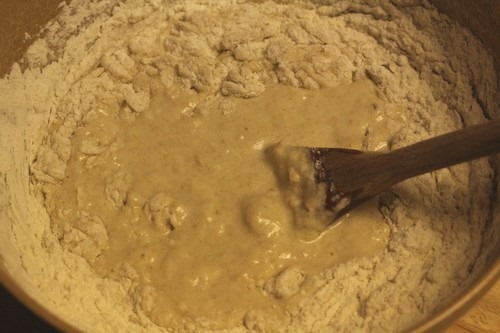
    Add the flour, 1/2 cup at a time, beating vigorously until a soft dough is formed that just clears the sides of the bowl.
    shepherds-bread_0007


    3) Knead the Dough:

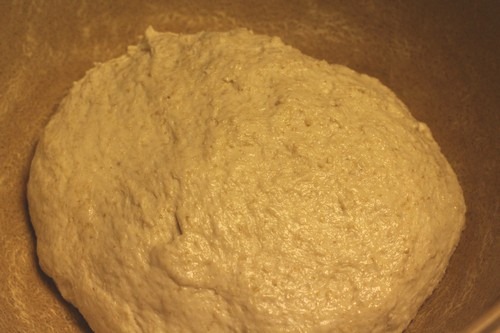
    Turn out the dough onto a floured work surface and knead about 5 minutes until a smooth dough is formed. It should be firm yet springy and resilient. Only add about 1 tbs flour at a time to prevent sticking. M

    My dough was a little sticky but I didn’t add more flour at this point. Home-milled flour usually soaks up more water so I decided to wait until after the bulk fermentation to add any additional flour.
    shepherds-bread_0008


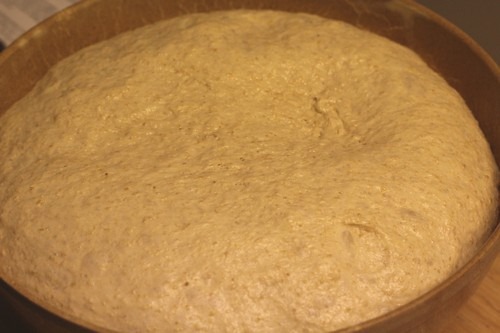
    Place the dough in a floured deep container, dust the top with flour, and cover with plastic wrap. Let rise at cool room temp until tripled in bulk, 2.5 - 3 hours.

    I placed the dough in a greased bowl rather than adding more flour.  This is what my dough looked like after 1 1/4 hours so I didn’t proof it any longer.
    shepherds-bread_0009


    4) Shaping:

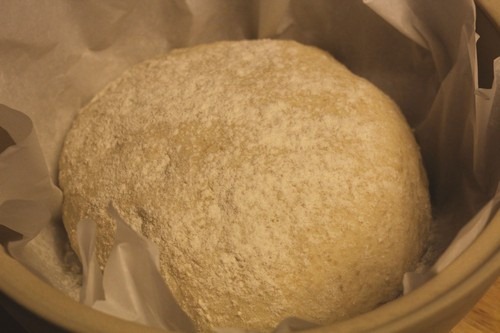
    Turn out the dough onto a clean surface. It will be slightly sticky from the long rise. Knead in about 1/4 cup more flour to make a firmer dough, about 1 minute. Shape into a tight round ball. Pull the ends tightly to the center of the loaf to form a smooth bottom and sides. Mist the surface with water. Coat the top surface with flour.

    As Karen recommended, I placed the dough on parchment paper to make it easier to remove the bread from the pot. It kind of got in the way of the bread baking so I’m not sure if I would do that next time. I don’t normally have any problems removing bread from the La Cloche or the Bread Dome so this part may not have been necessary except it made it easier to place the dough in the pot.
    shepherds-bread_0011


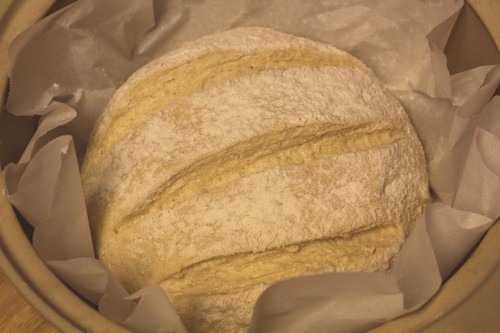
    Using a serrated knife or lame, slash the top of the loaf, no more than 1/4 inch deep to allow steam to escape and allow room for the dough to expand.

    I used a lame because the serrated knife was a bit too big to maneuver when the bread was in the pot.  In hindsight, I should’ve made the slashes before I placed the dough in the pot especially since it was already on the parchment paper.  This was an experiment so no harm done except I made the slashes a bit too deep.
    shepherds-bread_0014


    Place the lid on the bread dome (or Dutch oven or clay baker) and let the dough proof for 15 to 30 minutes. 
    shepherds-bread_0015


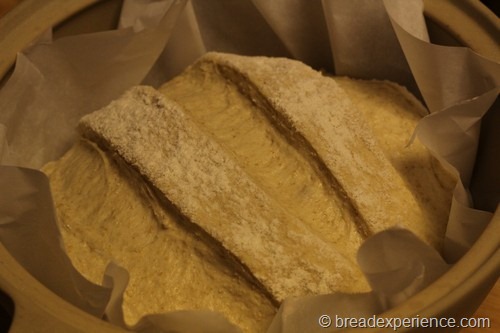
    In the meantime, preheat the oven to 425 degrees F. Remove the lid.

    I let the loaf proof for about 30 minutes while I was doing other stuff.  As you can see, the slashes really opened up. 
    shepherds-bread_0016


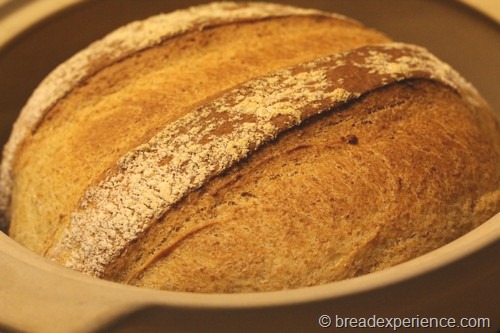
    Spritz the loaf with water and place the lid back on. Bake the loaf for 10 minutes, then lower the thermostat to 400 degrees F and bake an additional 25-35 minutes. Remove the lid after 30 minutes to allow the loaf to brown thoroughly. 
    shepherds-bread_0022

    If you want to use a baking stone or tiles, refer to Karen’s post for some helpful tips.

    Remove the loaf from the pot and let it cool thoroughly before slicing and serving.

    This is a great bread and butter bread.  Supposedly, it’s best to eat it on the same day you bake it, but I didn’t try it until the next day and it was great.  I’m still eating it after two days.  The crust was crispy after it baked but it softened up once it cooled. I liked the texture even though it got a little misshapen due to the parchment paper.

    shepherds-bread_0039


    This bread has been YeastSpotted.  Please visit Wild Yeast to view all of the lovely breads in the roundup.

    You should try this bread… It’s really good!   Thanks Karen for choosing this bread!
     

    BBBuddies may 2012


    Happy Baking! 

    Cathy
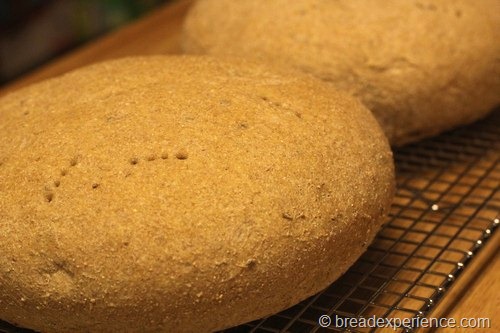
    Tuesday 22 May 2012

    Kimmelweck Rolls

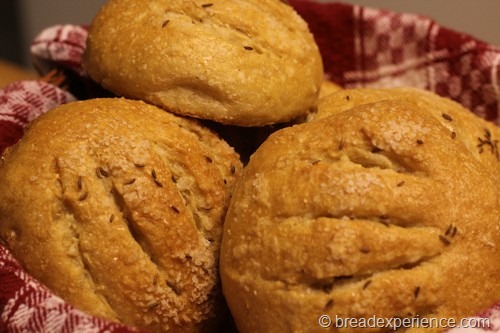
    The BOM (Bread of the Month) for the Artisan Bread Bakers FB Group is Kimmelweck Rolls. A Kimmelweck or “Weck” Roll as they are commonly referred to, is a hard roll that resembles a crusty Kaiser roll, but is topped with caraway and coarse salt instead of poppy seeds.

    I had never made this type of roll before so I decided to give it a shot. I made a light wheat version by adding white whole wheat flour. These rolls are really easy and don’t require too much hands on time. I enjoyed making them. It was a relaxing activity for a Sunday afternoon.

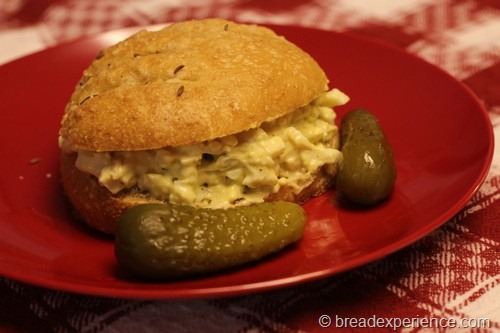
    Weck rolls are traditionally served as “beef on weck” but I had mine with egg salad and some sweet gherkins. It was an interesting combination of textures, but I enjoyed the flavors.

    kimmelweck-rolls_017


    Kimmelweck Rolls

    Makes: 8 Rolls

    Adapted from: http://www.jewishfood-list.com/recipes/bread/rollskimelweck01.html

    Ingredients:

    • 2-1/4 tsp. active dry yeast (1 envelope)
    • 1 cup lukewarm water (95°F to 110°F)
    • 2 tbsp. olive oil
    • 1 tbsp. sugar
    • 1/2 tbsp. salt
    • 1 tsp. honey
    • 2 large egg whites, 1 reserved for egg wash
    • 1 cup white whole wheat flour
    • 2 cups unbleached bread flour, extra for kneading
    • 1 tbsp. water
    • Coarse sea salt crystals and caraway seeds, for sprinkling


    Directions:

    Sprinkle the yeast over 1/4 cup of the lukewarm water in a small bowl. Set aside to proof until bubbly, about 5 minutes.

    kimmelweck-rolls_0002


    Combine the remaining 3/4 cup lukewarm water, the oil, sugar, salt, honey, and 1 egg white in a large mixing bowl. Stir to dissolve the sugar. Add 1-1/2 cups of the flour and mix until smooth. Add the yeast solution and slowly stir in an additional 1-1/2 cups of the flour.

    kimmelweck-rolls_0001


    Turn the dough out onto a lightly floured work surface. Knead the dough for 5 to 7 minutes, until smooth and elastic but still slightly tacky to the touch, adding only as much additional flour as necessary to keep the dough from sticking.

    kimmelweck-rolls_0005


    Transfer to a large greased bowl, cover with plastic wrap, and set aside at room temperature to rise until doubled, about 1 hour.

    kimmelweck-rolls_0007


    Punch the dough down, cover the bowl again, and let the dough rise a second time, for about 30 minutes.

    kimmelweck-rolls_00002


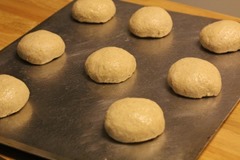
    Return the dough to the work surface and divide it into 8 equal pieces. Shape each piece into a smooth round, then flatten the rounds slightly.

    Place on a parchment-lined or greased baking sheet, well spaced to allow spreading. Cover loosely with plastic wrap and set aside at room temperature for 30 minutes.

    kimmelweck-rolls_00004


    Preheat the oven to 425°F.

    Combine the remaining egg white and the 1 tbsp. water in a small dish and blend.

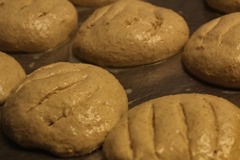
    Brush the rolls lightly with the egg white wash. Score the rolls with a lame or sharp knife by making 4 crescent-shaped slits that radiate out from the center.

    kimmelweck-rolls_00007


    Sprinkle the rolls with the coarse salt and caraway seeds and spritz, with water.

    kimmelweck-rolls_00009


    Bake for 5 minutes. Quickly open the oven door, spritz the rolls again with water, and close the oven. Bake the rolls for about 20 minutes more, until browned and crisp. Cool the rolls on wire racks.

    kimmelweck-rolls_00014


    These rolls definitely live up to their reputation of being hard and crusty. If you’re looking for a hard roll, this might just fit the bill.

    kimmelweck-rolls_001


    This is a versatile dough. You can make Vienna Bread or salt and pepper sticks out of the same dough. I debated about whether to make the rolls or the bread sticks. I think this dough would be good for bread sticks. Maybe next time.


    image


    Happy Baking!

    Cathy
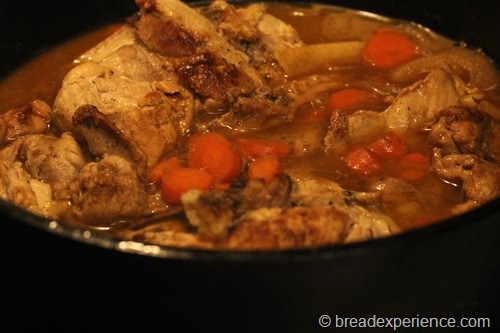
    Thursday 17 May 2012
    Whole Grain Spelt Levain

    This Whole Grain Spelt Levain is one of the breads featured in the May Issue of Saveur Magazine. They did a story on William Alexander and his breads and this is one of the breads. One of my Facebook friends posted about this issue on Facebook, and I couldn’t wait to take a look at the breads. I really like Mr. Alexander’s methods. I learned about him last year when a radio station did a feature on William Alexander’s 52 Loaves.

    spelt-levain0011

    There are several breads featured in the Saveur article, but this one really piqued my interest because it’s made with spelt. I’ve developed a keen interest in ancient grains because they are grown and harvested differently than modern wheat which makes them much better for you. Not to mention, the history is intriguing. I also wanted to make this bread because it utilizes a whole grain spelt starter. I haven’t worked with a spelt starter yet so this was a good opportunity to experiment. I liked the result.

    This Spelt Levain Loaf is made completely with whole grain spelt flour. It doesn’t contain any white bread flour. It takes 10 days to build the spelt levain, but it doesn’t require very much time each day.  You just add spelt flour and water and let it rest until the next day. On the 10th day, you create a sourdough culture and let it rest for 8 to 24 hours until you are ready to bake the bread. After you’ve created the starter, you can keep it going for use in breads like you would a regular starter.

    I had this spelt starter going and the goat’s milk starter from the Turcoman Sourdough Bread going at the same time last week. I had a lot fun experimenting with these starters (and no counter space).


    Spelt Levain Loaf

    Makes: 1 large loaf

    Look for the recipe in the May 2012 Issue of Saveur Magazine

    Here is a photo tutorial of the process for making the Spelt Starter and the resulting Spelt Levain Loaf.  I doubled the formula to make 2 loaves.

    spelt-levain01

    Day 1: Make paste of spelt flour, water and yeast and let sit 24 hours

    spelt-levain07Day 2: Feed starter with additional spelt flour and water and let sit for 24 hours
    spelt-levain001
    Days 3-9: Feed starter daily and let sit for 24 hours
    spelt-levain004
    Day 10: Create the sourdough culture and let sit for 8 – 24 hours
    spelt-levain006
    Day 11: Bubbly sourdough culture after 24 hours
    spelt-levain008
    Day 11: Mix the remaining ingredients with the sourdough culture
    spelt-levain009 spelt-levain013
    Day 11: Knead the Dough until smooth and elastic Day 11: Transfer dough to bowl and let dough double in size, about 3 hours
    spelt-levain017
    Day 11: Flatten dough slightly
    spelt-levain019
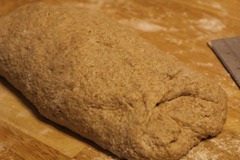
    Day 11: Shape into a loaf
    spelt-levain021
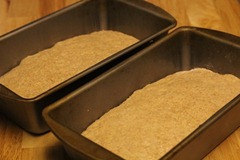
    Day 11: Place loaves into loaf pans and let double in size, about 2 – 3 hours.
    spelt-levain025
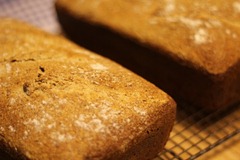
    Day 11: Score the loaves, bake in preheated oven and cool on wire rack


    I didn’t follow his process for baking the loaves. He bakes them in the loaf pan on the baking stone with a iron skillet underneath with ice cubes in it. I just baked the loaf in the loaf pan with no baking stone or steam pan underneath. I liked the loaf but I think it would do better as a hearth loaf. Next time I think I’ll shape this loaf freeform and bake it on a baking stone rather than in the loaf pan.

    spelt-levain0005

    This bread has been YeastSpotted.  Please visit Wild Yeast to view all of the lovely breads in the roundup.


    This bread has a very deep and rich flavor from the spelt. It is a little dense but very flavorful from the sourdough. It’s sour, but not so much so.  It goes really well with cheese.  I tried it with peanut butter and jelly, but it was a little bit funky so I’ll stick with cheese and sliced smoked turkey for this bread.


    image


    In case you’re interested, the bread I made last Fall from William Alexander's 52 Loaves was Peasant Bread. It utilizes a sourdough starter made from apples. Making the Apple Starter was lot’s of fun. I use that starter on a regular basis in sourdough breads. Now, I have a spelt starter to use with spelt breads. The apple starter is shown below.


    Happy Baking!
    Cathy